About RCM Ledger Sheet Bar Options
The options located on the Sheet Bar of the RCM Ledger allow you to perform tasks or view information found in other modules of AmkaiOffice while in the RCM module.
To access the RCM Ledger
- Open the RCM module.
- By default, all transactions with an RCM Follow-up Date of the current date or earlier that are assigned to you as the collector will be presented in the queue on the Home Page when you open the RCM module. You can use the filters at the top of the page to select a subset of this larger group of transactions. Click herehere to learn how to use the filters.
-
Defaults to blank to display all accounts with a Date Type prior to today's date. Enter or select a different date to limit your results.
-
Defaults to today's date. You can enter or select a new date to limit or extend the results.
-
RCM Follow-up Date - (default) - Select this Date Type to view accounts by their assigned follow-up date.
Transaction date - Select to view accounts by date of service
Post date - Select to view accounts by the date the charge was entered into the system
Assigned CollectorAssigned Collector
Click the check mark icon to select a collector, then click Refresh. The charges assigned to the selected collector will pull to the screen. Click the minus sign icon to clear this field.
-
Enter a specific account number to pull only that account to the queue.
Last Name From/ThruLast Name From/Thru
Enter the last name or initial of the last name or range of last names you would like to pull to the queue. Example: A thru N or Aaron thru North.
-
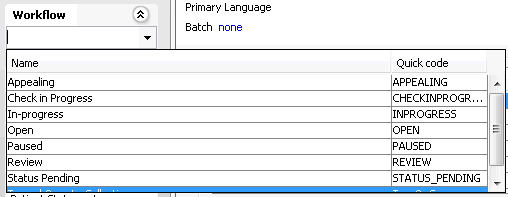
Select a workflow status of the accounts you would like to pull to the queue. Your facility can define your own statuses using the RCM Status dictionary in Administration. Typical Statuses include:
Appealing
Check in Progress
In-progress
Open
Paused
Review
Status Pending
The Status of an account in the queue is set as the account is worked from the RCM Ledger. Any status other than Open indicates the account is being worked by an individual collector or a member of a Workgroup.
-
You can filter the queue by current responsible party (Due from), Provider, Patient Status, Patient Classification, and/or Case Classification by selecting one or more options from one or more of the 5 combo boxes shown.
Underneath each box, the system will display the number of items available to choose from in the box followed by the number selected. Example 12/1 displayed under Due from would indicate that there are 12 items in the list and 1 has been selected. All items are selected by default.
Use the
 icon
to add all of the items in the group or the
  to
de-select items already selected in the group.
-
- Double-click an item (charge) in the collector's queue, or click the item and then click Ledger from the RCM Home Page Sheet Bar.
RCM Ledger Sheet Bar Options
Go
- BackBack
To return to the Home page, click Back.
Workflow
- WorkflowWorkflow
Workflow is designed to allow a collector to change the status of a transaction to indicate whether it is being actively worked, and at what stage of the collections process it is sitting currently. Sorting of the collection queue can also be done from the Home page based on Status.
To change the Status of an item, highlight the line in the Transactions ListTransactions List on the RCM Ledger and click the workflow statusworkflow status you wish to assign to the transaction. The Status will display in the Transaction List as well as in the Status field on the Home page.


Note: This option is best used when collections are being done by a Workgroup. Changing the Status will allow other members of the group to easily see which line items are being worked and which are not. It is a good policy to have all members of the workgroup agree on what each of the statuses is intended to signify and how it will be used by the work group.
Ledger Options
Ledger Options are used to access and add/edit information in other areas of the software. Any change you make here will update the data in all related areas of the system. User Roles and security checkpoints will apply just as if you had accessed the module or field directly.
-
Billing HistoryBilling History
To create and print a report showing the history of when patient statements were generated:
-
Click the Billing History Sheet Bar option.
-
Select the date range for the report. Only statements run in this range will appear on the report.
-
Click OK.
-
A new tab will open with the patient statement history report.
-
To print, click the green HP button at the top left of this window.
-
-
Click Message from the Sheet Bar to launch a dialog that enables you to compose an email message to users of the AmkaiOffice system. The Messaging Feature is managed from the User Desktop module. See Managing Messages.
Charge Options
- ContractsContracts
If the selected transaction is currently out to an insurance carrier, and a contract has been associated to the carrier, the terms of the contract can be viewed from this option.
- Verification
- Insurance Billing HistoryInsurance Billing History
Obtain a history of the claim file/forms generated for the selected transaction from this option. Rebill history as well as form type and user information will be included in the information displayed.