About the RCM Ledger
The collections activity on individual accounts is performed from the RCM LedgerRCM Ledger. The RCM Ledger Sheet Bar options enable you to access information and functionality in other modules. See RCM Ledger Sheet Bar Options for more information.
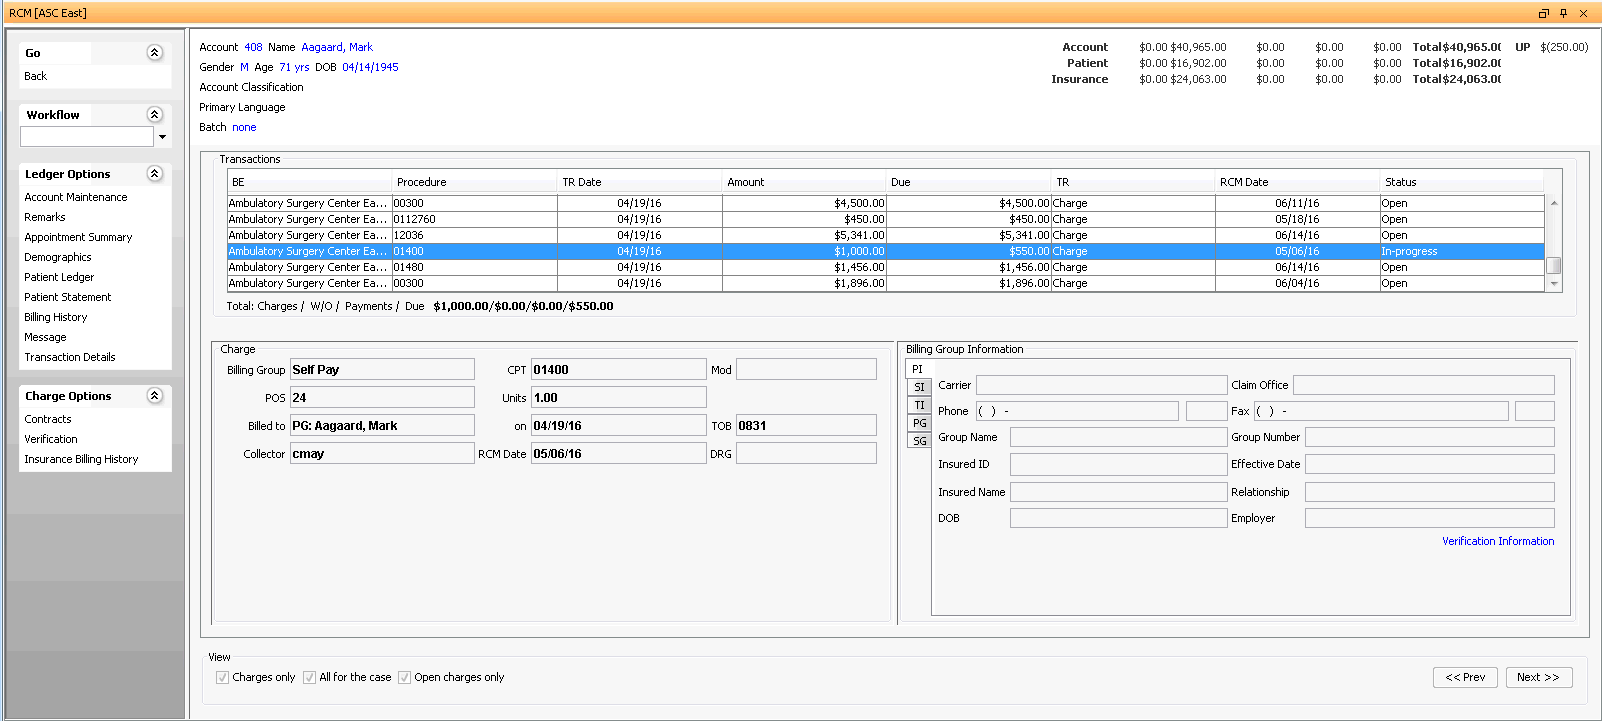
Collections activities are performed on individual accounts using the context menucontext menu that appears when you right-click a charge from the RCM Ledger.

For more information, see Collections Workflow, RCM Ledger Sheet Bar Options and RCM Ledger Right-Click Menu Options.
To access the RCM Ledger
- Open the RCM module.
- By default, all transactions with
an RCM Follow-up Date
of the current date or earlier that are assigned to you as the collector
will be presented in the queue on the Home Page when you open the
RCM module. You can use the filters at the top of the page to select
a subset of this larger group of transactions. Click
herehere
to learn how to use the filters.
-
Defaults to blank to display all accounts with a Date Type prior to today's date. Enter or select a different date to limit your results.
-
Defaults to today's date. You can enter or select a new date to limit or extend the results.
-
RCM Follow-up Date - (default) - Select this Date Type to view accounts by their assigned follow-up date.
Transaction date - Select to view accounts by date of service
Post date - Select to view accounts by the date the charge was entered into the system
Assigned CollectorAssigned Collector
Click the check mark icon to select a collector, then click Refresh. The charges assigned to the selected collector will pull to the screen. Click the minus sign icon to clear this field.
-
Enter a specific account number to pull only that account to the queue.
Last Name From/ThruLast Name From/Thru
Enter the last name or initial of the last name or range of last names you would like to pull to the queue. Example: A thru N or Aaron thru North.
-
Select a workflow status of the accounts you would like to pull to the queue. Your facility can define your own statuses using the RCM Status dictionary in Administration. Typical Statuses include:
Appealing
Check in Progress
In-progress
Open
Paused
Review
Status Pending
The Status of an account in the queue is set as the account is worked from the RCM Ledger. Any status other than Open indicates the account is being worked by an individual collector or a member of a Workgroup.
-
You can filter the queue by current responsible party (Due from), Provider, Patient Status, Patient Classification, and/or Case Classification by selecting one or more options from one or more of the 5 combo boxes shown.
Underneath each box, the system will display the number of items available to choose from in the box followed by the number selected. Example 12/1 displayed under Due from would indicate that there are 12 items in the list and 1 has been selected. All items are selected by default.
Use the
 icon
to add all of the items in the group or the
  to
de-select items already selected in the group.
-
- Double-click an item (charge) in the collector's queue, or click the item and then click Ledger from the RCM Home Page Sheet Bar.
RCM Ledger Header
The system display the following information in the header portionheader portion of the screen as read-only:

Account number/Name (Last, First, Middle, Title)
Gender / Age / DOB
Account Classification
Primary language
Aging informationAging information
There are five columns within this section which represent aging amounts (from left to right): 0-30, 31-60, 61-90, 91-120, and 120+ days based on the transaction date of the charge.
Account: Displays the total balance for the entire account.
Patient: Displays the portion of the balance that is assigned to the patient.
Insurance: Displays the portion of the balance that is assigned to an insurance carrier on the patient’s account.
UP (Unassigned Payment): Displays any payments received on the account that have not been allocated to charges.
Batch (select batch) Several of the features performed on the RCM Ledger will require you to create or select a batch, which you can do by clicking the link next to Batch.
RCM Ledger Transactions
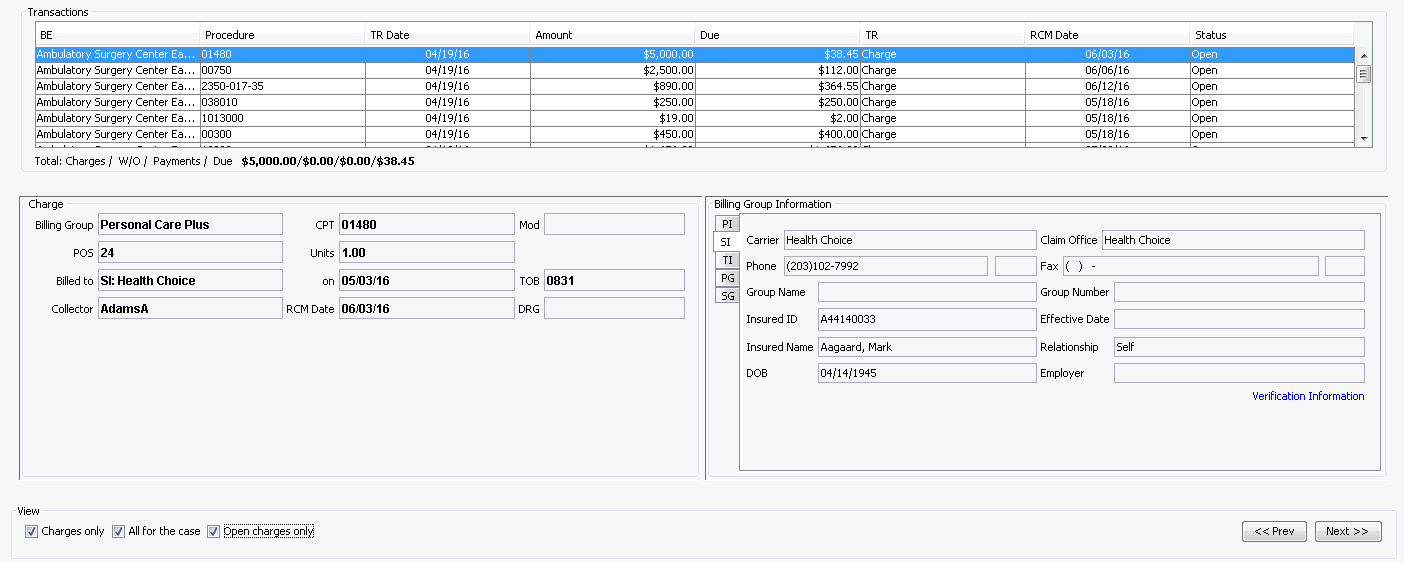
The system will display the transactions in the queue for the selected account in the transactions section transactions section of the RCM Ledger. Information displayed in the list of transactions shown in the table is controlled by the options selected under View.
View
You can limit the transactions displayed in the transactions list using the following check boxes:
Charges only: When checked, the list will display charges only, regardless of assigned collector. It will not display any other transaction type. The system will default with the box checked.
All for the case: When checked will display all of the transaction associated to the case regardless of who is currently responsible for the collection activity. Unchecked will display only the transaction assigned to the current collector. The system will default with the box checked.
Open charges only: When checked will display only charges currently in the queue with a balance due. The system will default with the box checked.
Transaction List
The Transaction ListTransaction List displays all Transactions posted to the account that meet the criteria specified in the View section. Click herehere to learn about the information included in the Transaction List.
BE - Business Entity in which the transaction was posted.
Procedure - Quick code of the procedure or supply resource associated to the charge
TR Date - Transaction date
Amount - Charge amount
Due - Current balance due on the charge
TR - Transaction type
RCM Date - Current RCM follow up date
Status - Current workflow status of the transaction
Total - Charges / W/O / Payments / Due. This field adjust based on the line items selected. All values displayed are net.

Details
The Details section of the RCM Ledger screen display the Transaction details (left-hand side of the screen) and billing group information (right-hand side of the screen) associated to the selected transaction.
Transaction Details
All transaction details shown in the Transaction Details sectionTransaction Details section pull from the Patient Ledger in the Financial Management module. The specific details shown depend on the type of transaction selected:
-
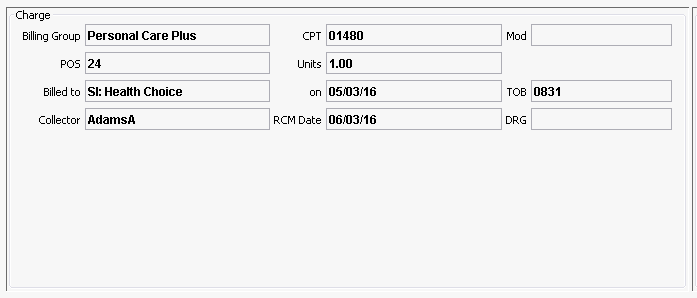
Included in the display for a Charge is the following information:
Billing Group - Name of the Billing Group associated to the charge
CPT® - CPT® code associated to the procedure
Mod CPT® Modifier Quick Codes (up to 4)
POS Place of Service code for where the procedure was performed
Units Number of units of the supply/resource or service associated to the charge
Billed to - Name of the current role the charge resides with (PI, SI, TI, PG, or SG)
On - Date of service. This is not the date the charge was billed. If the charge has been billed, the Bill Date displays in the Transaction Details dialog. You can access this dialog by double-clicking the charge in the Transactions List.
TOB - Type of Bill
Collector - Passport of the current Collector associated to the charge
RCM Date - Current follow-up date associated to the charge.
DRG Diagnostic Related Group if one has been entered (Inpatients only)
-
Included in the display for PaymentPayment is the following information:
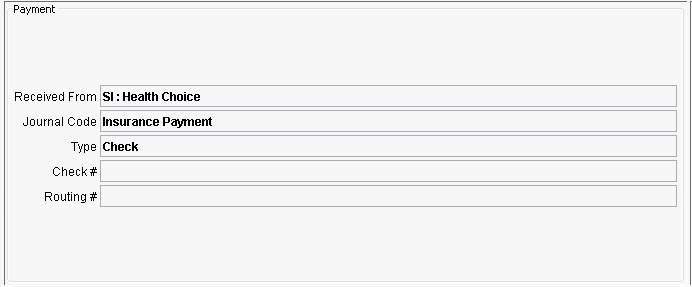
Received From - Role and Name from whom the payment was received
Journal Code - The code associated to the transaction
Type - Check, Cash, Credit Card or EFT
Check # - this field is dynamic and will change based on the Type. If the Type is Check number will display, if Credit Card the Card number will be displayed, if EFT, the routing number will display.
Routing # - The bank routing number
-
Included in the display for Write OffWrite Off is the following information:
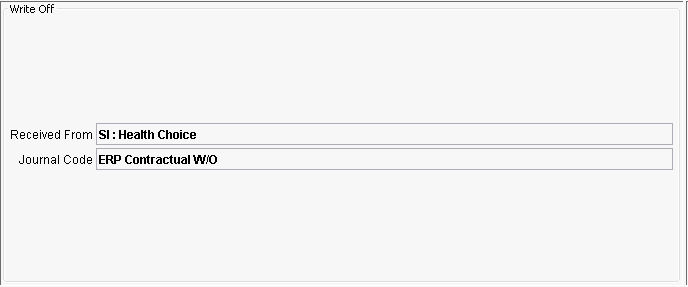
Received From: Role and Name from whom the write off was taken
Journal Code: The code associated to the transaction
-
Included in the display for TransferTransfer is the following information:
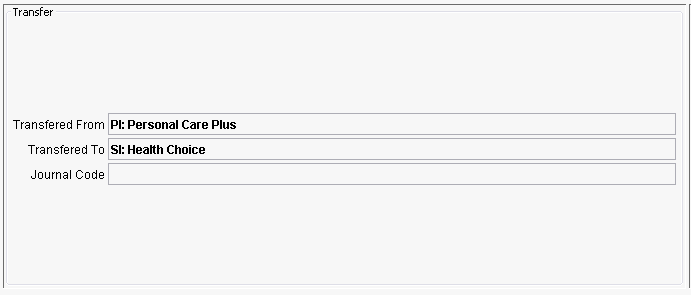
Transfer From: Role and Name from whom the amount originally resided with
Transfer To: Role and Name of whom the amount was moved to
Journal Code: The code associated to the transfer
-
Included in the display for NoteNote is the free text entered in the Note attached to the Transaction.
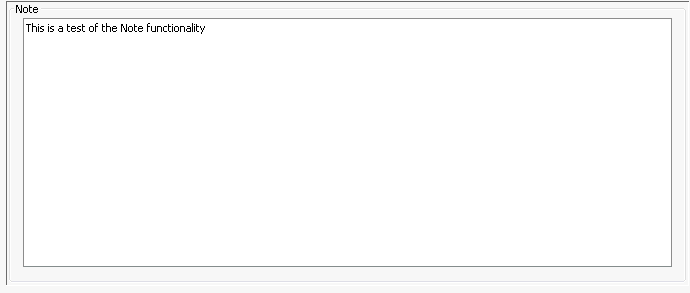
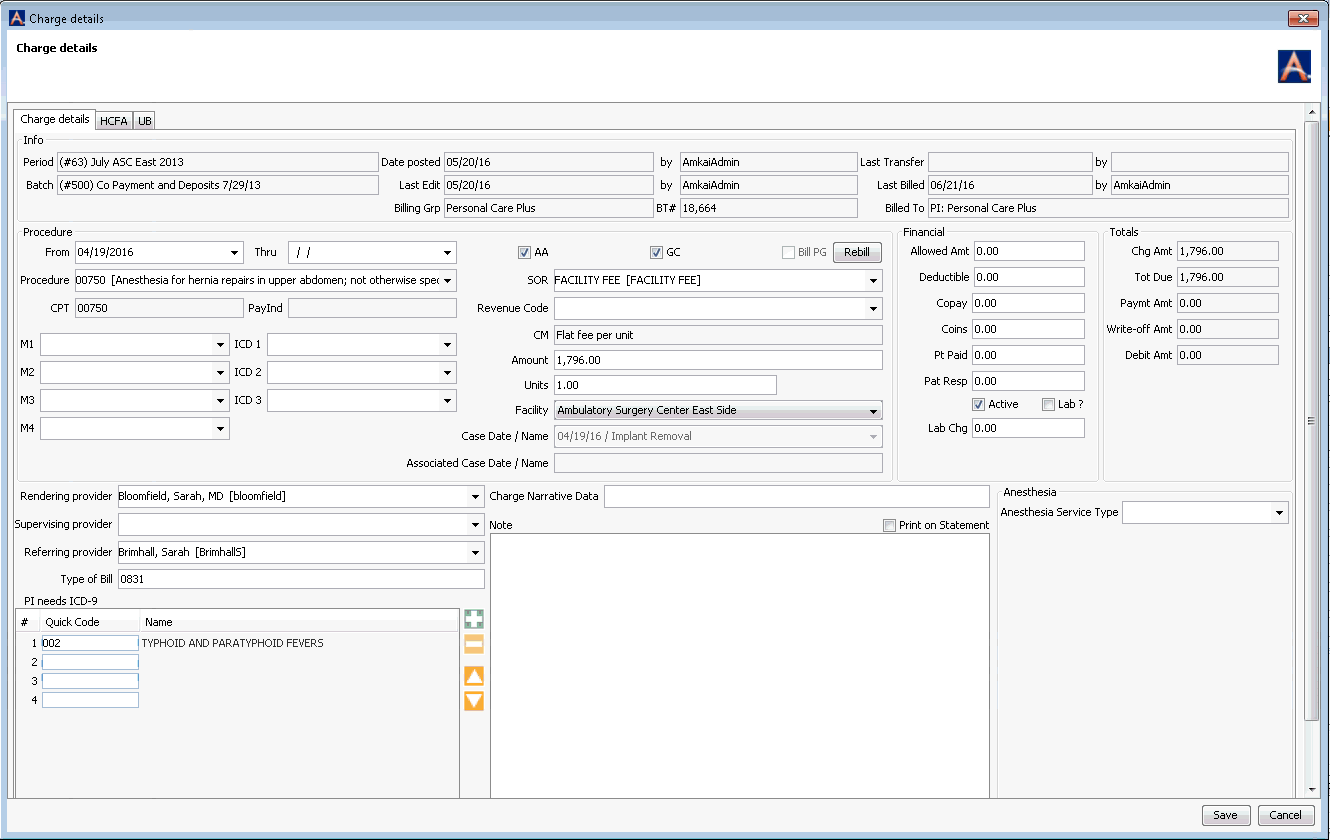
Note: If you wish to see even more detail on a transaction or to edit transaction details, double-click the transaction to launch the Transaction Details dialogTransaction Details dialog. See Transaction Details dialog for more information.
Billing Group Information
The Billing Group Information sectionBilling Group Information section displays read-only data organized by tab for the Primary (PI), Secondary (SI), Tertiary (TI) Insurances, Primary Guarantor (PG), and Secondary Guarantor (SG) for the associated billing group for the charge. The data pulls from the Insurance Policies screen in the Demographics module. When you highlight a charge from the Transaction List, the tab in the Billing Group Information section that represents the current responsible party for the charge is automatically selected. For example, if the selected charge is currently the responsibility of the Secondary Insurer, the SI tab will automatically be selected.
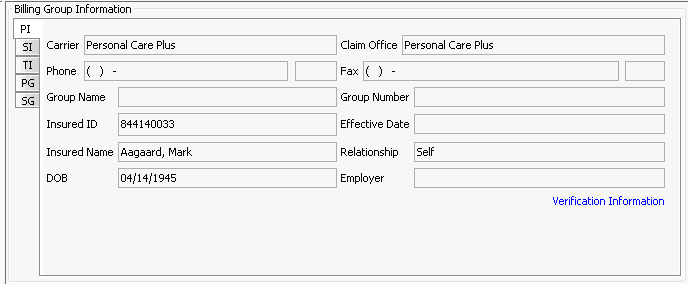
To access the Verification screen for an Insurance, click the tab associated to the insurance and then Verification Information. For more information on using this screen, see Insurance Verification.
Payment Plan Information
If the selected charge is billed under a Patient Payment Plan to the Plan Owner of that case’s active Payment Plan, the information listed below about the plan is displayed in a box at the foot of the Ledger. These fields auto-populate from the Payment Plan Details and are not editable here. To learn more about Patient Payment Plans, click here.
- Next Payment Date
- Next Payment Amount
- Payoff Amount
- Amount per Payment
- Number of Payments
- Last Payment Date
- Payment Plan Total
Buttons
Next will move you to the next account in the queue:
![]()
Previous will move you back to the previous account in the queue:
![]()
RCM Ledger Sheet Bar options
Most of these options will take you to other system locations where you can perform related activities. For more information and links to topics covering all these options, see About RCM Ledger Sheet Bar options.