Collections Workflow
When a charge is posted, accounts are automatically assigned a collector (workgroup) and initial action date for follow up based on the settings your facility has configured using the Tools > Configuration Sheet Bar option in the RCM module. This workflow describes the steps typically taken by a collector when working an individual account.
To perform collection activities on outstanding charges for an individual account
Launch the RCM module, which opens to the RCM Home PageRCM Home Page. If you are a collector for more than one Business Entity (BE), select the BE(s) from the Sheet Bar for which you wish to perform collections activities.
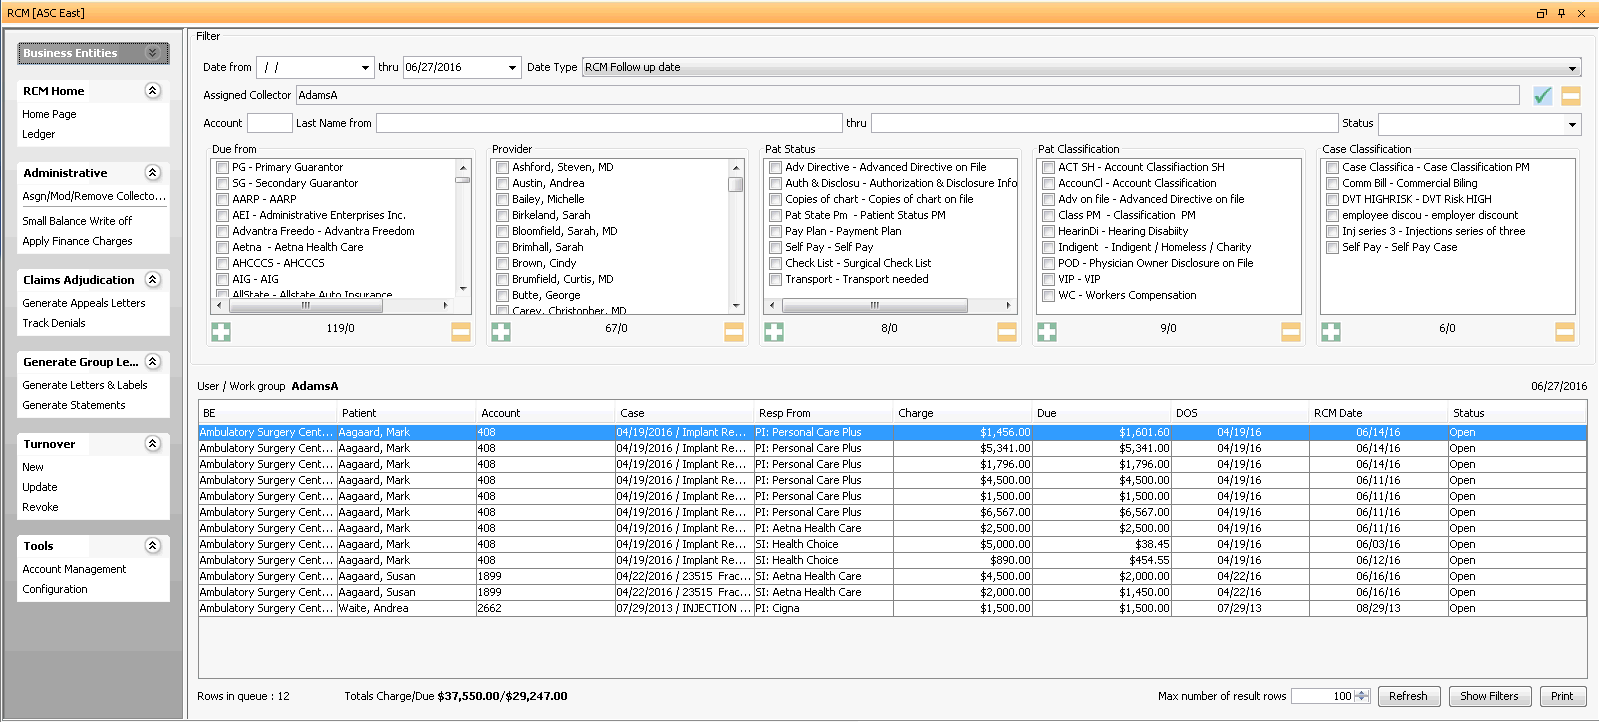
Charges with follow up dates of today's date or earlier that are assigned to you as the collector will be displayed by default in the queue on the RCM Home Page. You can filter the charges to see only a subset of this larger group.
Click herehere to learn how to filter the charges shown in the queue on the Home page.
-
Defaults to blank to display all accounts with a Date Type prior to today's date. Enter or select a different date to limit your results.
-
Defaults to today's date. You can enter or select a new date to limit or extend the results.
-
RCM Follow-up Date - (default) - Select this Date Type to view accounts by their assigned follow-up date.
Transaction date - Select to view accounts by date of service
Post date - Select to view accounts by the date the charge was entered into the system
Assigned CollectorAssigned Collector
Click the check mark icon to select a collector, then click Refresh. The charges assigned to the selected collector will pull to the screen. Click the minus sign icon to clear this field.
-
Enter a specific account number to pull only that account to the queue.
Last Name From/ThruLast Name From/Thru
Enter the last name or initial of the last name or range of last names you would like to pull to the queue. Example: A thru N or Aaron thru North.
-
Select a workflow status of the accounts you would like to pull to the queue. Your facility can define your own statuses using the RCM Status dictionary in Administration. Typical Statuses include:
Appealing
Check in Progress
In-progress
Open
Paused
Review
Status Pending
The Status of an account in the queue is set as the account is worked from the RCM Ledger. Any status other than Open indicates the account is being worked by an individual collector or a member of a Workgroup.
-
You can filter the queue by current responsible party (Due from), Provider, Patient Status, Patient Classification, and/or Case Classification by selecting one or more options from one or more of the 5 combo boxes shown.
Underneath each box, the system will display the number of items available to choose from in the box followed by the number selected. Example 12/1 displayed under Due from would indicate that there are 12 items in the list and 1 has been selected. All items are selected by default.
Use the
 icon
to add all of the items in the group or the
  to
de-select items already selected in the group.
-
See Home Page to learn about the regions on the Home page.
Double-click the first name in the queue or select the name and click Ledger from the RCM Sheet Bar. The RCM Ledger screenRCM Ledger screen appears. This screen is where most collections activity takes place. Click herehere to learn about the regions on this screen and how to use the RCM Ledger Sheet Bar options to access information and functionality in other modules as needed.
Click here to learn more about the regions on the RCM Ledger screen.
The RCM Ledger Sheet Bar options enable you to access information and functionality in other modules as needed while working individual accounts. See RCM Ledger Sheet Bar Options for more information.
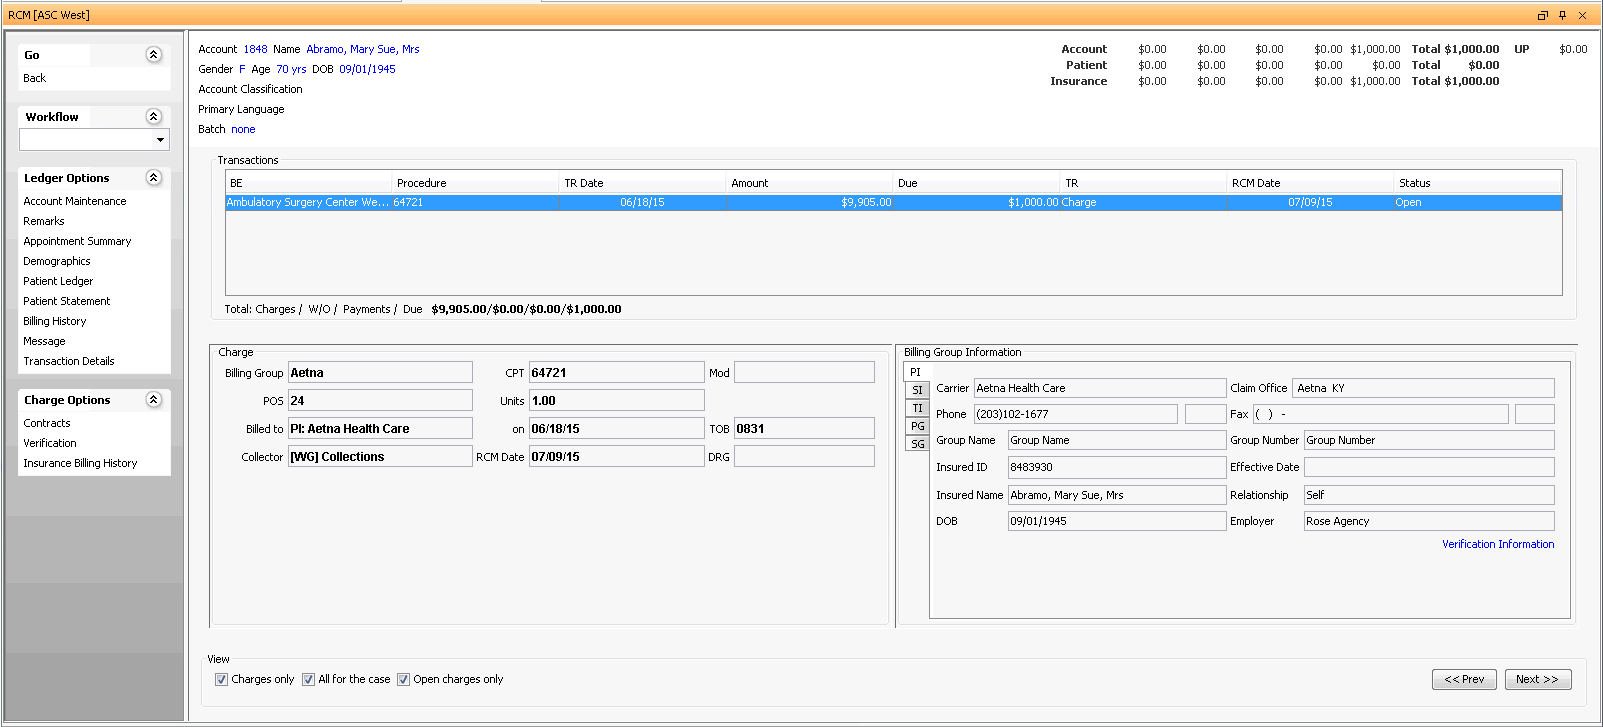
Determine what action has already been taken on the account by:
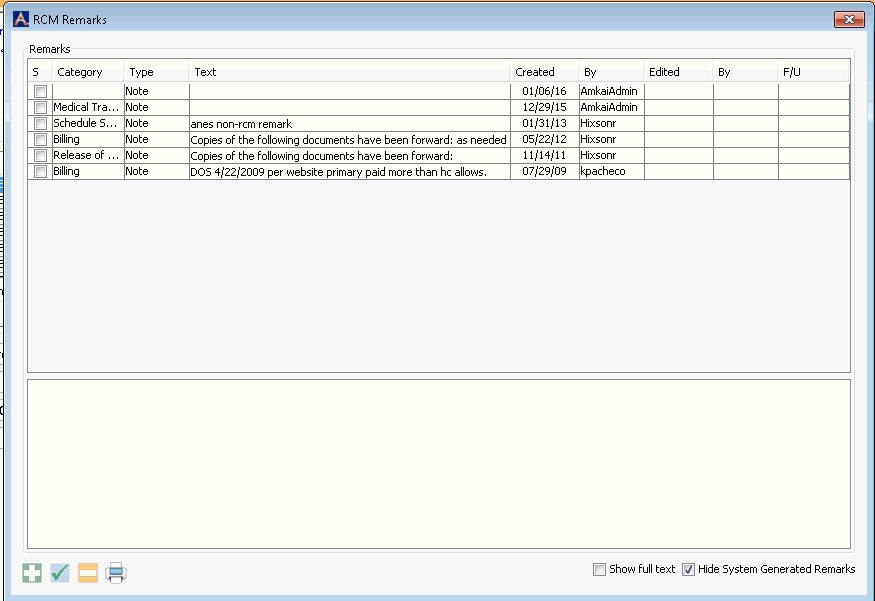
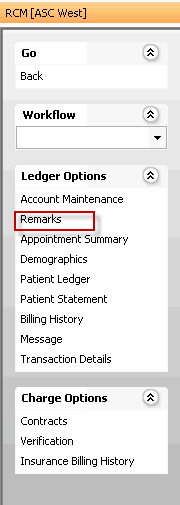
Reviewing any prior action or notes made on the account by clicking Remarks on the RCM Ledger Sheet BarRCM Ledger Sheet Bar. The RCM Remarks dialogRCM Remarks dialog appears. Click herehere to learn more about this dialog.
Select the Show full text check box to open all of the Remarks for easy review.
Deselect the Hide System Generated Remarks check box if you wish to view system-generated Remarks.
Click here to learn more about RCM Remarks.
Reviewing the workflow status shown in the Status column in the Transactions tableTransactions table on the RCM Ledger.

Based on your internal collections procedures, determine what the next step would be in the collection process.
Tools are available to help you carry out the next step(s) in the collection process from the context menu optionscontext menu options. This menu appears when you right-click a charge from the RCM Ledger.
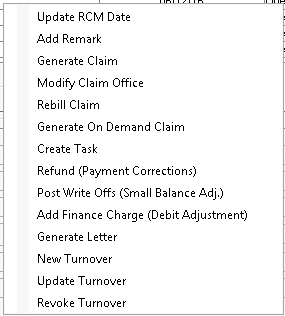
To learn how to use these menu options, see About RCM Ledger Right-Click Menu Options.
When the action has been completed, record any new remarks needed by right-clicking on the transaction and selecting Add Remark. Click herehere to learn how to add a remark.
The Remark dialogRemark dialog appears.
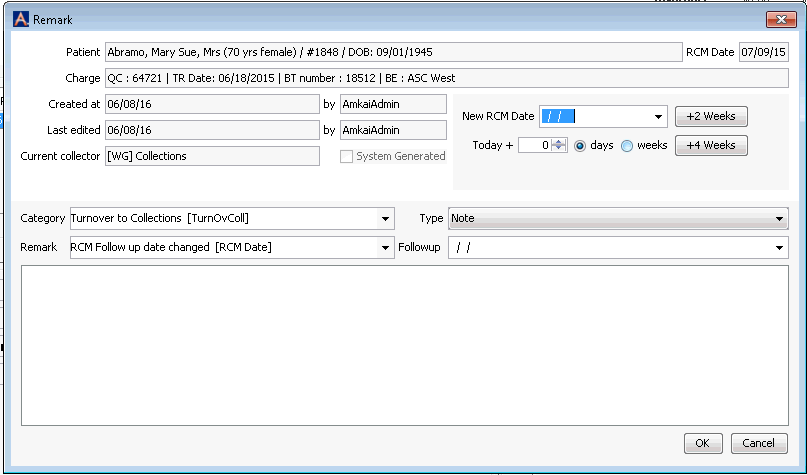
Set the next date you want the transaction to come to the queue (if the balance is not subsequently brought to zero) by setting the new RCM Date on the Remark dialog.
Type notes in the text box regarding action you took on the account.
Close the dialog and return to the RCM Ledger screen by clicking OK.
Use the Workflow drop down menu from the RCM Ledger Sheet Bar to update the Workflow status to reflect current status of the account.
Click the Next button to move to the next account in the queue. Repeat this process until all of the accounts in the queue have been worked.