RCM Remarks
Use the Remark Sheet Bar option from the RCM Ledger to attach a note to a Transaction during the collections process and to view Remarks created in other modules or by the system. You can also create a new Remark by right-clicking a Transaction from the Transactions List on the RCM Ledger and selecting Add Remark.
Note: RCM Remarks have several checkpoints in Roles (Administration > Security > Roles) that govern who can edit or delete Remarks.
 It is suggested that you not allow users
to delete any Remarks. It is also suggested that you set the checkpoints
so that users can only edit their own Remarks
but not other collector's Remarks
to ensure information is not being
inappropriately modified or removed from the system.
To view Remarks associated to a Transaction
Remarks are specific to the transaction to which they are attached and will move with the transaction as it moves from one Collector to another. In order to associate a Remark to more than one transaction use the Ctrl + shift key to highlight each of the transaction you wish to connect to the Remark.
Open the RCM module. Charges with follow up dates of today's date or earlier will be displayed by default in the queue on the RCM Home Page. See Home Page to learn how to filter the charges shown in the queue.
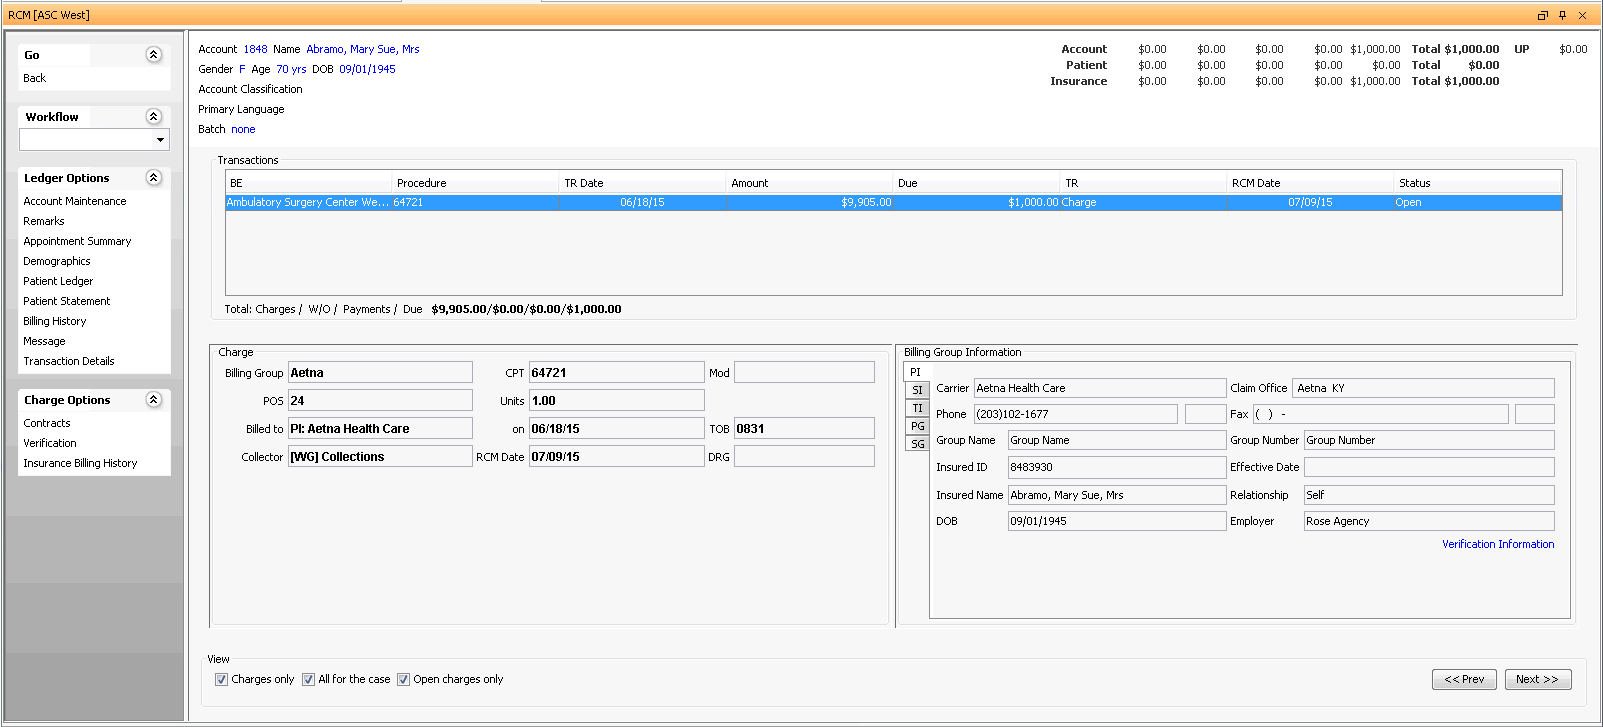
Double-click the name of the patient in the queue or select the name and click Ledger from the RCM Sheet Bar. The RCM Ledger screenRCM Ledger screen appears.

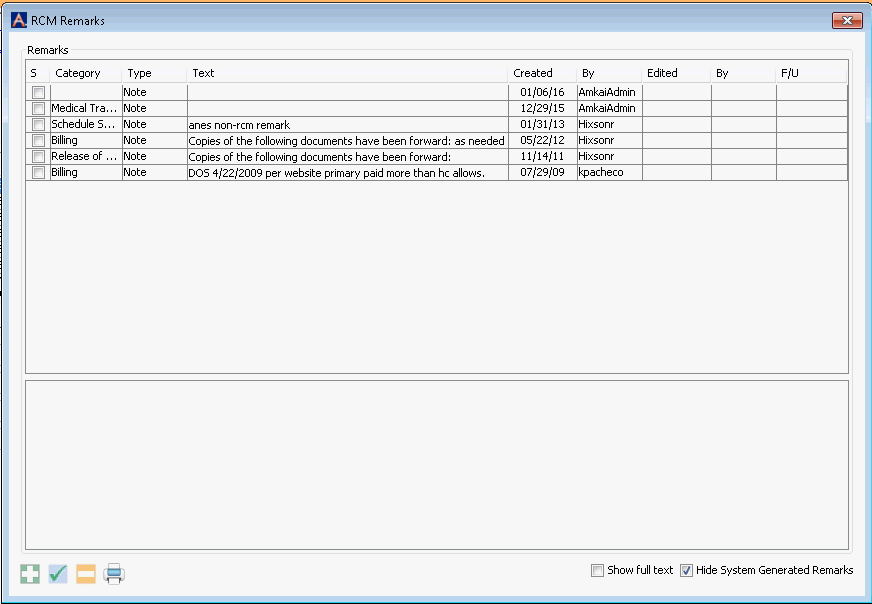
To view Remarks associated to a Transaction, highlight the line in the Transactions ListTransactions List on the RCM Ledger and click Ledger Options > Remarks from the Sheet Bar. The RCM Remarks dialogRCM Remarks dialog appears. Click herehere to learn about the columns shown in the list of Remarks.
S - System. If the Remark is a result of the system recording data, this box will be checked. System Remarks may not be edited and will display as read only.
Category - The Remark Category associated to the entry. System generated Remarks will default to the Remark Category selected in the Configuration settings RCM Remark Category.
Type - Displays the type of remark: Note, Comment, Resolved.
Text - If the Remark is a System generated Remark, you will see the name of the user who initiated the corresponding action along with a description of the action. If the Remark is user generated, a portion of the text will be displayed. Click on the text to view the entire Remark in the detail screen at the bottom of the page.
Created - The date the Remark was entered into the system
By - The Passport of the user who created the Remark or initiated the action that resulted in the Remark being created by the system.
Edited - The last date the Remark was edited
By - The Passport of the user who last edited the Remark
F/U Follow up date if one has been entered


To show system generated remarks, deselect the Hide System Generated Remarks check box. A default can be set for this field in the Configuration screen. The system default is to hide these Remarks.
To show the full text of all Remarks without having to click each one, select the Show full text check box.
You can sort the list by a column by clicking that column's header.
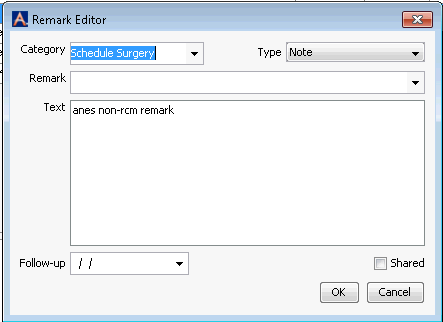
To edit or view the context of a Remark click on
 .
The Remark
EditorRemark
Editor appears.
To delete an RCM Remark, highlight it and click
 .
.To print a note, highlight it and click

To add a new Remark to a Transaction
From the RCM Ledger, do one of the following:
Right-click the Transaction to which you wish to add the Remark and select Add Remark, or
Highlight the Transaction and select Ledger Option > Remarks. Click
 .
.
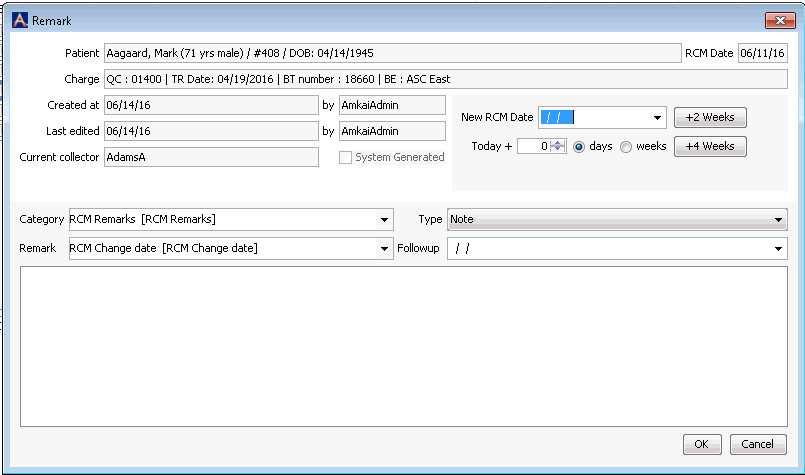
The Remark dialogRemark dialog appears.

(Optional) You can add a new RCM Date from this dialog:
New RCM Date: Manually enter a new date or click on the down arrow to access the calendar.
+2 weeks: Advance the date to two weeks from current date ( this is actual days not business days)
+4 weeks: Advance the date to four weeks from current date
Today + (number) days: Advance the specified number of days from today
Today + (number) weeks: Advance the specified number of weeks from today
Select a Category for the Remark. The system will default the category to the one set in the Configuration settings.
Select a Remark if you wish to use one of the pre-defined Remarks entered in the Remarks Dictionary. Use the Alt + E or Alt + D hot keys to jump to the Remarks Dictionary to add a new Remark.
Select a Type. The system will default to Note. Options are:
-
Selecting Comment will provide a way to categorize Remarks for reporting purposes. For instance, you could label internal Remarks as Comments, so that you could filter the Remark List report by Comments to see all internal Remarks.
- NoteNote
This is the most typical Remark type. A Remark labeled as a Note will not appear automatically each time the patient record is pulled up as it would if it were labeled Important.
- ResolvedResolved
This option can be used to indicate that an ongoing issue has been resolved. Changing an Important Note to Resolved stops it from appearing each time the Patient record is pulled up.
-
- Enter a Follow-up date if you would like one referenced on the Remark. The Remarks Report can be run by follow up date.
- Enter free text into the field provide.
- Click OK to save the Remark.