Account Maintenance
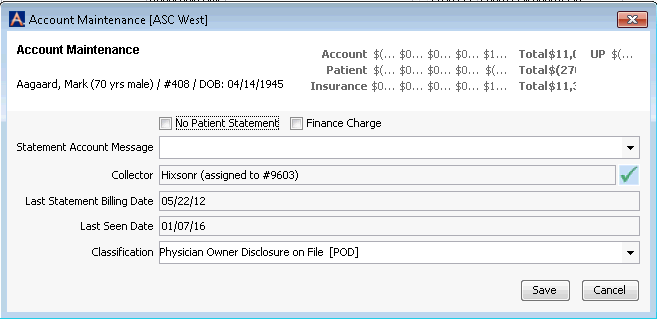
The General > Account Maintenance option from the Patient Ledger Sheet Bar launches the Account Maintenance dialog and enables you to set billing and collection options for a patient's account. Collectors can also access this dialog from the RCM (Revenue Cycle Management) module.
Accessing the Account Maintenance dialog
- From Financial ManagementFrom Financial Management
-
- Open the Financial Management module.
- From the Sheet Bar, click Patient Ledger. The Patient Ledger screenPatient Ledger screen appears.

- To select the patient record, click the patient information shown highlighted in blue in the upper left of the Patient Ledger Screen. The MPI launches. Click here to learn how to search for and select a patient record in the MPI.
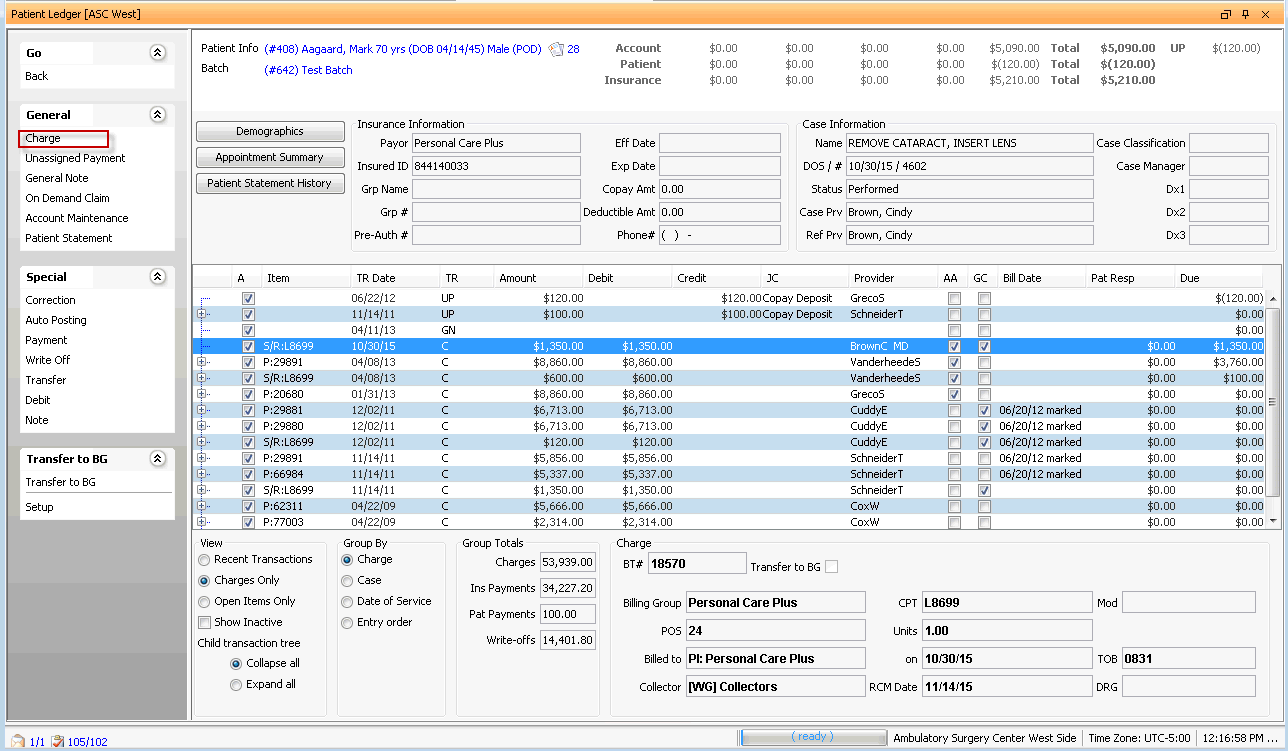
- From the Patient Ledger screen Sheet Bar, under the General heading, click Account Maintenance. The Account Maintenance dialogAccount Maintenance dialog appears.

-
- From RCMFrom RCM
-
Open the RCM module. Charges with follow up dates of today's date or earlier will be displayed by default in the queue on the RCM Home Page. See Home Page to learn how to filter the charges shown in the queue.
-
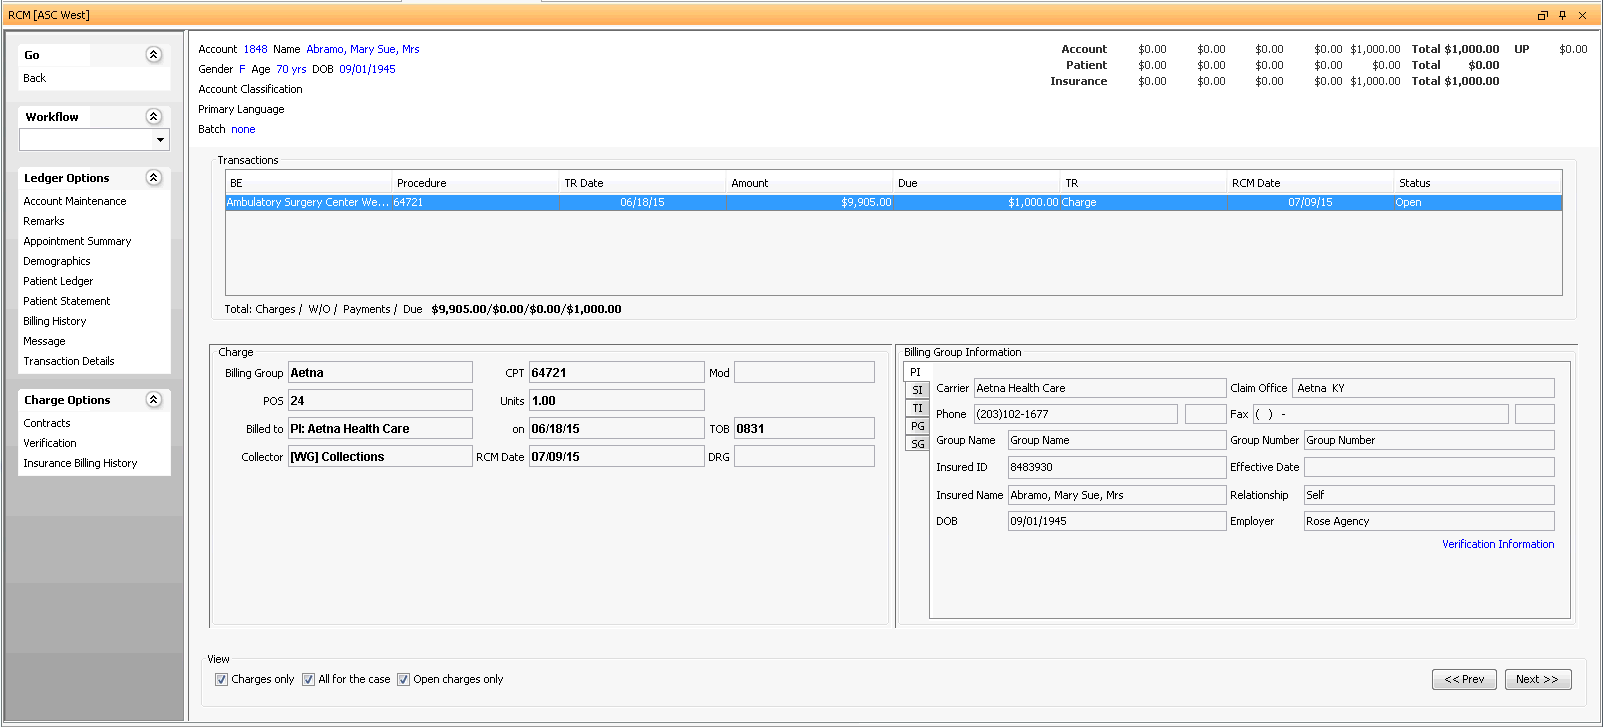
Double-click the name of the patient in the queue or select the name and click Ledger from the RCM Sheet Bar. The RCM Ledger screenRCM Ledger screen appears.

-
Select Ledger Options > Account Maintenance from the Sheet Bar. The Account Maintenance dialogAccount Maintenance dialog appears.

-
To set billing and collections options for a patient's account
- Launch the Account Maintenance dialogAccount Maintenance dialog from either the Financial Management or RCM module. (see links above)

- Set any of the following billing and collections options:
-
No patient statement: Patient statements will not be generated even when there is a balance due from the patient.
-
Finance Charge: Allows the program to add finance charges to this patient's account if you are using the finance charge option in the RCM module.
-
Statement Account Message: Select a message to print on the patient’s statement. This statement will print on every statement generated for this patient.
-
Collector: Typically, collectors are assigned in the RCM module to groups of patients (grouped by insurance carrier or by physician). This option gives you the ability to assign a collector to this specific patient account.
-
-
Click the check mark icon to assign a collector to this specific patient. The RCM Options dialogRCM Options dialog appears.

-
Click the check mark icon to select a collector.
-
Select the type of Follow-up date to assign to the selected collector by checking one of the following boxes:
-
-
use IFUD (initial follow-up date), or
-
use TFUD (Transfer follow-up date: the date the responsibility for payment was shifted to a different role, example: Transferred from Primary Insurer to Secondary Insurer)
-
-
To remove an assigned collector, click Remove.
-
To save your changes, click OK.
-
-
Last Statement Billing Date: Displays the last date on which a patient statement was generated.
-
Last Seen Date: Displays the date the patient last had an appointment.
-
Classification: Select the patient classification from the drop-down list.
-
-
Click Save.