Verifying insurance coverage, V. 3.18x or later
This topic applies to AmkaiOffice Version 3.18x or later. If you are working on Version 3.16x or 3.17x, click here.
When you verify insurance by phone or through an online service, you can document the details of insurance coverage in the Demographics module on the Insurance Verification dialog. You may also view/edit this dialog from the RCM (Revenue Cycle Management) module.
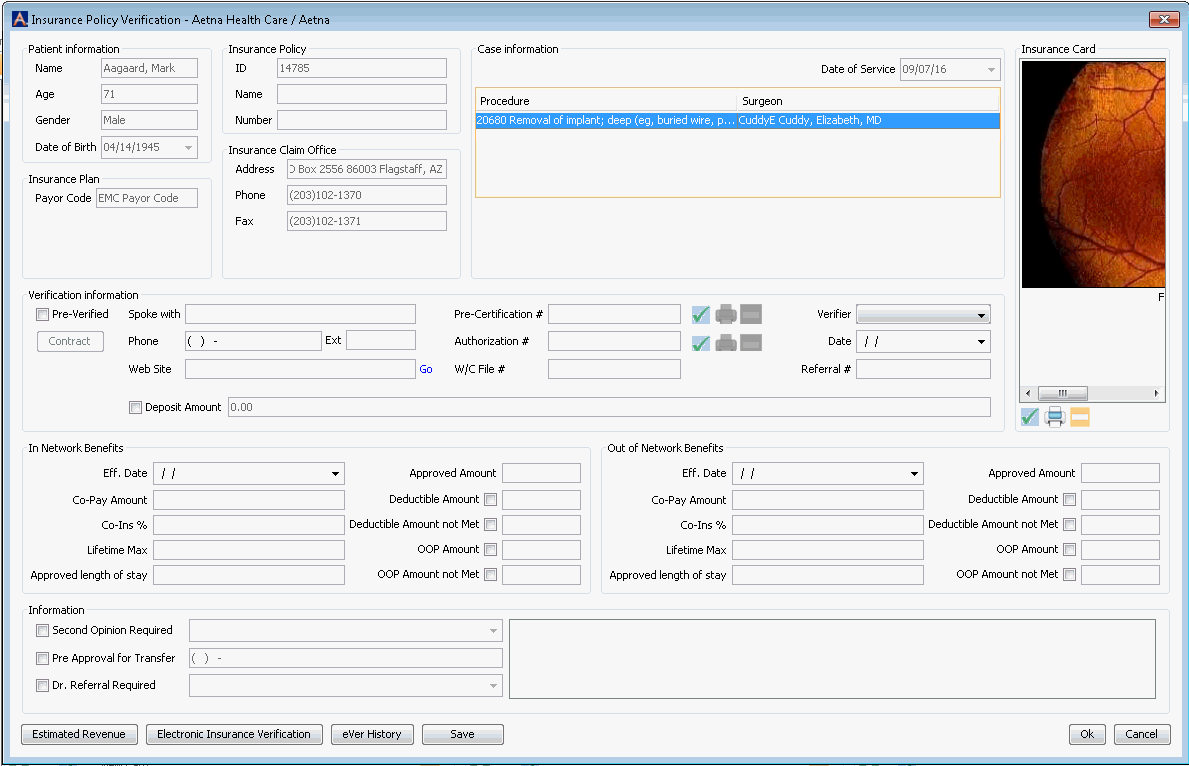
The fields on the dialog are grouped in sections as shown in the list below. Click each link in the list for more information about the fields included in each section. Many of the fields pre-fill from other areas in the system.
If your facility has purchased e-Verify, you can electronically verify coverage through the Insurance Verification dialog as well. See Electronic Insurance Verification.
Accessing the Insurance Verification dialog
- From DemographicsFrom Demographics
- Open the Demographics module.
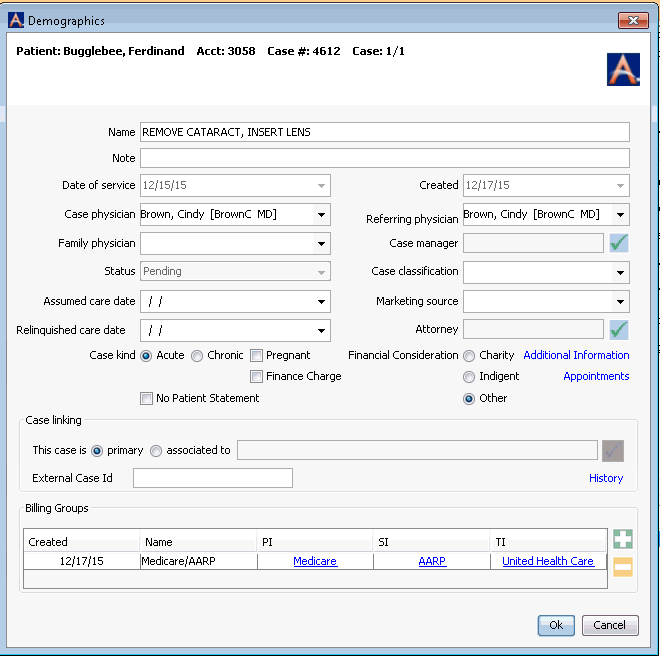
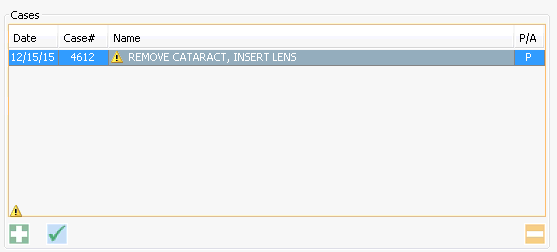
- In the Cases
sectionCases
section of the Demographics screen,
double-click the case for which you wish to verify insurance.
The Case
Details dialogCase
Details dialog appears.


- Double-click the Primary (PI), Secondary (SI), or Tertiary (TI) Insurer in the Billing Groups section.
- From RCMFrom RCM
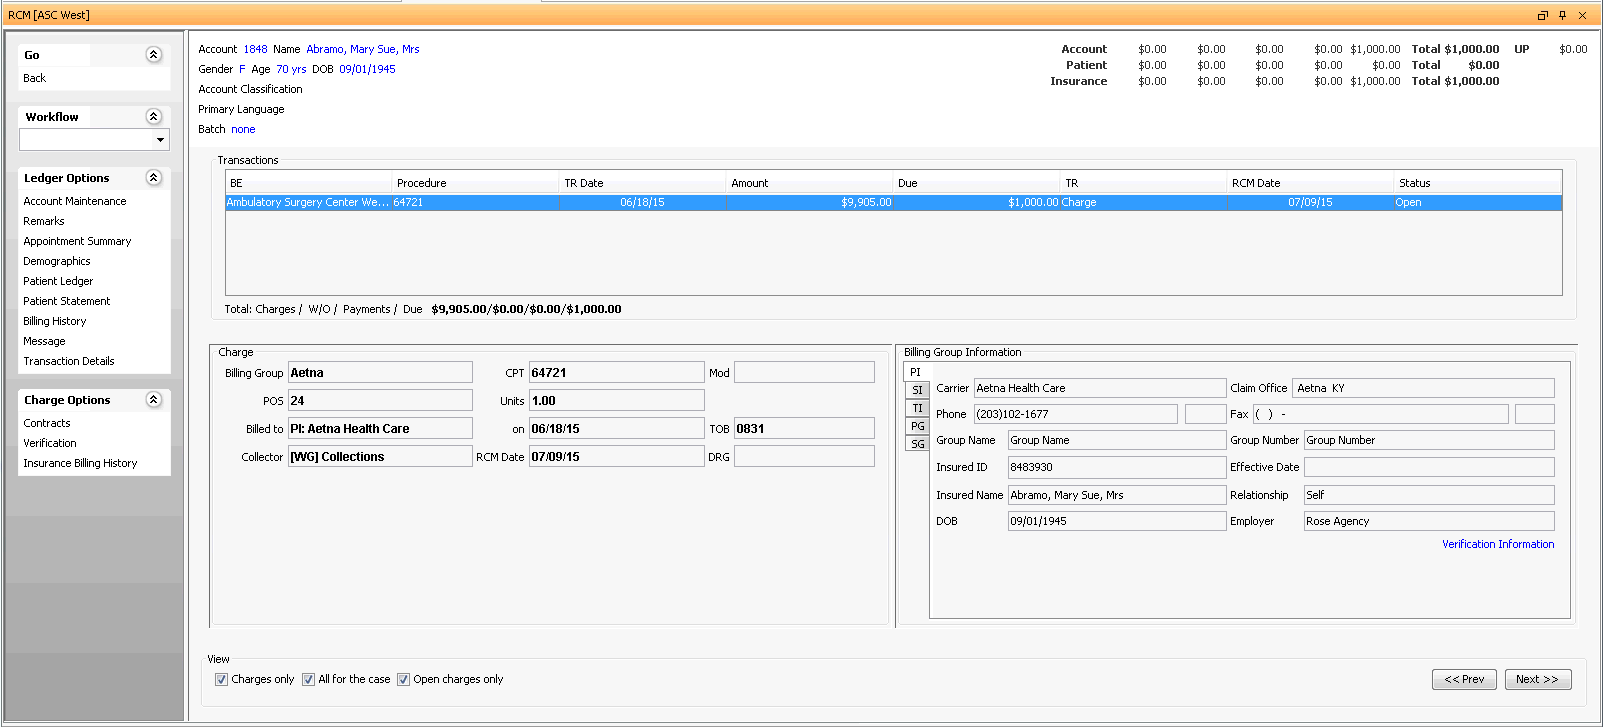
Open the RCM module. Charges with follow up dates of today's date or earlier will be displayed by default in the queue on the RCM Home Page. See Home Page to learn how to filter the charges shown in the queue.
Double-click the name of the patient in the queue or select the name and click Ledger from the RCM Sheet Bar. The RCM Ledger screenRCM Ledger screen appears.

Highlight the Transaction for which you wish to verify insurance from the Transactions List.
Select Charge Options > Verification.
Documenting insurance verification done by phone or through an online service
- Launch the Insurance
Verification dialogInsurance
Verification dialog from the module in which you
are currently working (see above).

- Complete the fields on this dialog. If a notation has been set in the contract that pre-authorization may be required, the Authorization # field in the Verification Information section will display with the alert icon. Click the links in the list below for more information about each section of the dialog and the fields in each section.
- Clicking Save on this dialog updates benefit information so it is immediately available should you choose to click the Estimated Revenue button at this time.
- Or, if you do not wish to view Estimated Revenue, click Ok to exit the dialog, then continue clicking Ok on the dialogs that appear until you are returned to the Scheduling Grid. Your changes will be saved and will flow to other areas of the system.
Sections on the Insurance Verification dialog
- Patient
InformationPatient
Information
Patient information defaults in from the Demographics screen. This section is not editable here.
- Insurance
PlanInsurance
Plan
The Insurance Plan/ electronic payor code from the Insurance Plan dictionary will populate in this field.
- Insurance
PolicyInsurance
Policy
The Insurance ID that was entered in the Insurance Policy screen for this patient will display here along with the Policy Group Name and Group Number.
- Insurance
Claim OfficeInsurance
Claim Office
The Insurance Claim Office, Mailing address, phone number and fax number are displayed here as they were entered in the Insurance Claim Office dictionary.
- Date of
ServiceDate of
Service
The scheduled date of service for the case is displayed here as read only.
- Case InformationCase Information
Displays the case scheduled procedures, Surgeon(s), and primary diagnosis for the case.
- Insurance
CardInsurance
Card
You can attach an image of the insurance card here. Click here to learn how.
If one has already been associated to the insurance, the image will be displayed here.
- Verification
InformationVerification
Information
In the Verification information sectionVerification information section, click the Pre-Verified check box once verification has been completed. The system will add your name to the Verifier field and today's date in the Date field. Verifier and date can be updated if needed by clicking in the fields and adjusting the data.
To view any contract associated with the patient's plan that may be loaded in the system, click Contract. This button will only be active if there is a contract on file for the plan associated to the patient. The Contracts dialog appears. For more information on the Contracts dialog, click here. Complete one of the following fields:
- Spoke
withSpoke
with
Enter the name of the insurance company representative you spoke with and the phone number you called.
- Web
siteWeb
site
Enter the URL of the web site you used to verify coverage.
- Spoke
withSpoke
with
Note: Data entered in this field will print only for HCFA-1500 paper forms in FL 23, based on Claim Customization settingsClaim Customization settings at the Global and Carrier level. Data entered in the Pre-Certification field will not pull to paper UB04 forms The customization settings will not impact electronic claims, and data entered in this field will not pull to electronic claims.

- Authorization number - Enter the authorization number from the Payor in this field. Use the check mark icon to the right of this field to scan or attach a copy of the authorization to the case. Click here to learn how to scan documents.
Note: Data entered in this field will print to paper UB-04 forms FL 63 Treatment Authorization Codes. The field can be pulled to FL 23 of the HCFA-1500 form by using the Claim Customization settings at the Global and Carrier level.
Data entered in this field will also be included in both x12 institutional and x12 professional electronic claim files. The data will be pulled to Loop 2300;REF segment with the G1 qualifier:

- Worker's Compensation file number - Enter the number issued by the worker's compensation carrier that is used to reference this claim.
Note: Data entered in this field will print to paper UB-04 form FL 69a-c and to FL 11b for paper HCFA-1500 form. It can also be pulled to FL 23 of the HCFA-1500 form by using the Claim Customization settings at the Global and Carrier level. The data will be pulled to the EMC file when the Insurance Plan Classification has been set to Workers' Compensation in the Insurance Plan dictionary.
Note: If both an Authorization number and Worker's Compensation file number are referenced in the Verification information section, the paper claim will include both values in UB-04 paper form FL 69.
- Referral # - Enter a Payor-specific referral number in this field. This field will pull to electronic claim files only.
- Deposit Amount - Enter the amount the patient is responsible for paying prior to the scheduled procedure. This amount will show as read-only on the Arrival/Departure Status dialog in Scheduling and on the Estimated Revenue dialog.
- Amount Collected - Enter the amount of any deposit collected from the patient.
- Remaining Amount Due - the system will calculate based on the values in the Deposit Amount field and the Amount Collected field.
- In Network
BenefitsIn Network
Benefits
Enter the in-network benefits that you verified by phone or online. Click the field names below for more information.
- Effective
DateEffective
Date
The date the insurance became effective.
- Co-pay
AmountCo-pay
Amount
The fixed fee the health insurer requires the patient to pay for covered medical services.
- CoinsuranceCoinsurance
The amount the individual is required to pay for services after a deductible has been paid. This is often specified as a percentage.
- Lifetime
MaxLifetime
Max
The maximum amount the health plan will pay in benefits to an insured individual during that individual’s lifetime.
- Approved
length of stayApproved
length of stay
The number of days authorized by the plan for an inpatient episode of care.
- Approved
AmountApproved
Amount
The plan maximum amount approved for an episode of care.
- Deductible
AmountDeductible
Amount
The amount an individual/family must pay out-of-pocket before the insurance coverage will cover the remaining costs.
- Deductible
Amount not MetDeductible
Amount not Met
The remaining amount of the deductible that has not yet been met.
- OOP
AmountOOP
Amount
The maximum amount an individual/family will have to pay for covered medical expense in a plan year through deductible and coinsurance before the insurance plan begins to pay 100 percent of covered medical expenses.
- OOP
Amount not MetOOP
Amount not Met
The amount of the Out-of-Pocket Maximum not yet met for the plan year.
Note: If you are working in AmkaiOffice Version 3.19 or later, the amount you enter here will be reflected on the Estimated Revenue screen as the maximum amount the patient could owe.
- Effective
DateEffective
Date
- Out of
Network BenefitsOut of
Network Benefits
Enter the out of network benefits that you verified by phone or online. Click the field names below for more information.
- Effective
DateEffective
Date
The date the insurance became effective.
- Co-pay
AmountCo-pay
Amount
The fixed fee the health insurer requires the patient to pay for covered medical services.
- CoinsuranceCoinsurance
The amount the individual is required to pay for services after a deductible has been paid. This is often specified as a percentage.
- Lifetime
MaxLifetime
Max
The maximum amount the health plan will pay in benefits to an insured individual during that individual’s lifetime.
- Approved
length of stayApproved
length of stay
The number of days authorized by the plan for an inpatient episode of care.
- Approved
AmountApproved
Amount
The plan maximum amount approved for an episode of care.
- Deductible
AmountDeductible
Amount
The amount an individual/family must pay out-of-pocket before the insurance coverage will cover the remaining costs.
- Deductible
Amount not MetDeductible
Amount not Met
The remaining amount of the deductible that has not yet been met.
- OOP
AmountOOP
Amount
The maximum amount an individual/family will have to pay for covered medical expense in a plan year through deductible and coinsurance before the insurance plan begins to pay 100 percent of covered medical expenses.
- OOP
Amount not MetOOP
Amount not Met
The amount of the Out-of-Pocket not yet met for the plan year.
- Effective
DateEffective
Date
- InformationInformation
Select one or more of the following radio buttons, as appropriate:
- Second
Opinion RequiredSecond
Opinion Required
If the insurance plan requires that a second surgical opinion be received prior to surgery check the box. Select a surgeon from the drop down to indicate a specific physician that must provide the second opinion.
- Pre-Approval
for TransferPre-Approval
for Transfer
If authorization is necessary for transfer to a different facility, check the box and indicate the phone number used to receive the authorization.
- Dr.
Referral RequiredDr.
Referral Required
If a physician referral is required for the services scheduled on the case, check the box. You will then be able to select a specific physician from the drop down menu.
- Second
Opinion RequiredSecond
Opinion Required
- CommentsComments
Enter free text notes in this area of the screen. The notes will remain with the case, but can only be viewed from the Verification information section.
Note: If you are using the Electronic Verification Option, some of the imported data is stored in this field. Any information entered in this field by the user will be overwritten upon update of the verification data.
- Estimated Revenue button
- Electronic Insurance Verification
- eVer
History buttoneVer
History button
This button enables you to view all information received through electronic insurance verification for the current patient, case and Insurance Policy.