Electronic Insurance Verification
If your facility uses Electronic Insurance Verification, or e-Verify, you can verify insurance coverage electronically for a case through the Demographics module or from the Scheduling Grid. AmkaiSolutions offers e-Verify as an add-on service that is available for purchase. In order to use e-Verify, your role must include the appropriate Permission Checkpoints, which are assigned to roles in the Roles Dictionary in the Administration module.
Troubleshooting Electronic Insurance Verification
If you receive an error message after clicking the Verify button as described below, see Troubleshooting Electronic Insurance Verification for more information about typical error messages and how to resolve them.
To verify insurance electronically in Scheduling
- Click on the appointment for which you wish to verify insurance on the Scheduling Grid.
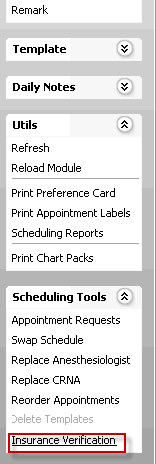
- Select Insurance
VerificationInsurance
Verification under the Scheduling Tools heading.
The Electronic
Insurance Verification dialog Electronic
Insurance Verification dialog appears. The selected
patient's name is auto-populated in the Patient field.
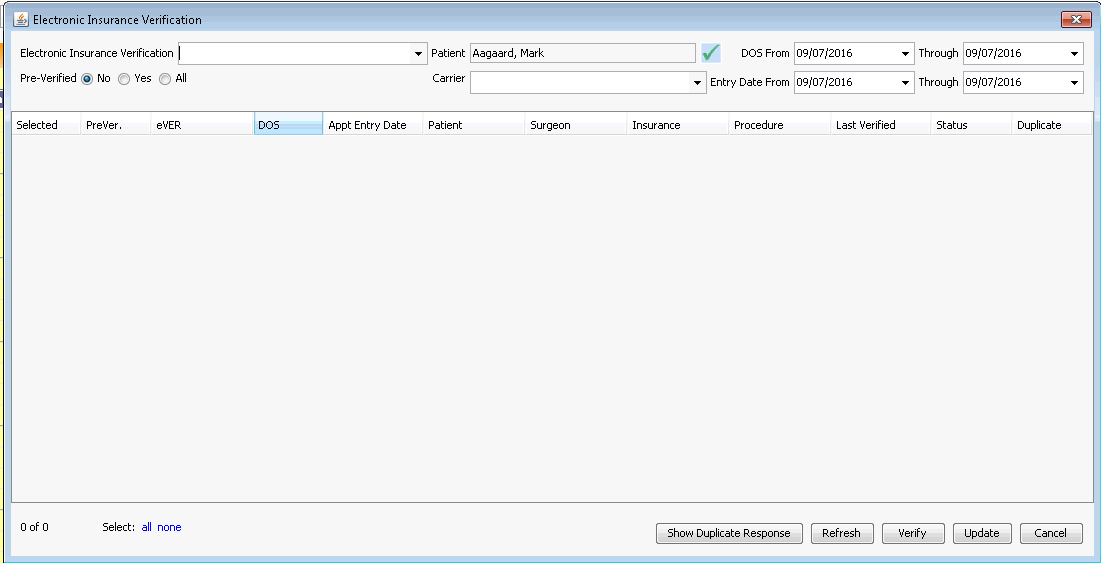
- If you are working on AmkaiOffice Version 3.16x, search for the case(s) for which you wish to verify insurance using the DOS (Date of Service) from and Entry Date (date appointment was entered into the system) to define a date range pertaining to the case(s). Click Refresh. All policies for all cases within the defined date range are listed in the table. Check the Selected check box in the table to select the policy(s) you wish to verify. Proceed with Step 4.
- If you are working on AmkaiOffice Version 3.18 or later, you do not have to select a case, because the system "remembers" the appointment you clicked on. If you wish to select a different case or cases, use the date fields to pull up the case(s) for which you wish to verify insurance. Proceed with Step 4.
- If the policy you wish to verify is not listed in the table on the dialog, check the Insurance Plan Dictionary to ensure the necessary fields have been enabled.
- If you change any of the fields that auto-populated based on the case you selected, click the Refresh button to show the policies matching those parameters.
- Click the Verify button. The system sends an electronic eligibility request to the vendor noted in the eVER column.
- When a response is received, the Status column will be updated.
The Duplicate box will also be checked if a duplicate response message was also made available by the vendor. To view a duplicate response, highlight the row with the response ad click the Show Duplicate Response button.
- To save the verification information to the patient's record, click the Update button.
To verify insurance electronically in Demographics
- Open the Demographics module and select a patient.
- In the Cases
sectionCases
section of the Demographics screen, select a case.
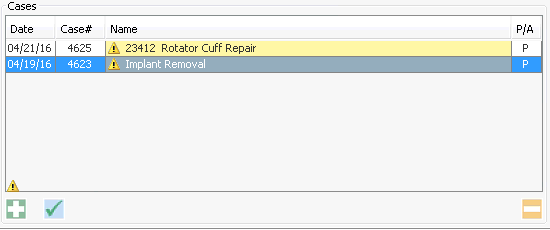
- From the Demographics Sheet Bar, select Electronic Insurance Verification.
- If there are multiple insurance policies associated to the case,
select the appropriate policy from dialogdialog
that appears.
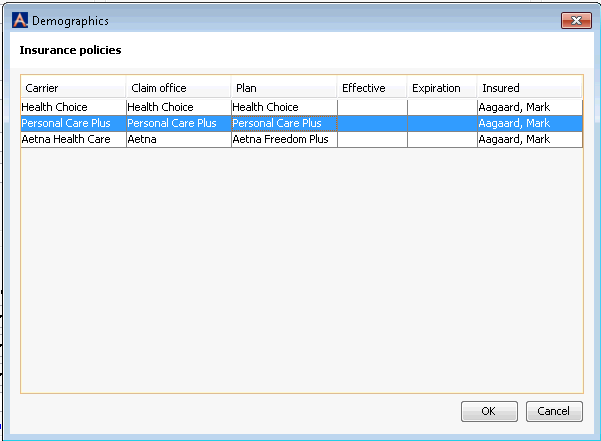
- The Electronic
Insurance Verification dialogElectronic
Insurance Verification dialog appears.
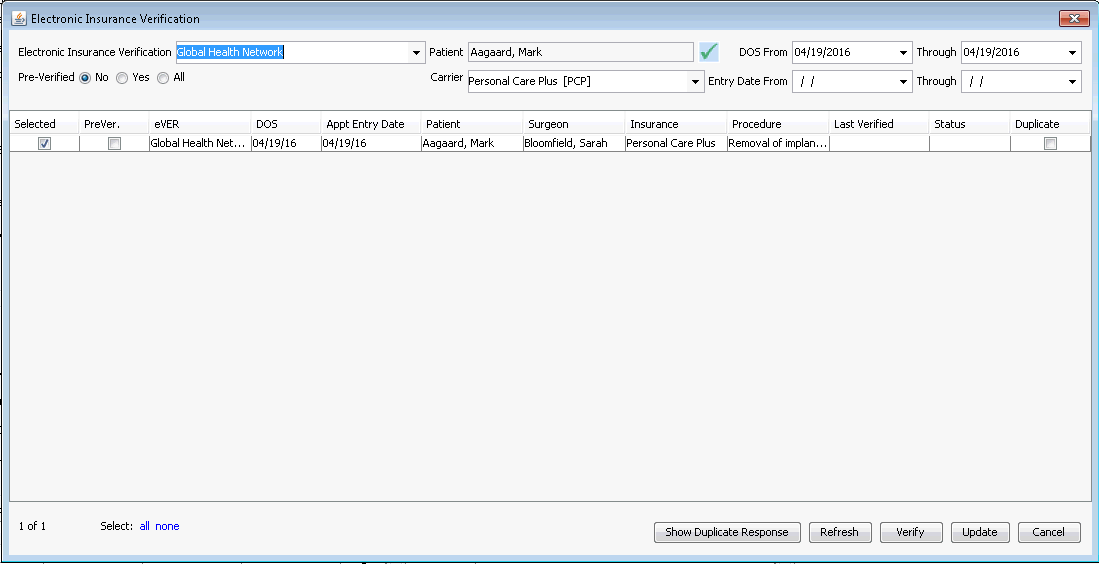
- If the policy you wish to verify is not listed in the table on the dialog, check the Insurance Plan Dictionary to ensure the necessary fields have been enabled.
- If you wish to verify all insurance policies associated to the case, right-click in the Carrier field on the Electronic Insurance Verification dialog and select Clear to remove the selected policy. Then click the Refresh button to display all policies associated to the case.
- If you change any of the fields that auto-populated based on the case you selected, click the Refresh button to show the policies matching those parameters.
- Check the Selected check box in the table to select the policy you wish to verify.
- Click the Verify button. The system sends an electronic eligibility request to the vendor noted in the eVER column.
- When a response is received, the Status column will be updated.
- The Duplicate box will also be checked if a duplicate response message was also made available by the vendor. To view a duplicate response, highlight the row with the response and click the Show Duplicate Response button.
- To save the verification information to the patient's record, click the Update button.
Related Topics