Correction (or Refund) of Payment or Unassigned Payment
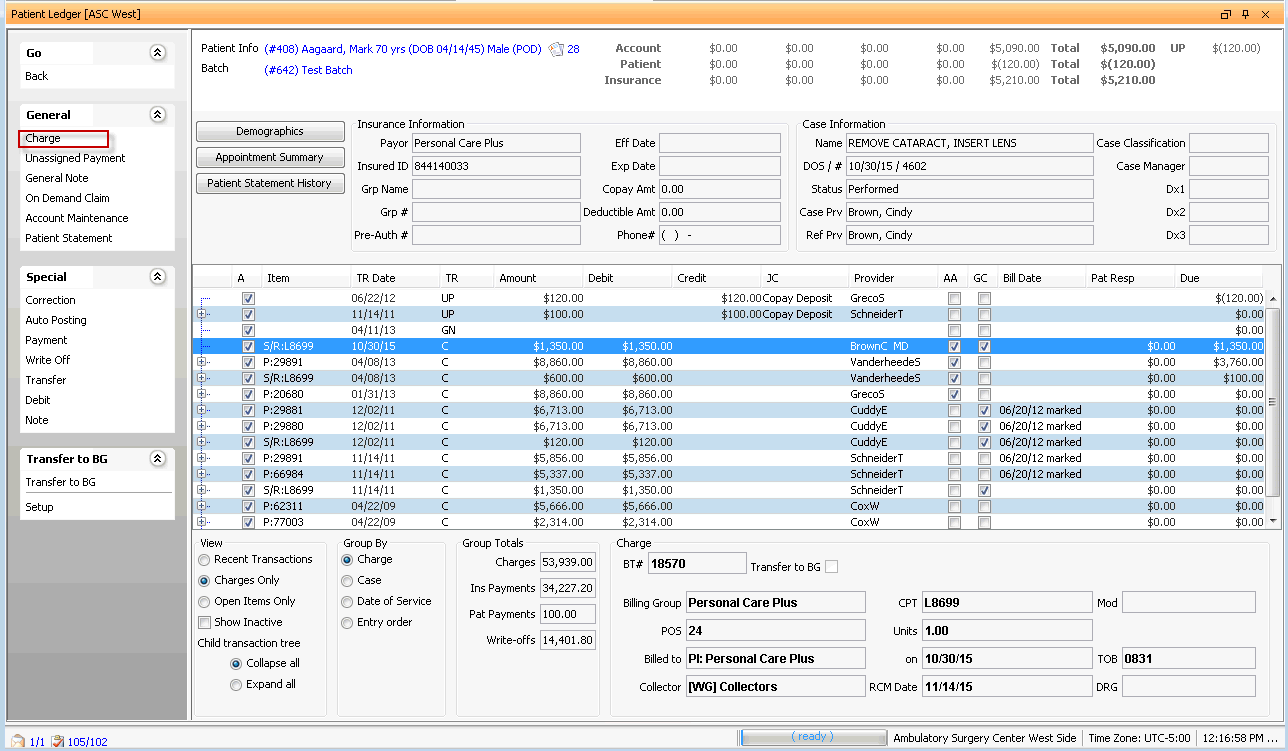
You can make corrections to the amount or journal code of a transaction posted to the Patient Ledger using the Correction Sheet Bar option under the Special heading in the Financial Management module. The Correction Sheet Bar option appears when you click on a transaction on the Patient Ledger, offering options for managing transactions. The specific options vary based on the type of transaction you selected.
Alternatively, for payment or charge corrections, you can right-click on a transaction and select the Correction option from the menu that appears.
Though there are various reasons for which you might post a correction, a payment correction is the process to follow when you refund a payment from a patient or an insurance carrier.
There are different instructions for correcting a Payment or Charge vs. correcting an Unassigned Payment, and different instructions when that Unassigned payment has been allocated vs. unallocated. (Click links below for instructions.)
Note: You cannot correct an Unassigned Payment if the amount Due is 0.
The instructions provided here are specific to processing payment refunds. For general instructions for posting a correction, see Correction.
Preparing to post a refund
When you are performing a correction to refund a patient or insurance carrier payment, following the suggestions below may be helpful.
Create a separate batch for refunds
If you are refunding a patient or insurance carrier payment, creating a separate batch for patient refunds and one for insurance carrier refunds will prevent the process from impacting the daily deposit numbers.
Create specific journal codes for refunds
Create a specific Journal Code in the Journal Code dictionary for patient refunds and a separate Journal Code for insurance refunds. This step will enable you to easily track the transaction when running reports such as the Journal Entry report at month-end.
Create a Remark Category specific to refunds
Creating a Remark Category specific to refunds can assist you when running the Remarks Report to pull a list of all refunds completed in a date range. To learn how to create a Remark Category, click here.
Correcting a transaction posted to the Patient Ledger
- To correct
a Payment (that has been posted directly to the charge) or Charge
transactionTo correct
a Payment (that has been posted directly to the charge) or Charge
transaction
- Open the Financial Management module.
- From the Sheet Bar, click
Patient Ledger.
The Patient
Ledger screenPatient
Ledger screen appears.

- To select the patient record, click the patient information shown highlighted in blue in the upper left of the Patient Ledger Screen. The MPI launches. Click here to learn how to search for and select a patient record in the MPI.
- The current batch being used for posting transactions is displayed in blue text just below the patient name. All transactions you complete on the patient ledger will be posted to this batch. Select the batch you created for patient or insurance carrier refunds, or create a new one. Click here to learn how to create a new batch.
- Select the charge with the payment to be refunded.
- Right-click the charge
and select Correction.
The Corrections
of Associated Transactions dialogCorrections
of Associated Transactions dialog
appears.

- The charge you selected from the Patient Ledger is listed in the Charges Eligible for Correction section of this dialog. Select this charge.
- The payment from the patient are identified with a Transaction Type (TR) or P and the From field will display PG: guarantor name. Insurance carrier payments are identified with any of the following: PI (Primary Insurance), SI (Secondary Insurance), or TI (Tertiary Insurance).
- Correcting Journal Code field: Select the journal code you created for patient or insurance carrier refunds from the drop-down list or click Alt +D or Alt + E to jump to the dictionary.
- Corr Amt field: Enter the amount of the correction in this field. You can correct out up to the full amount of the full amount of the payment received.
- Click Ok to save the changes.
- You may also want to add a comment in Remarks. Creating a Remark Category specific to Refunds can assist you when running the Remarks Report to pull a list of all refunds completed in a date range.
- Click herehere to
view a screen shot showing a refund where the payment
has been applied directly to the charge.

-
Step 1 - Return the allocation to Unassigned Payment
- Open the Financial Management module.
- From the Sheet Bar, click Patient
Ledger. The Patient
Ledger screenPatient
Ledger screen appears.

- To select the patient record, click the patient information shown highlighted in blue in the upper left of the Patient Ledger Screen. The MPI launches. Click here to learn how to search for and select a patient record in the MPI.
- Click on (left-click) the charge for the patient payment you will be refunding.
- The current batch being used for posting transactions is displayed in blue text just below the patient name. All transactions you complete on the patient ledger will be posted to this batch. Select the batch you created specifically for refunds, or create it now. Click here to learn how.
- Right-click the charge with the allocated payment and select
Correction. The Corrections of Associated Transactions
dialogCorrections of Associated Transactions
dialog appears.

- Select the charge with the allocated payment from the Charges Eligible for Correction section of the dialog.
- Journal Code: Enter the journal code for the reversal of the allocated payment in the Payment Allocation (PA) transaction in the Associated Transaction for Selected Charge Grid. (Note: if posting a refund, use the journal code you created for refunds.)
Corr Amt field: Enter the entire amount of the allocation here. If you enter an amount less than the full payment, you will receive a warning message from the system indicating that amount must be the full payment value.
- Click Ok. The system will return the full amount of the allocation to Unassigned Payment. If you have additional charges with allocations that will need to be refunded, repeat this process on each charge.
Step 2 - Refund the amount due to the patient or insurance carrier
- Click on (left-click) the Unassigned Payment in the Patient Ledger.
Right-click on that Unassigned Payment and select Correction. The Unassigned Payment correction dialogUnassigned Payment correction dialog appears.

- Select the Journal Code you created for patient or insurance carrier refunds.
- Enter the amount of the refund. This amount can the up to the full amount received.
- Add a Note to the refund, if needed.
- You may also want to add a comment in Remarks. Creating a Remark Category specific to Refunds can assist you when running the Remarks Report to pull a list of all refunds completed in a date range.
- Check Print on Statement if you would like the text in the note to post to the patient statement.
- Click Save.
- If you are not refunding the full amount of the pre-payment, the remaining portion will need to be re-allocated to the charge.
Step 3 - Reallocate the balance due on the charge(s)
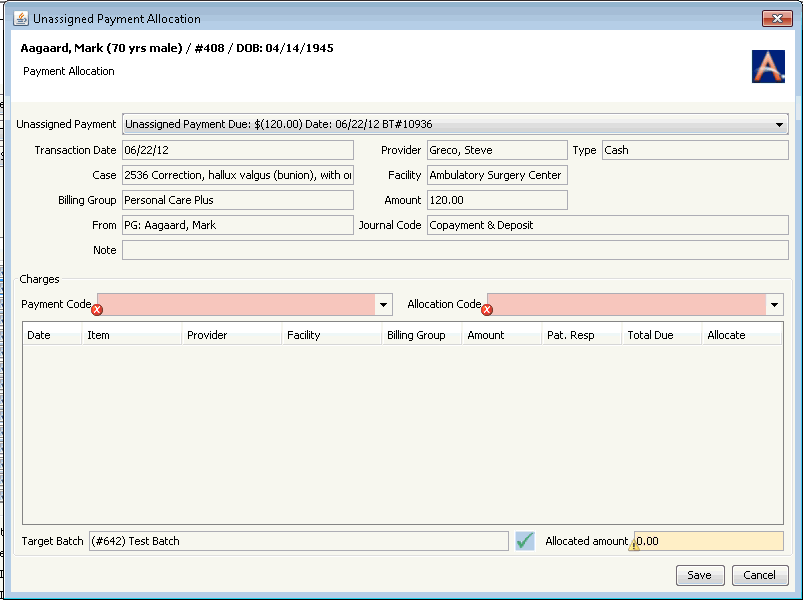
- Right-click on the Unassigned Payment on the Patient Ledger
and select Allocate Payment.
The Unassigned
Payment Allocation dialogUnassigned
Payment Allocation dialog appears.

- Select the appropriate Journal Code.
- Select charge(s) for the allocation and enter the amount to be applied.
- Click Save.
- Click herehere
to view a screen shot showing a Patient Refund where the prepayment
has been applied to the charge.

-
- Open the Financial Management module.
- From the Sheet Bar, click Patient
Ledger. The Patient
Ledger screenPatient
Ledger screen appears.

- To select the patient record, click the patient information shown highlighted in blue in the upper left of the Patient Ledger Screen. The MPI launches. Click here to learn how to search for and select a patient record in the MPI.
- The current batch being used for posting transactions is displayed in blue text just below the patient name. All transactions you complete on the patient ledger will be posted to this batch. You can select a different batch or create a new one. Click here to learn how.
- To open the Unassigned
Payment correction dialogUnassigned
Payment correction dialog, right-click
the transaction you wish to correct and select Correction.

- The General Information, Case Information and Transaction to be Corrected sections on the Unassigned Payment correction dialog populate with details of the selected transaction. These fields are not editable here.
- In the Correction Information section, you can edit the following fields to correct the transaction:
- Transaction Date: Click in the field to select the correct date.
- Amount: Type the correct amount in this free text field. If refunding patient or insurance payment, this amount can be up to the full amount received.
- Journal Code: Select the correct journal code from the drop-down list or click Alt +D or Alt + E to jump to the dictionary. (Note: if posting a refund, select the journal code you created for refunds.)
- Note: You can type a note in this free-text field. The note is viewable only when you open the item. If you have a check number for the refund, you can add it in this field. You may also want to add a comment in patient Remarks using the Remark Category you created specifically for refunds.
- Print on Statement check box: Select to print the note you associated to the Unassigned Payment on the Statement.
- Click Save to post the transactions.
- Allocate the remaining amount of the prepayment to the transaction(s) using the Allocate Payment option. Click here for instructions.
- Click herehere
to view a screen shot showing Patient Refund posted and allocation
of the remaining prepayment posted.

To correct a "Recoupment" (or "Takeback") of Insurance Payment