Procedures, PAT/Follow-up
For billing and reporting purposes, Procedures performed must be confirmed in either the CDM module or on the Charge Entry Screen in Financial Management. This topic covers updating Procedures information for a PAT or Follow-up appointment, which is performed using the PAT/Follow-up > Procedure Sheet Bar Option. Operative procedures can be updated under the Operative > Procedures Sheet Bar option.
Procedures information updated in the CDM module flows into Financial Management and vice versa.
To update/edit Procedures information, the case status must be set to one of the following: Performed, Partially Performed/Billable, Partially Performed/Not Billable, or In Progress. Procedures information will not be allowed to be entered if the case status is set to Pending or Cancelled. You can update the case status on the Case > General screen in CDM.
For information on integration with AmkaiCharts, SIS Charts, and/or SIS Advanced and workflow issues in the CDM module, see About the CDM module.
To update the CDM module with PAT/Follow-up Procedures performed
- Launch the CDM module. You will be prompted to select a patient and case. Click herehere for more information, including instructions for selecting a patient and a case. The PAT/follow-up appointment will not be displayed on this dialog. Instead, you must select the main appointment for the case. Then you can access the PAT/follow-up appointment using the Sheet Bar options under the PAT heading. When you select the main appointment, the module opens to the Case > General screenCase > General screen..
- When you first open the CDM module, the Person -Patient selection dialog appears, prompting you to select a patient. Click here to learn how to select a patient record.
- After you select a patient, the
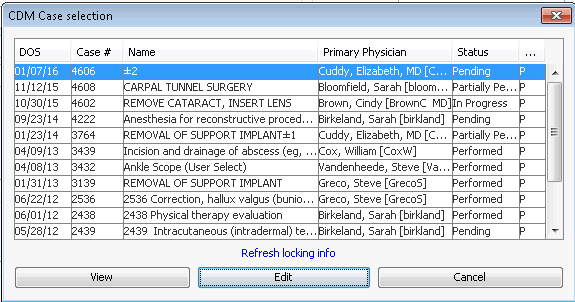
CDM Case Selection dialog
CDM Case Selection dialog appears, prompting you
to select a case. Highlight a case from the dialog and do one of the
following:
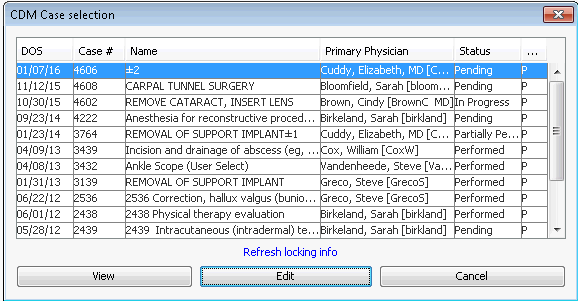
- Click View to see, but not edit case information. Or,
- Click Edit to update/edit case information.
Note: Only one user at a time can edit a case, but multiple users can view it at once. If you open a case someone else is already editing, a system prompt will indicate you are in View Only mode and let you know who has the case open for editing and for how long. Click the Refresh Locking Info button to see if the case has been released for editing.
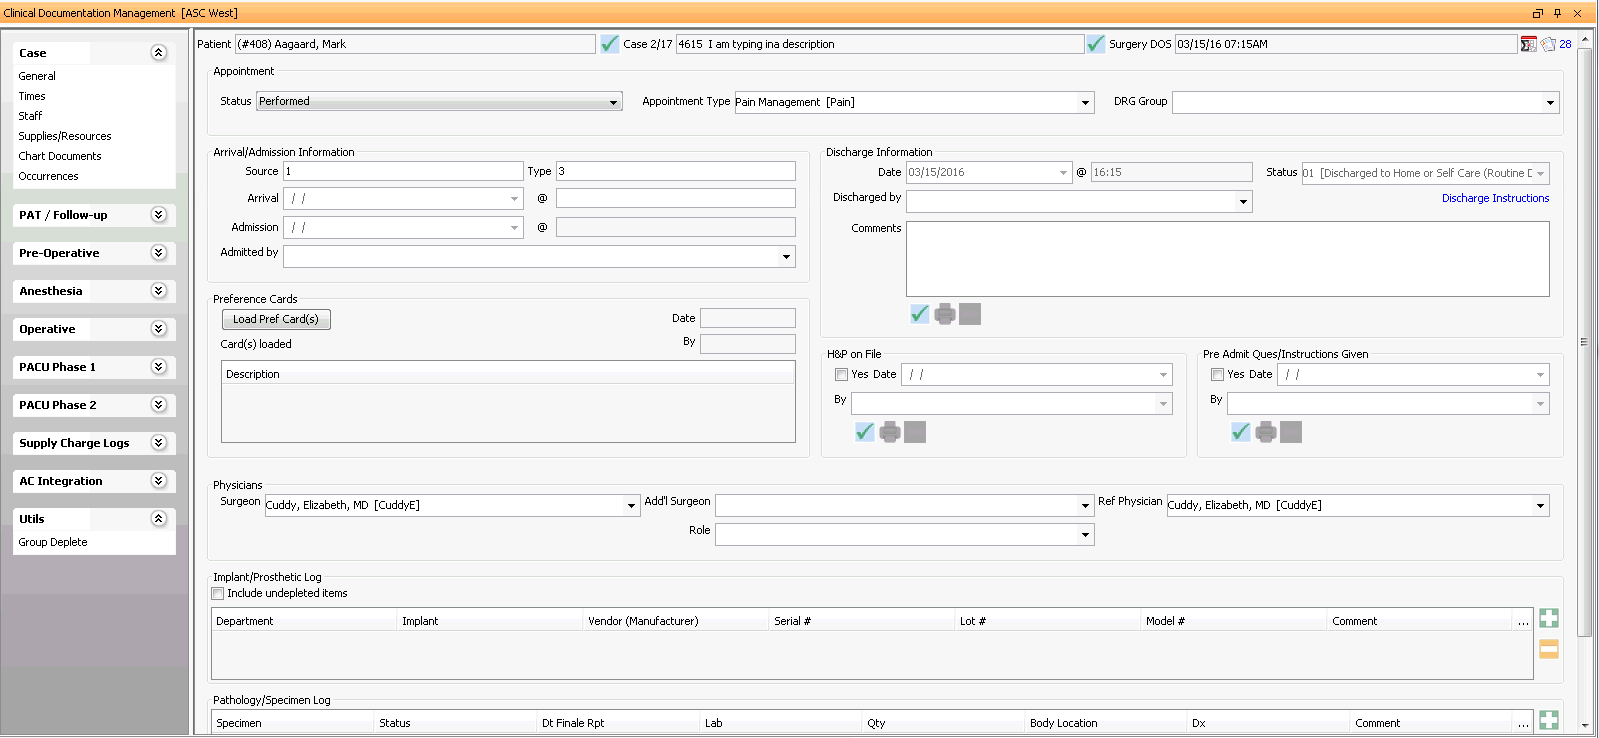
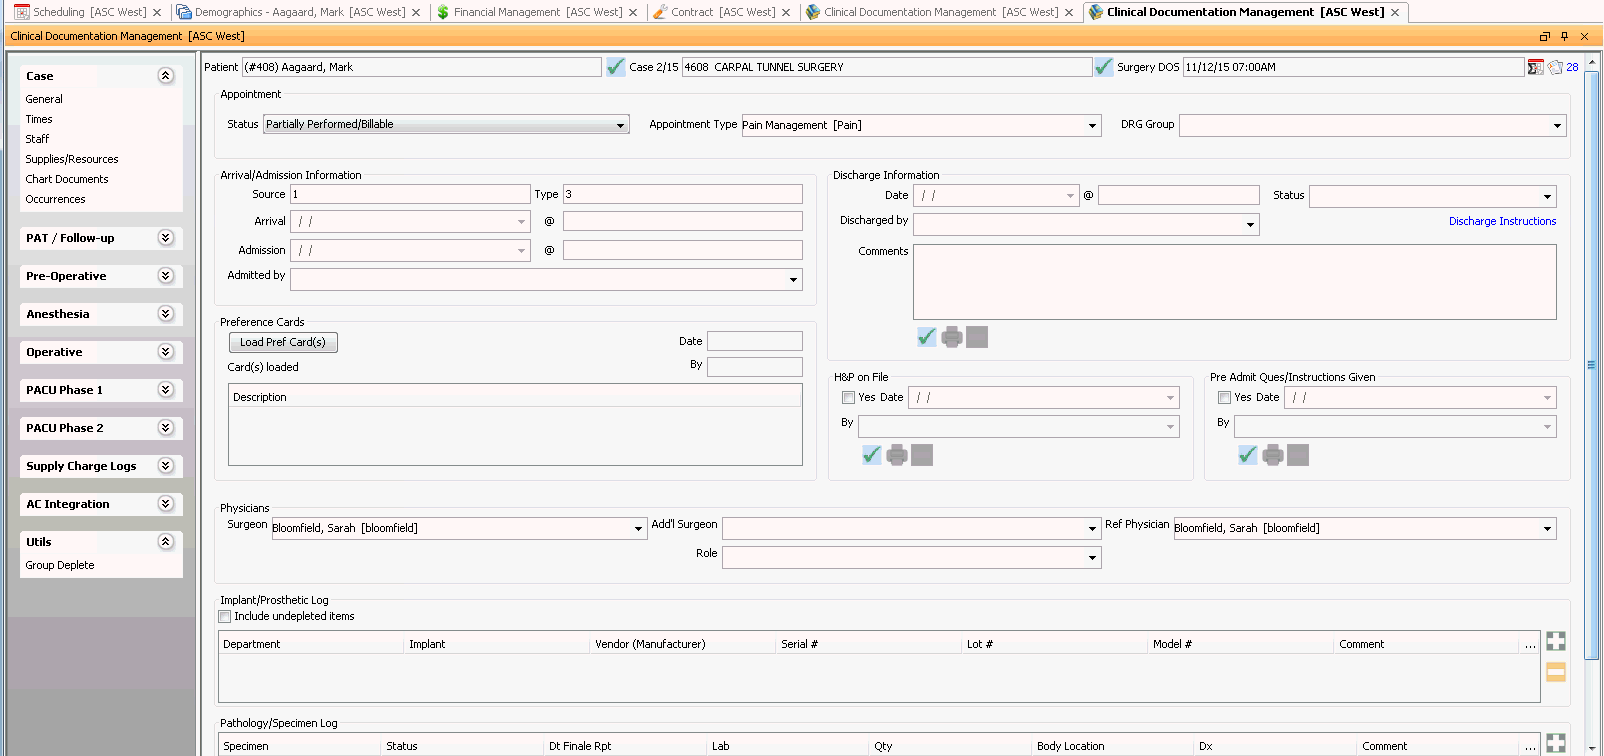
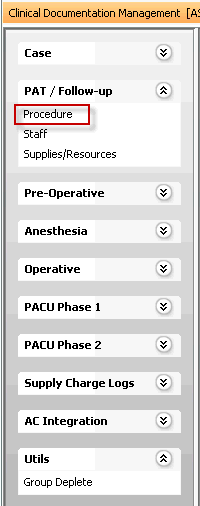
- Click Procedures under the PAT/Follow-up Sheet Bar HeadingPAT/Follow-up Sheet Bar Heading.
- The patient information sectionpatient information section at the top of the screen auto-populates from the Scheduling module. Click the links below for more information about these fields:

- PatientPatient
To select a different patient, click the check mark icon. The Person -Patient selection dialog appears. Click here to learn how to use this dialog to select a patient.
- CaseCase
To select a different case, click the check mark icon. The CDM Case selection dialogCDM Case selection dialog appears. Select a case and click Edit to open the case for editing, or click View if you do not wish to edit the case.
- Surgery
DOSSurgery
DOS
The Surgery Date of Service defaults in from the Scheduling module. Read-only field.
- Appointment
SummaryAppointment
Summary
To view an appointment summary, click the calendar icon to the far right of patient information section (circled in red) to launch the Appointment Summary dialog. Click here to learn how to use this dialog.

- RemarkRemark
To view or create a remark, click the icon (circled below) in the far right of the patient information section. Click here to learn how to use the dialog that appears. The number to the right of the icon indicates how many remarks exist on this account.

- The PAT/Follow-up visits sectionPAT/Follow-up visits section auto-populates from the Scheduling module. Click the links below for more information about the fields in this section:

- Begin/End
DateBegin/End
Date
Defaults in from the Scheduling module as the date of the appointment.
- Begin/End
TimeBegin/End
Time
Defaults in from Scheduling. The begin time cannot be edited here.
- FacilityFacility
Defaults in from Scheduling.
- RoomRoom
Defaults in from the Scheduling module.
- StatusStatus
Update the appointment status using the drop down menu. To update/edit Procedures information, the PAT appointment status must be set to one of the following: Performed, Partially Performed/Billable, Partially Performed/Not Billable, or In Progress.
After updating the status to one of the above, click Save to enable the ability to add Procedures.
-
Add any procedures to the Procedures Performed tableProcedures Performed table. Click the following links to learn more about the functionality of this table:

-
-
Add additional performed procedures to the tableAdd additional performed procedures to the table
-
- Select line in the PAT/Follow-up visit grid and then click the plus sign icon to add a procedure to the performed grid . A new summary line appears in the table. The fields in this line are read-only.
- The From date and Rendering Provider (Rend Prv) default in based on the scheduled date of the PAT and the provider associated to the case.
- After you complete the appropriate fields in the Procedure Details section, the other summary line fields will populate with information you added.
- You can change the position of procedures in the table using the up and down arrows to the right of the table.
If a User Select preference Card was used to schedule the appointment, you can select procedures from that card to add to the table:
-
- Click Select from
Card. The Select
Procedure dialogSelect
Procedure dialog appears. This
dialog lists all procedures attached to the Preference
Card.
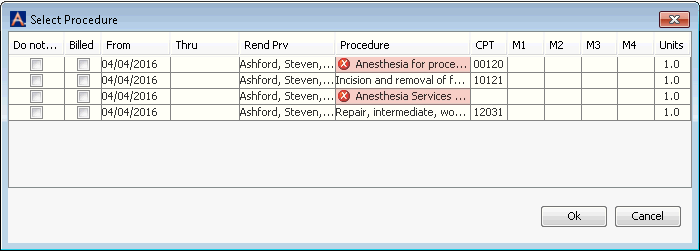
- From this list, select all procedures performed and click OK to add them to the Procedures Performed table. Use CTR + click to select more than one procedure.
- Click Select from
Card. The Select
Procedure dialogSelect
Procedure dialog appears. This
dialog lists all procedures attached to the Preference
Card.
-
-
- Click No Batch. The Batch Selection dialog appears.
- Click here to learn how to use this dialog to select or create a new batch.
-
Click here to learn more about the Case additional Information dialog that appears when you click Additional case info.
-
- Highlight a procedure from the Procedures Performed table. Key fields in the Procedure DetailsProcedure Details section will populate with information about the selected procedure. Complete at least the Mandatory fields in this section. Information you enter in this section will then backfill into the appropriate fields in the Procedures Performed table. Click the following links for more information about the fields in the Procedure Details section.

- ProcedureProcedure
Click the check mark icon next to the Procedure field to access the Procedures dictionary. This is a Mandatory field.
- Modified
Procedure DescriptionModified
Procedure Description
The description as entered in the Procedure Dictionary or entered on the scheduled case defaults into the Modified Procedure Description field. This is a free text field that you can edit as needed for this specific case.
- The following fields are read-only:
- CPTCPT®
Defaults in from the Procedure Dictionary.
- Modified
CPT®Modified
CPT®
If you have set a carrier-specific CPT® code for this procedure in the procedure dictionary, that code will be displayed as read-only here.
- ICD
1 - 3ICD
1 - 3
Default ICD-10 Procedure codes can be set in the procedure dictionary and will pull to these fields if set. Generally, only inpatient cases will require ICD-10 Procedure codes.
- Insurance
CarrierInsurance
Carrier
The primary insurance carrier defaults in from the Billing Group assigned to the case at Scheduling.
- Rend
PrvRend
Prv
The rendering physician defaults in to the Rend Prv field. You can select a different provider from the drop-down list.
- Assistant 1 and Assistant
2Assistant 1 and Assistant
2
You can add any assistant surgeons using the drop-down list in the Assistant 1 and Assistant 2 fields.
- Diagnosis
CodesDiagnosis
Codes
Use the + to add diagnosis codes. If you are working on AmkaiOffice Version 3.16x, you may enter up to 9 codes. If, however, you are working on Version 3.17b or greater, you may enter up to 18 codes.
- Mod
1 -4Mod
1 -4
Select any modifiers from the drop-down lists at the Mod 1 -4 fields
- ICD
1 -3ICD
1 -3
Select any ICD-10 Procedure Codes from the drop down menus in these fields. Generally used only for In Patient cases.
- UnitsUnits
Number of times the procedure was performed. Defaults to 1.
- Medicare
Fee Grp #Medicare
Fee Grp #
This field is no longer used as Medicare Contracts are no longer based on fee groups.
- Source
of RevenueSource
of Revenue
Use the drop down menu to select the Source of Revenue for this procedure. SOR can be defaulted in the procedure dictionary. SOR is often used to apply discounts to second and additional tasks.
- It is highly recommended that you avoid clicking Create Charge. Charges should be generated in the Financial Management module instead to ensure all billable supplies and Quality Indicator codes are considered when the charges are posted.
- Click one of the following buttons:
- SaveSave
Click to save your changes to the patient's account and remain in this account in the CDM.
- Save & NextSave & Next
Click to save your changes to the current record and search for the next patient whose record you wish to update in the CDM.
- SaveSave