Scheduling a P.A.T. &/or Recovery Appointment
In order to schedule a P.A.T. and/or Recovery Care Appointment, you must first schedule a surgical Appointment. To learn how to schedule a surgical case, click here.
To schedule a P.A.T. or Recovery Care Appointment:
Open the Scheduling Module.
Do either of the following to launch the Appointment object:
Double-click on an existing Appointment on the Scheduling Grid.
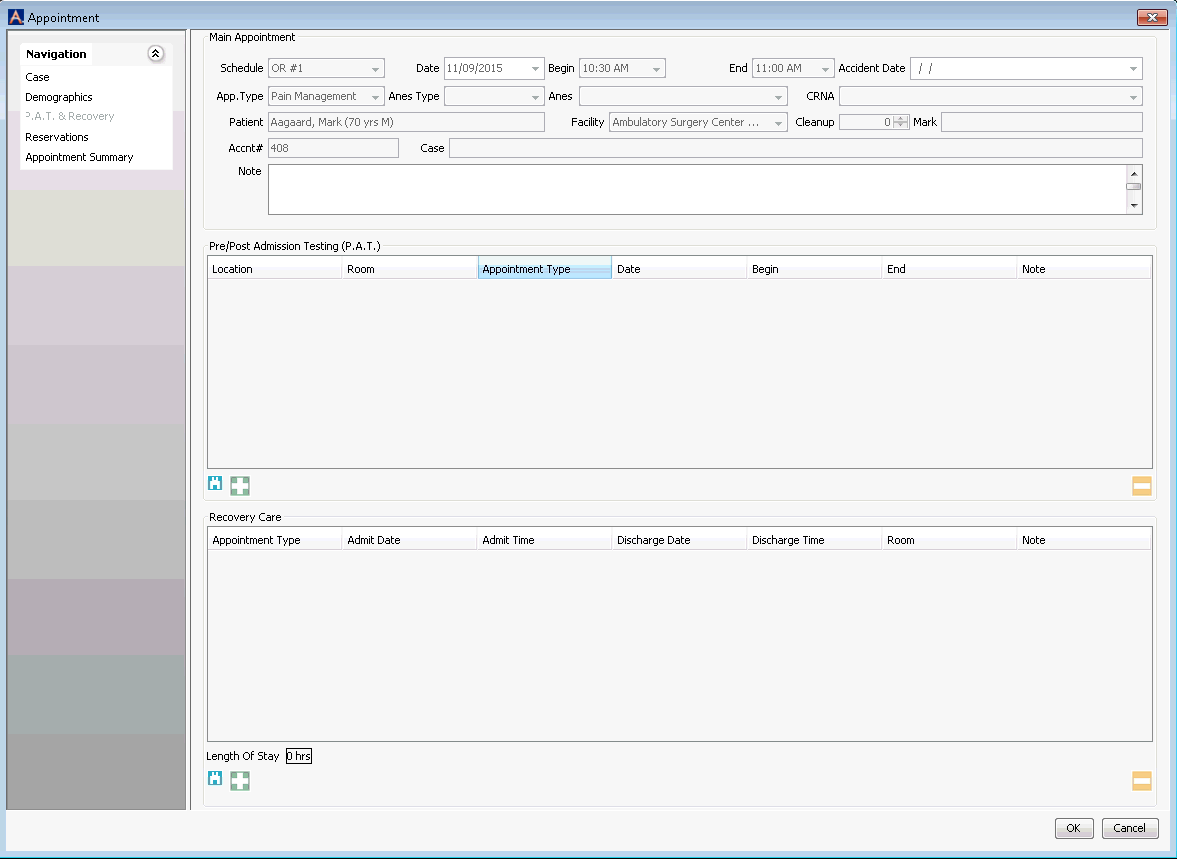
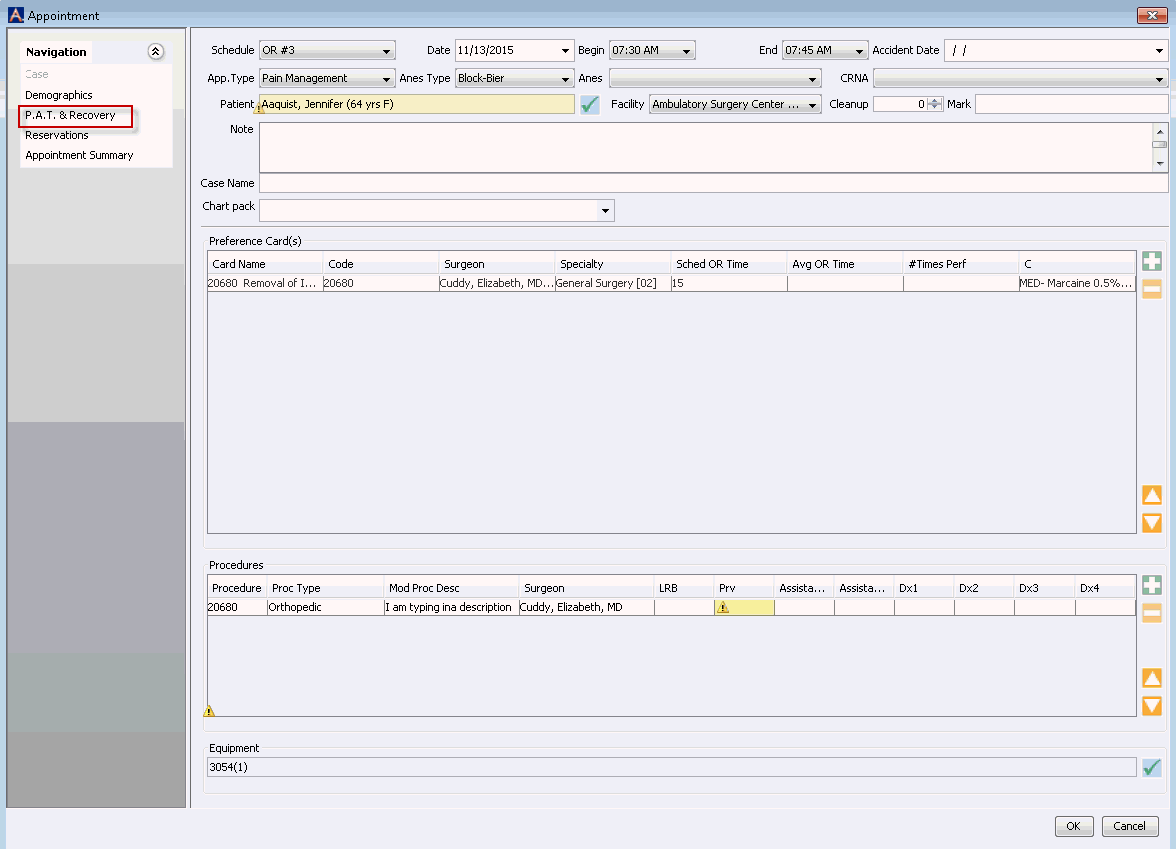
From the Sheet Bar options on the Appointment objectAppointment object, select P.A.T. & Recovery. The Appointment details screenAppointment details screen for P.A.T. and Recovery Appointments appears.


Most of the fields in the top section of the screen (Main Appointment) default from the Surgical Appointment. Ensure that at least the required fieldsrequired fields in the Main Appointment section are complete. Your Business Entity may define additional Mandatory and Suggested fields. If you need to make changes in this section, see Case for instructions for completing each of these fields.
Schedule
Date
Begin
End
Appointment Type
Patient
If you are scheduling a P.A.T. Appointment, perform the following steps in the Pre/Post Admission Testing (P.A.T.) section:
Click the plus sign icon in this section to add a new row for a P.A.T. Appointment.
- The following fields default based on the Main Appointment, but you can change the data using each field's drop-down list:
- DateDate
Defaults to the same date as the Main Appointment.
- BeginBegin
The begin time for the appointment. he system defaults to the facility’s work day start time. You can modify this time as needed.
- EndEnd
The end time for the appointment. The system defaults the end time to 15 minutes after the start time. Modify as needed.
- DateDate
- Location field - select a location for the appointment using the drop-down list. The location must be set up in a room type that is specific to PAT.
- Room field - select a room for the appointment using the drop-down list. Only rooms that have a type of PAT will be included in the drop-down list.
- Appointment Type - select an appointment type using the drop-down list. Only appointment types that are associated to PAT will be included in the drop down menu. If a patient is going to be scheduled for multiple PAT visits, the Appointment Type must be unique.
- Note - This is a free text field that can be used to include details on the visit such as what procedures or tests will be performed. When notes have been added to the appointment, a paper clip symbol will appear on the scheduling grid. Place the cursor on the paper clip to view the note.
- Instead of using the defaulted date/time/Room, you can search
for a free slot on the Scheduling Grid by clicking the binoculars
iconbinoculars
icon, which launches the Free Slot Search
dialog. Click here
to learn how to search for a free slot.

- To remove a P.A.T. Appointment, click the minus sign icon in this section.
- If you are scheduling a Recovery Care Appointment, perform the
following steps in the Recovery Care section:
- Click the plus sign icon in this section to add a new row for a Recovery Care Appointment.
- The following fields default based on the Main Appointment, but you can change the data using each field's drop-down list:
- Admit
DateAdmit
Date
Defaults to the same date as the Main Appointment.
- Admit
TimeAdmit
Time
Defaults to the End Time of the Main Appointment.
- Discharge
DateDischarge
Date
Defaults based on the date/time of the surgical appointment. The Length of Stay field will display an erroran error if you exceed the maximum length of stay.

- Discharge
TimeDischarge
Time
You can change the Discharge Time using the field's drop-down list. The Length of Stay field will display an erroran error if you exceed the maximum length of stay.

- Admit
DateAdmit
Date
- Appointment Type - select an appointment type using the drop-down list. Only appointment types that have been identified as Recovery Types will be included in the drop down menu.
- Room field - select a room for the appointment using the drop-down list. Only rooms that have been set up as Recovery Rooms will be included in the drop-down list.
- Note - This is a free text field that can be used to include details on the visit such as what procedures or tests will be performed. When notes have been added to the appointment, a paper clip symbol will appear on the scheduling grid. Place the cursor on the paper clip to view the note.
- Instead of using the defaulted date/time/Room, you can search
for a free slot on the Scheduling Grid by clicking the binoculars
iconbinoculars
icon.

- To remove a Recovery Care Appointment, click the minus sign icon in this section.
Click OK to schedule the Appointment.
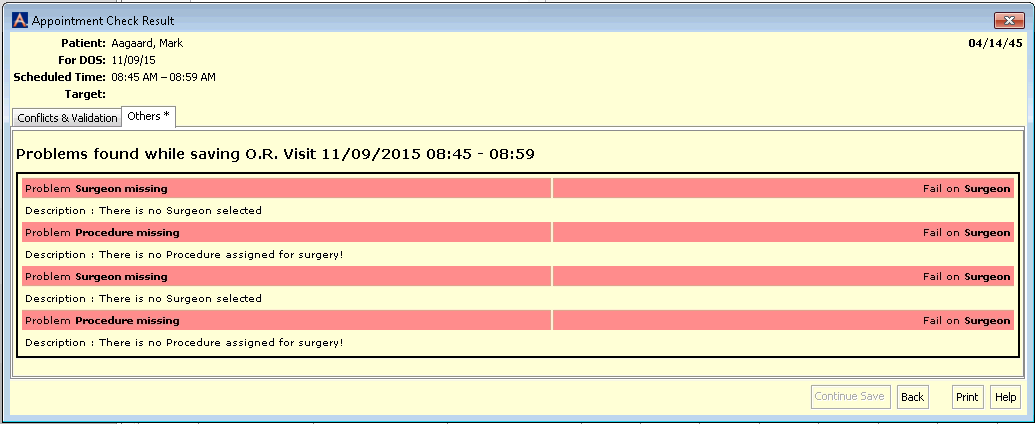
If there are any Conflicts, an alert windowalert window will appear indicating what those Conflicts are. Conflicts in Suggested fields will not prevent you from saving the Appointment. If there are any Conflicts in Mandatory fields, the Continue Save button on the alert window will be disabled, and you will not be able to save the Appointment until those Conflicts are corrected. Click here to learn more about Conflict Checking.

Related Topics