Editing an Appointment
To edit an existing Appointment:
- Open the Scheduling module.
- Find the Appointment on the Scheduling Grid using one of the following methods:
- Search for the Appointment using the Search Sheet Bar option. Click Edit from the Search for Appointment dialog.
- If you know the date of the Appointment, you can navigate to that date on the Grid (click here to learn how to navigate the Grid), and then click the Appointment. Click Edit under the Sheet Bar Appointment headingSheet Bar Appointment heading.

- You can also right-click on the Appointment and choose Edit from the menu that appears, or you can double-click the appointment.
- A paper clip icon on the Appointment indicates a Pre-Admission questionnaire has been received and is available for viewing from the
- If a Pre-Admit Questionnaire has been added to the record, a paper clip icon will appear on the Appointment and the Pre-Admit Questionnaire option on the Sheet Bar will be enabled. Click Pre-Admit Questionnaire to open and view the attachment. If the attachment is not a PDF, the system will display a message offering the option to view the attachment from CDM or Document Central. (for AmkaiOffice 4.5.0 and later).
- If your facility uses SIS Advanced and staff responsible for completing the pre-admission questionnaire are registered users of SIS Advanced, they may manually complete the questionnaire in SIS Advanced. The completed questionnaire will be sent to AmkaiOffice.
- The Appointment objectAppointment object appears and is populated with details of the Appointment you selected.

- Edit any of the fields you wish to change. See Scheduling an Appointment to learn how to edit the fields on the Appointment Object. If the appointment has already been billed, fields such as Date and Begin/End time will not be editable.
- Click OK on the Appointment object to save your changes.
-
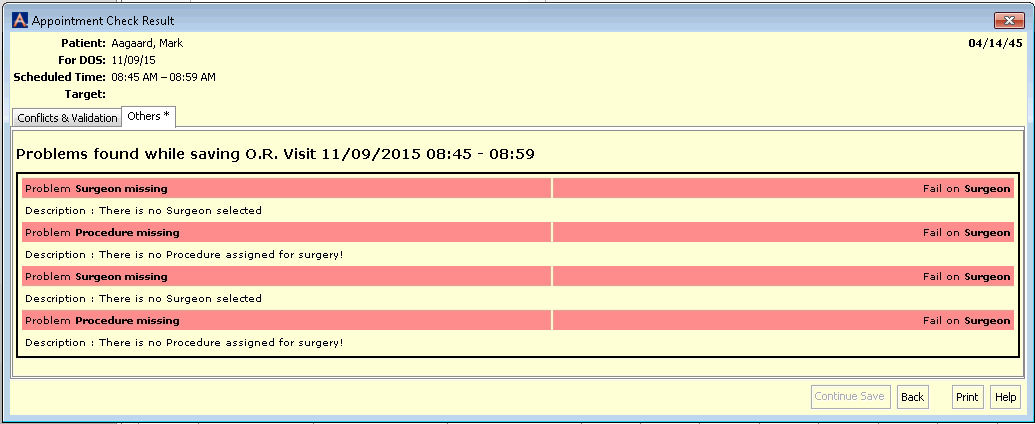
If there are any Conflicts, an alert windowalert window will appear indicating what those Conflicts are. Conflicts in Suggested fields will not prevent you from saving the Appointment. If there are any Conflicts in Mandatory fields, the Continue Save button on the alert window will be disabled, and you will not be able to save the Appointment until those Conflicts are corrected. Click here to learn more about Conflict Checking.

-
To exit the Appointment object without saving your changes, click Cancel.