On Demand Claim
The General > On Demand Claim option from the Patient Ledger Sheet Bar enables you to print either UB04 or HCFA 1500 claims directly from the Patient Ledger, while also enabling you to choose the type of form and the addressee.
To generate an On Demand Claim
- Open the Financial Management module.
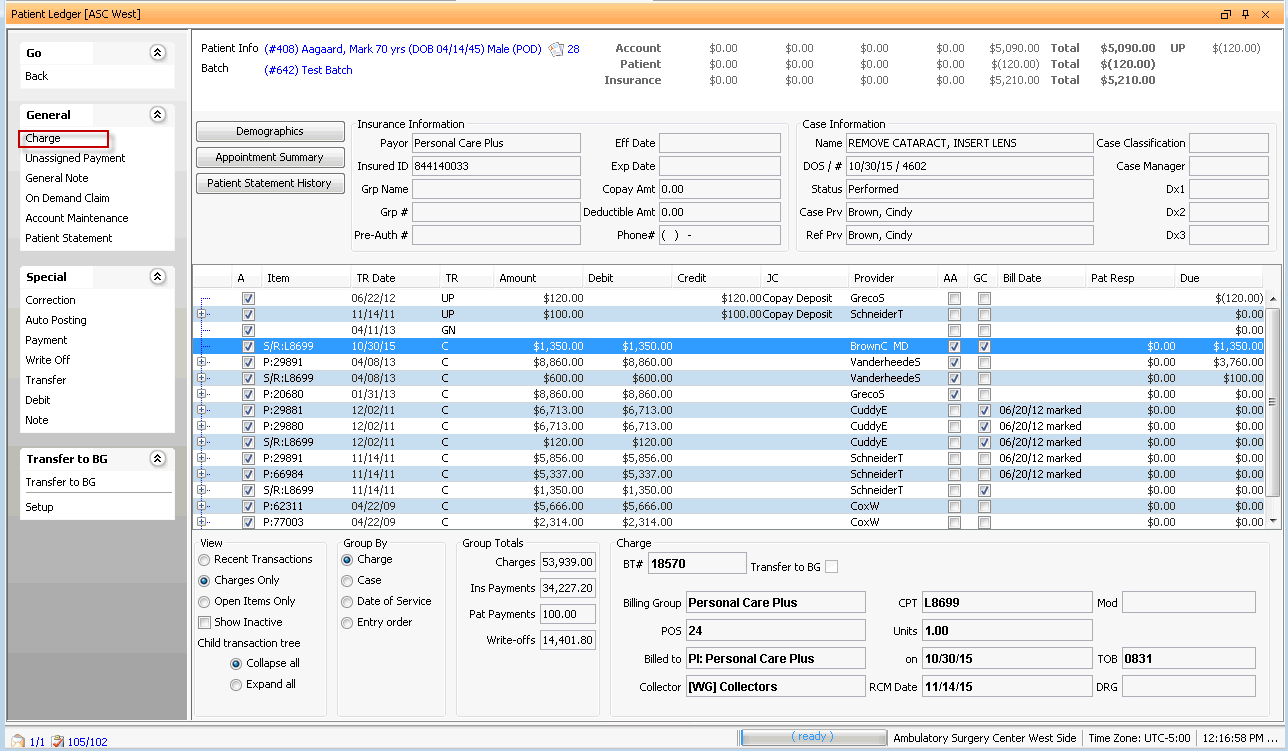
- From the Sheet Bar, click Patient Ledger. The Patient Ledger screenPatient Ledger screen appears.

- To select the patient record, click the patient information shown highlighted in blue in the upper left of the Patient Ledger Screen. The MPI launches. Click here to learn how to search for and select a patient record in the MPI.
- The current batch being used for posting transactions is displayed in blue text just below the patient name. All transactions you complete on the patient ledger will be posted to this batch. You can select a different batch or create a new one.
- From the Transaction List in the middle of the screen, select all charges to be printed on the claim form by holding the control button on your keyboard and clicking all charges to include.
- Select only charges that do not show a date in the Bill Date column, or remove the Bill Date by right-clicking a specific charge and selecting Remove Bill Date or by using the Group Rebill functionality for a group of charges.
- Only charges from the same case can be included on the same claim.
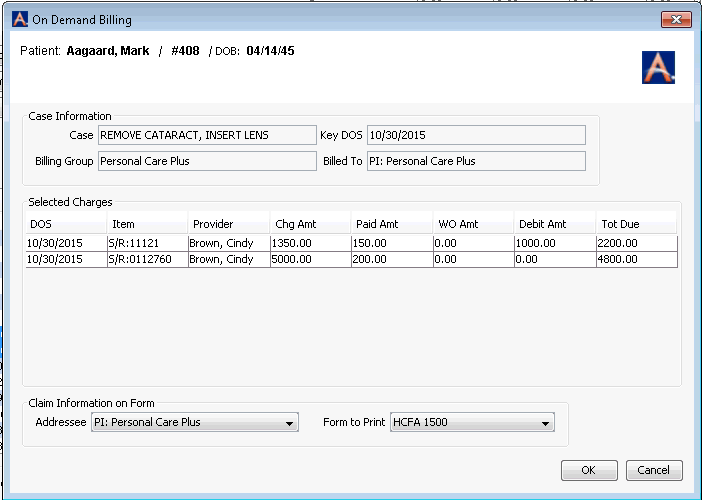
- Select General > On Demand Claim from the Sheet Bar. The On Demand Billing dialogOn Demand Billing dialog appears.

- In the Addressee field, select payor to be billed.
- In the Form to Print field, select the form type. This field defaults to the form type defined for the primary insurance carrier, but you can select to print on either UB04 or HCFA 1500 regardless of user defined defaults for the insurance carrier.
- Click OK.
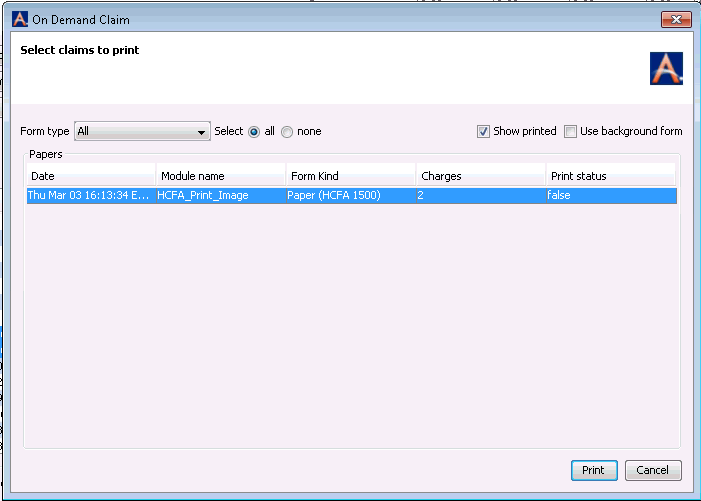
- The Select claims to printSelect claims to print prompt appears. Click herehere for information about the fields on this prompt.
-
- Form type - The form type you selected in step 8 (above) displays in the Form Kind field on the Select claims to print dialog. There is no need to make a choice in this field.
- Show printed - This field has no function at this time.
- Use background form - If you are printing the claim for internal purposes, the system will print a mask of the form selected. This should never be used for claims being mailed to a payor.

-
- Click the Print button to print the form and mark the claim Billed in the system.