Correction (Posting a Charge Correction on a Patient Account)
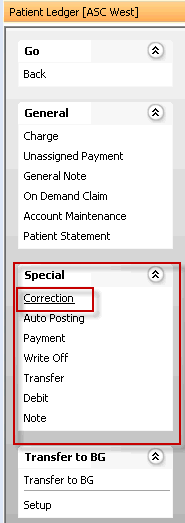
You can make corrections to transactions posted to the Patient Ledger using the Correction Sheet Bar option under the Special heading in the Financial Management module.
Note: If there are "child" transactions (AKA "Associated Transactions") posted for the charge (i.e. payments), you will need to first correct those before you can correct the (parent) charge. See Correction of Associated (Child) Transactions.
Correcting a Charge posted to the Patient Ledger
- Open the Financial Management module.
From the Sheet Bar, click Patient Ledger. The Patient Ledger screenPatient Ledger screen appears.

- To select the patient record you wish to make a correction to, click the patient information shown highlighted in blue in the upper left of the Patient Ledger Screen. The MPI launches. Click here to learn how to search for and select a patient record in the MPI.
- The current batch being used for posting transactions is displayed in blue text just below the patient name. You can select a different batch or create a new one. Click here to learn how.
Select the charge you wish to correct from the list of transactions in the middle of the Patient Ledger. On the Sheet Bar, the Special headingSpecial heading activates, offering options for managing transactions. The specific options vary based on the type of transaction you selected.

Select Correction from the Sheet Bar. Or right-click the charge and select Correction. The Charge Correction dialogCharge Correction dialog appears.

The Batch Information, Case Information, and Transaction to be Corrected sections of this dialog are read-only. Click herehere for an explanation of the fields in these sections.
Batch Information
Displays Batch, Period, Posting Date for the correction
Displays your user name in the by field.
Will display Last Edited date and user if the correction is later edited.
After you save the correction, the Billing Transaction number will autofill the BT# field.
Case Information
Displays Case Name, Billing Group, Date of Service, and to whom the charge is currently billed.
- The Transaction to be Correction section are read-only.
- In the
Correcting Entry Information section, select the appropriate Journal Code
for the correction.
- The Amount field shows the full amount of the charge to be corrected. It is read-only.
- Do not deselect the Active checkbox unless you wish to make the correction inactive.
- If desired, you can enter a note in the Note section. To make this note appear on the patient statement, select the Print on Statement checkbox.
- Click Save to post the correction transaction to the Patient Ledger.
- You may wish to change the Procedure Code of the billed procedure for this charge in order to keep your procedure-based reports accurate. See Modifying the Procedure Code for a Corrected Charge.