Posting an Unassigned Payment
Unassigned payments (UP) are typically payments received prior to charges being posted to an account for services rendered. A co-pay or deposit is a type of unassigned payment, which is usually posted when the patient arrives for his or her appointment.
Payments may also be posted as unassigned if they are duplicate payments or overpayments that are intended to be refunded to the payer. The payments are credit transaction and will result in a negative due amount to an account. If the unassigned payment is a pre-payment such as a deposit or co-pay it will be applied to the charge(s) after the case has been performed and billed using a process called Allocation of Payment. If the unassigned payment is an overpayment or duplicate payment, a refund will generally be done to return the overpayment to the appropriate party.
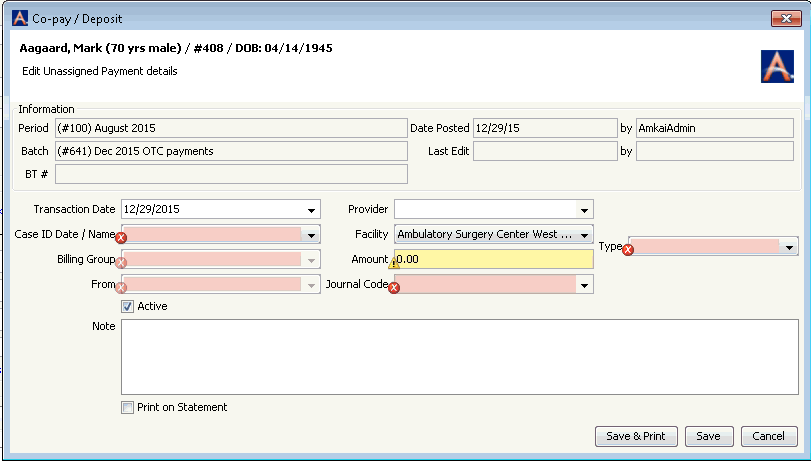
Unassigned Payments are posted using the Unassigned Payment dialogUnassigned Payment dialog, accessible from the following locations. (This dialog is called the Co-pay/Deposit dialog when you access it from the Demographics module, but it is the same dialog.)
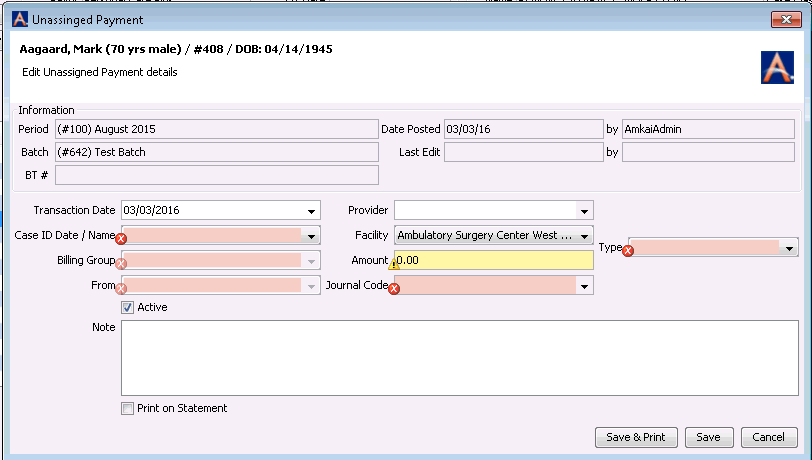
Accessing the Unassigned Payment dialog
From the Scheduling moduleFrom the Scheduling module
- Right-click the appointment on the grid and select
Arrival/Departure Status
from the menu. The Arrival/Departure
Status dialogArrival/Departure
Status dialog appears.
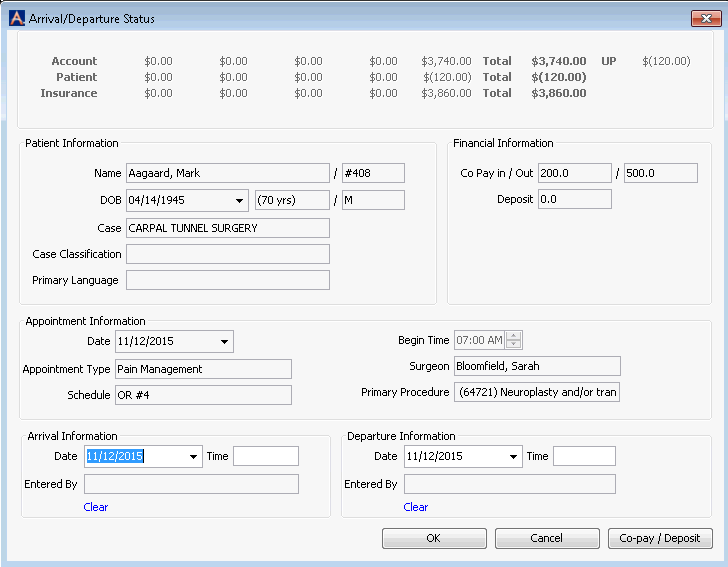
- Click the Co-pay/Deposit button. The Select Batch for Co-pay/Deposit dialog appears.
- Select a batch to which the payment should be posted. Click here to learn how.
- The Unassigned Payment dialog appears.
- Right-click the appointment on the grid and select
Arrival/Departure Status
from the menu. The Arrival/Departure
Status dialogArrival/Departure
Status dialog appears.
From the Demographics moduleFrom the Demographics module
- Select the patient's record.
- From the Sheet Bar, select Co-pay/Deposit.
The Select
Batch dialogSelect
Batch dialog appears.
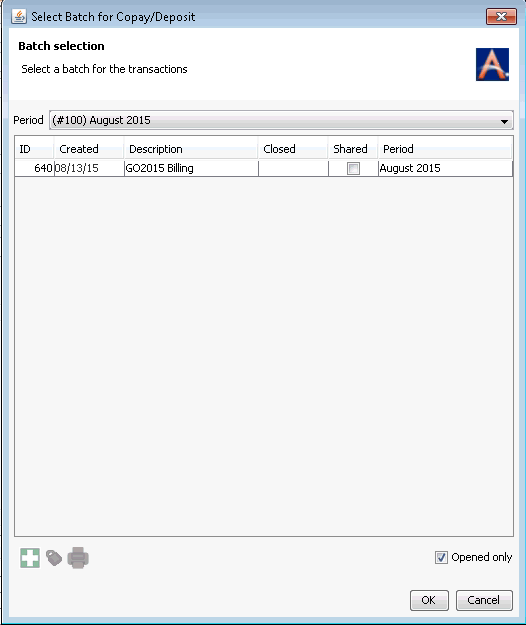
- Click here to learn how to use this dialog to select a billing period and batch, or to create a new batch if necessary.
- The Co-pay/Deposit
dialogCo-pay/Deposit
dialog appears.
From the Financial Management moduleFrom the Financial Management module
- Open the Financial Management module.
- From the Sheet Bar, click Patient
Ledger. The Patient
Ledger screenPatient
Ledger screen appears.
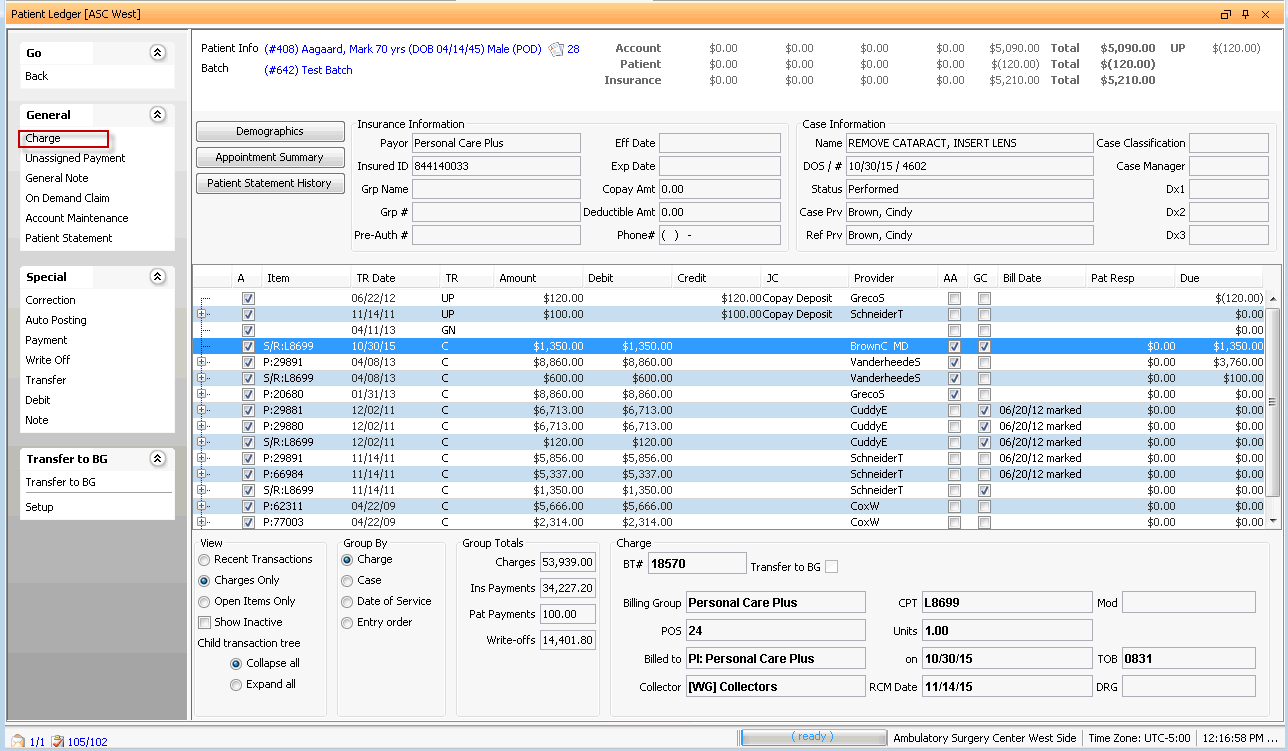
- To select the patient record, click the patient information shown highlighted in blue in the upper left of the Patient Ledger Screen. The MPI launches. Click here to learn how to search for and select a patient record in the MPI.
- The current batch being used for posting transactions is displayed in blue text just below the patient name. All transactions you complete on the patient ledger will be posted to this batch. You can select a different batch or create a new one. Click here to learn how.
- From the Patient Ledger screen Sheet Bar, under the General
heading, click Unassigned
Payment. Unassigned
Payment dialogUnassigned
Payment dialog appears.

To post an Unassigned Payment
- After accessing the Unassigned Payment dialog (see the link above
that corresponds to the module in which you are working), and selecting
a patient record, complete at least the Mandatory fields on this dialog. The values
in the Information section
at the top of the dialog default in and are not editable.
- Transaction DateTransaction Date
Defaults to today's date, but you can change it using the drop-down arrow, if needed, to a date no more than 3 days into the future.
- Case
Date / NameCase
Date / Name
The case date and name will pre-fill based on the case selected and is read-only.
Billing GroupBilling Group (Mandatory)
(mandatory field) Select the group that is associated to the case and is responsible for transactions associated to this case. The options here will be based on the information entered for the case in the Demographics module.
FromFrom (Mandatory)
(mandatory field) Select from whom the payment was received. The options here will be based on the information entered for the Billing Group in the Demographics module.
-
This field will populate based on the case selected and the provider associated to the Case. This field can be cleared by right-clicking and selecting Clear from the menu that appears.
-
This field will populate based on the appointment associated to the selected case.
-
Enter the amount of the payment being posted.
Journal CodeJournal Code (Mandatory)
(mandatory field) Select a code that describes what the payment represents. Example: Co-payment, Deposit, or Pre-Payment. Use the Alt + e or Alt + d keys to jump to the Journal Code dictionary to add or modify Journal Codes if necessary.
TypeType (Mandatory)
(mandatory field) Select the medium of the payment.
If the type is Check the system will also display a field to enter the check number.
If payment type is Card a field for the card number will be displayed. The card number will be save with the transaction. It is recommended that you do not enter the full credit card number in this field. Enter the last 4 digits to keep a record of the card used if necessary.
If the type is EFT (electronic fund transfer) fields for the checking account number and routing number will be displayed.
-
This field will default to checked to indicate that the transaction is active in the system.
-
Enter any free text information you would like referenced on the transaction. This information will be stored with the payment and will be visible when the transaction is viewed from the Patient Ledger. The system will automatically apply the text “Thank you for your payment” when the receipt is printed.
Print on StatementPrint on Statement
Check this box if you would like the text entered in the Note field to be printed on Patient Statements when the unassigned payment is included in the statement.
- Transaction DateTransaction Date
- After completing the fields on the dialog, select one of the following options:
- Save & PrintSave & Print
Click this option if you would like to save the transaction to the patient’s account and also print a receipt for the patient.
-
Click this option to save the transaction and close the Co-pay/ Deposit dialog.
-
Click this option to close the Co-pay / Deposit dialog without saving the transaction.
- Save & PrintSave & Print