Staff
In the CDM module, you can enter Staff information for a case for billing, costing and reporting purposes. This topic addresses updating the Staff log from the Case > Staff Sheet Bar option.
To update/edit Staff information, the case status must be set to one of the following: Performed, Partially Performed/Billable, Partially Performed/Not Billable, or In Progress. Staff information will not be allowed to be entered if the case status is set to Pending or Cancelled.
For information on integration with AmkaiCharts, SIS Charts, and/or SIS Advanced and workflow issues in the CDM module, see About the CDM module.
Note: If a Sheet Bar option is disabled, check the Appointment StatusAppointment Status on the Case > General screen. Click herehere to learn which Sheet Bar options are enabled with each Appointment Status.
- PendingPending
Pending status means the patient has not yet been logged in as Arrived for the appointment. Available Sheet Bar options are: Case > General, PAT/Follow-up (all menu options under this heading), and Utils.
- In ProgressIn Progress
In Progress status means the patient has been logged in as Arrived for the appointment. Case details can be updated/edited and all Sheet Bar options are available, but the case cannot yet be billed.
- Partially
Performed/Not BillablePartially
Performed/Not Billable
If the status is Partially Performed/Not Billable, case details can be updated/edited and all Sheet Bar options are available. The case will not be billed.
- Partially
Performed/BillablePartially
Performed/Billable
If the status is Partially Performed/Billable, case details can be updated/edited and all Sheet Bar options are available. The case is billable.
- PerformedPerformed
If the status is Performed, case details can be updated/edited and all Sheet Bar options are available. The case is billable.
- CancelledCancelled
Appointment has been cancelled and is not billable. Available Sheet Bar options are: Case > General, PAT/Follow-up (all menu options under this heading), and Utils.

 When entering staff information from Case > Staff Sheet Bar option, it is recommended that you enter the Time log (Case > Time Sheet Bar option) prior to entering the Staff log, so you have the option to pull these times (also known as Room Times) to the staff begin/end time/date. See the section below on right-click menu options to learn how to pull Room Times to the fields in the Staff log.
To update the Staff log
- Launch the CDM module. You will be prompted to select a patient and case. Click herehere for more information, including instructions for selecting a patient and a case. The module opens to the Case > General screenCase > General screen..
- When you first open the CDM module, the Person -Patient selection dialog appears, prompting you to select a patient. Click here to learn how to select a patient record.
- After you select a patient, the
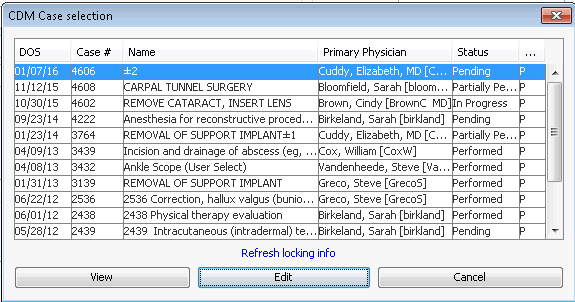
CDM Case Selection dialog
CDM Case Selection dialog appears, prompting you
to select a case. Highlight a case from the dialog and do one of the
following:
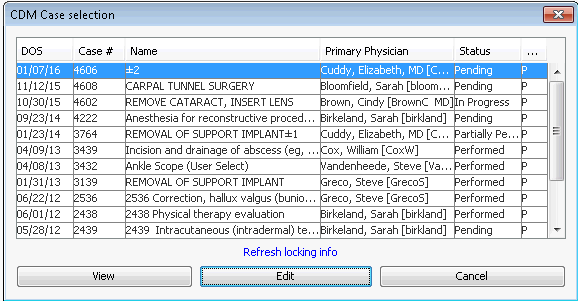
- Click View to see, but not edit case information. Or,
- Click Edit to update/edit case information.
Note: Only one user at a time can edit a case, but multiple users can view it at once. If you open a case someone else is already editing, a system prompt will indicate you are in View Only mode and let you know who has the case open for editing and for how long. Click the Refresh Locking Info button to see if the case has been released for editing.
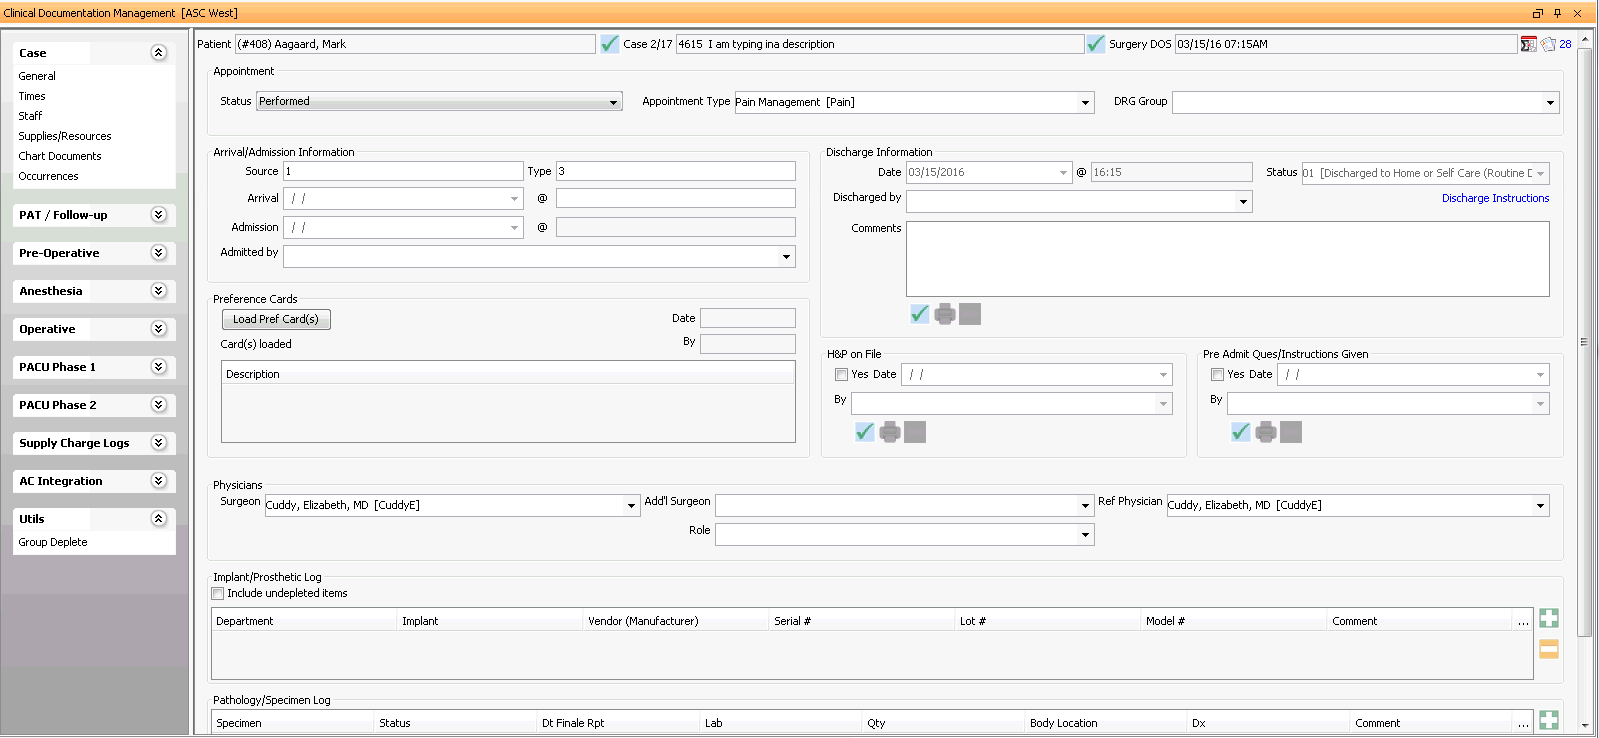
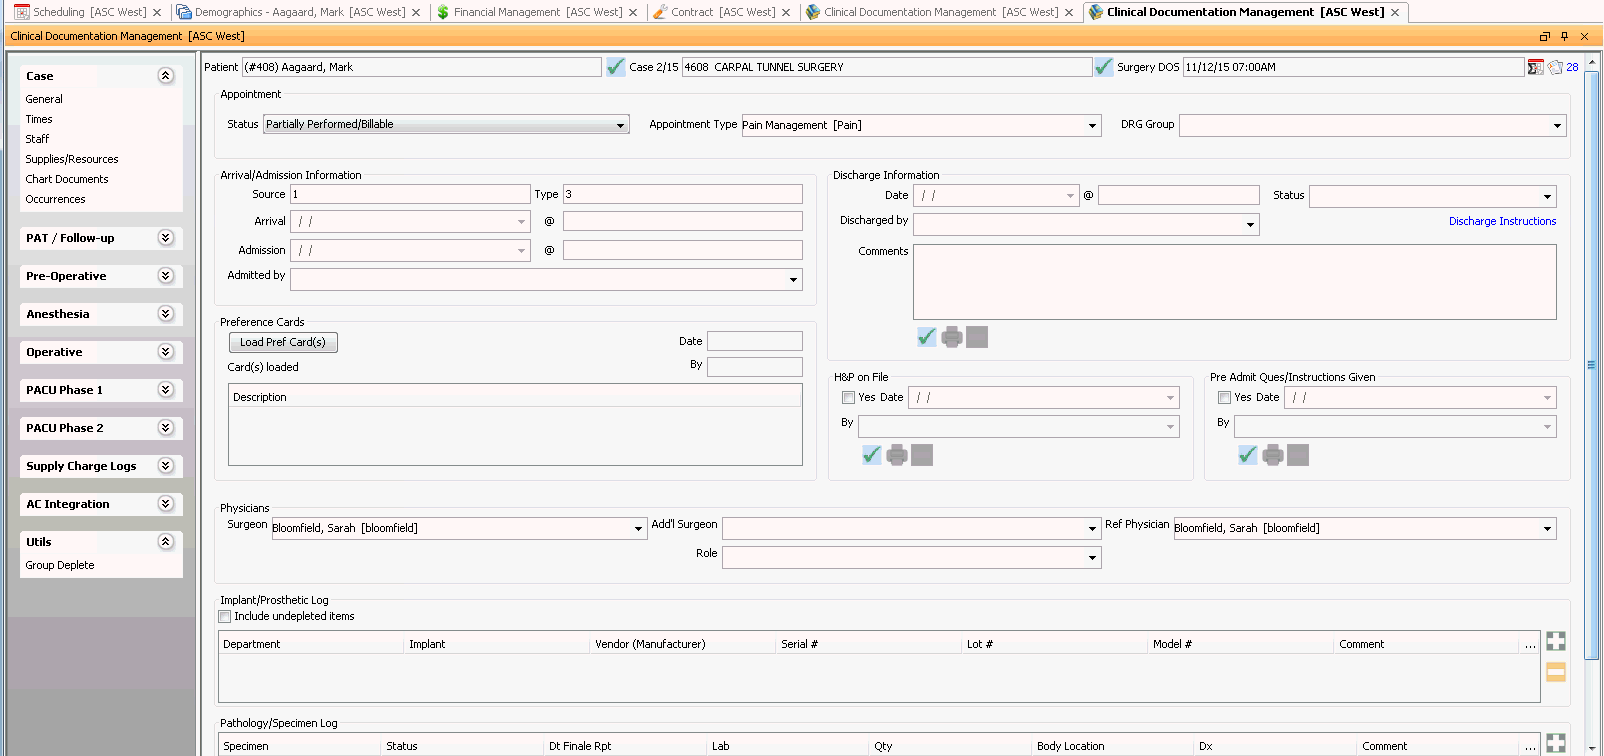
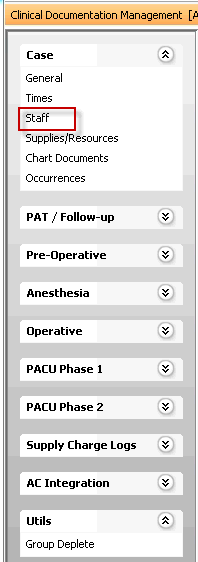
- From the CDM module Sheet BarSheet Bar, select Staff under the Case heading. The Staff Log displays at the bottom of the screen.
- The patient information sectionpatient information section at the top of the screen auto-populates from the Scheduling module. Click the links below for more information about these fields:

- PatientPatient
To select a different patient, click the check mark icon. The Person -Patient selection dialog appears. Click here to learn how to use this dialog to select a patient.
- CaseCase
To select a different case, click the check mark icon. The CDM Case selection dialogCDM Case selection dialog appears. Select a case and click Edit to open the case for editing, or click View if you do not wish to edit the case.
- Surgery
DOSSurgery
DOS
The Surgery Date of Service defaults in from the Scheduling module. Read-only field.
- Appointment
SummaryAppointment
Summary
To view an appointment summary, click the calendar icon to the far right of patient information section (circled in red) to launch the Appointment Summary dialog. Click here to learn how to use this dialog.

- RemarkRemark
To view or create a remark, click the icon (circled below) in the far right of the patient information section. Click here to learn how to use the dialog that appears. The number to the right of the icon indicates how many remarks exist on this account.

- You can update the Appointment Status and Type using the drop-down lists in these two fields. If you change either one of these items here, it also changes the item in Scheduling. The Sheet Bar options in the CDM module are enabled/disabled depending on the Appointment Status. Click herehere to learn which Sheet Bar options are available with each Appointment Status.
- PendingPending
Pending status means the patient has not yet been logged in as Arrived for the appointment. Available Sheet Bar options are: Case > General, PAT/Follow-up (all menu options under this heading), and Utils.
- In ProgressIn Progress
In Progress status means the patient has been logged in as Arrived for the appointment. Case details can be updated/edited and all Sheet Bar options are available, but the case cannot yet be billed.
- Partially
Performed/Not BillablePartially
Performed/Not Billable
If the status is Partially Performed/Not Billable, case details can be updated/edited and all Sheet Bar options are available. The case will not be billed.
- Partially
Performed/BillablePartially
Performed/Billable
If the status is Partially Performed/Billable, case details can be updated/edited and all Sheet Bar options are available. The case is billable.
- PerformedPerformed
If the status is Performed, case details can be updated/edited and all Sheet Bar options are available. The case is billable.
- Direct AdmitDirect Admit
Patient was directly admitted to the surgical hospital as a medical admit.
- CancelledCancelled
Appointment has been cancelled and is not billable. Available Sheet Bar options are: Case > General, PAT/Follow-up (all menu options under this heading), and Utils.
- PendingPending
- Click herehere to learn about the fields in the Arrival/Admission Information section.
Source and TypeSource and Type
The Source (code indicating the source of the referral for the visit) and type (code indicating the type and priority of a visit) can be set to default in the Preferences dictionary. You can change these codes here by typing in the free text fields.
Note: This information is used in claims processing and in many state-mandated reports.
-
Arrival date/time default in from the Scheduling module once completed at the front desk.
-
Admission time defaults in from AmkaiCharts. If you do not use AmkaiCharts, you can enter the Admission time in this field.
-
Select the name of the physician who admitted the patient from the drop-down list.
- Click herehere to learn about the fields in the Discharge Information section.
-
Enter the Discharge Date and Time on this screen. This information can also be entered on the Case > Times screen in the Department Time Log. The information will then auto-fill into the Date and Time fields in the Discharge Information section.
-
Select a discharge status from the drop down menu. If you do not find the appropriate status, use Alt + e or Alt + d to jump to the dictionary.
-
Select the appropriate provider from the drop down menu.
-
Enter any comments in the free text field.
Click the check mark icon to attach a document to the patient's record. Click here to learn how.
-
- Click the Preference Card button to load information from the Preference Card into the CDM module. After you click this button, the Procedure Description on the Card populates the Description field, and any Supplies/Resources noted on the Card will populate in the Supplies/Resources/Trays section, which you can edit/update by clicking the Supplies/Resources Sheet Bar option under the Case heading.
- To add an entry to the Staff logStaff log, click the plus sign, which adds a line to the log with fields for you to complete. All fields are required. Click the links for information about each field:

- DepartmentDepartment
This field lists the department where the staff (physician) member carried out his/her duties. The field defaults to the page you are currently on in CDM. For example, if you are on the Operative page in CDM, the field defaults to Operative. Cannot be edited here.
- StaffStaff
In this field, enter the staff member that was present by double-clicking on […].Only persons entered in the physician and staff dictionary will show in this item selector.
- RoleRole
Staff can be assigned a default role in the Staff Dictionary. Defaults can be modified for the case as needed.
- Start DateStart Date
Date on which the staff member assumed care of the patient. A single click on start date will default to the date of service. You can also enter the start date manually or access the Amkai calendar by clicking the down arrow .
- Start TimeStart Time
Enter the time at which the staff member assumed care of the patient. You can enter the time manually or by using the right click options.
- End DateEnd Date
Enter the date on which the staff member ceased care of the patient. A single click on End Date will default to the date of service. You can also enter the end date manually or access the Amkai Calendar by clicking the down arrow.
- End TimeEnd Time
Enter the time at which the staff member ceased their care of the patient. User can enter time manually or by using the right click options.
- To add additional entries to the Staff log, click the plus sign to add a new line for each entry.
- When you are finished updating the Staff log, click one of the following buttons:
- SaveSave
Click to save your changes to the patient's account and remain in this account in the CDM.
- Save & NextSave & Next
Click to save your changes to the current record and search for the next patient whose record you wish to update in the CDM.
- SaveSave
Right-click menu options
When entering begin and end times/dates you can use the following right-click options:
- Pull Room time: By using this option users could fill time/date with the previously entered time/date entered into the Times Grid in the CDM (CDM > Case > Times). User has the option to pull just the begin time, just the end time, or to pull both times. If no time has been entered for the department the system will not pull data to the field when this option is used.
- Pull Current time: By using this option users could fill time/date with the current time/date. User has the option to pull just the begin time, just the end time, or to pull both times