Adding an Item to the Supply Resource Dictionary
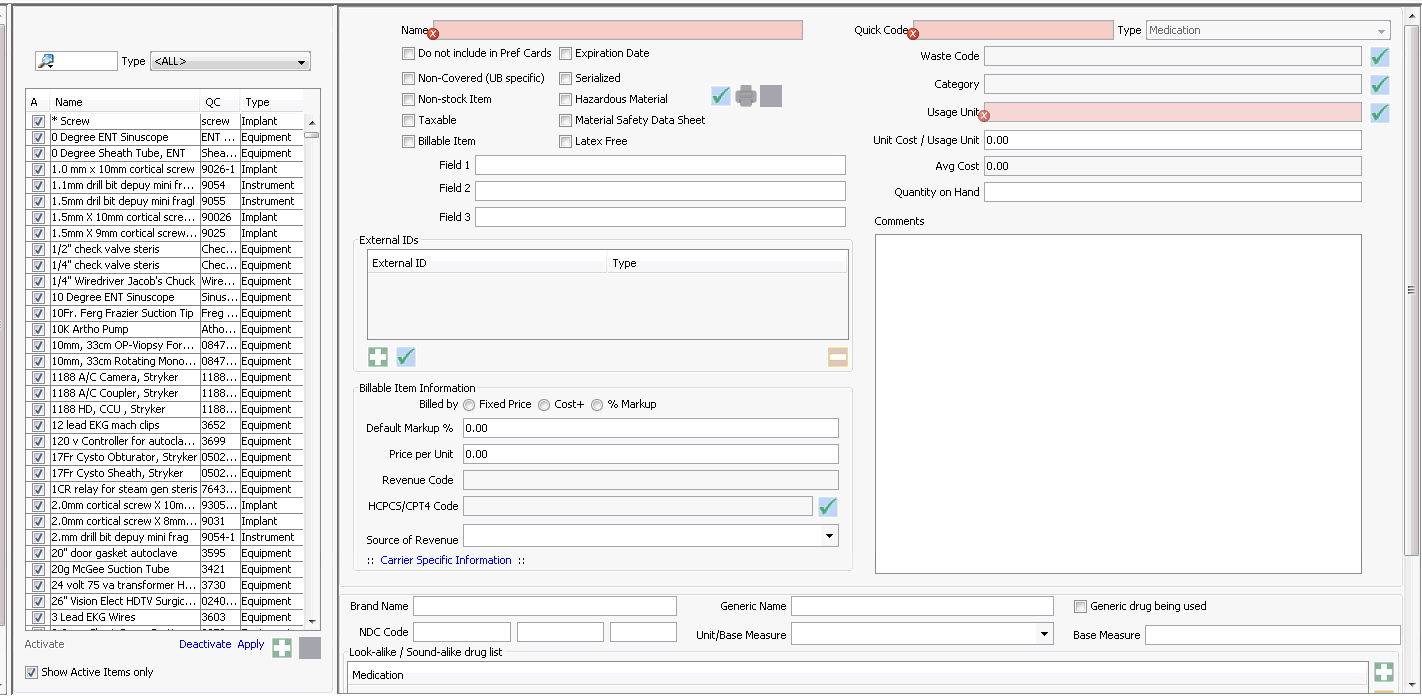
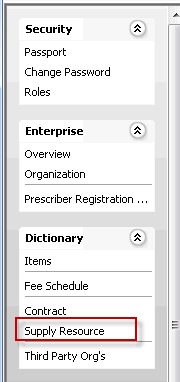
Access the Supply Resource dictionary by clicking Supply ResourceSupply Resource under the Dictionary heading on the System Administration module Sheet Bar. The dictionary opens to the main pagemain page. You may add or edit items into the dictionary, sort or look up items or make existing items active or inactive from this page.


The screen is divided into two sections. The left side displays a list of all of the individual items in the dictionary. The right side of the screen displays the details associated to the selected (highlighted) item. The details displayed on the right hand screen will change based on the type of item you are entering or editing. Mandatory fields are displayed in red.
Video Demo: Adding an Item to the Supply Resource Dictionary
This video provides a detailed demonstration of adding an item to the dictionary and an overview of Supply Resource dictionary setup.
To add an item to the Supply Resource dictionary
- From the System Administration Sheet Bar, select Dictionary > Supply Resource. The Supply/Resource dictionary main page appears.
- To add an item, click
 (located at the bottom of the left side of the main page).
 - Select the Type of item you are entering (Equipment, Instrument, Medication, Supply, Implant, Other). Note: Once the item is saved, the Type cannot be changed
- Name: Type the name (description) of the item you are entering.
- Quick Code: Enter a quick code for the item.
- Waste Code: If applicable, enter the proper disposal protocols to be apply for the item. Tied to the Waste Code Dictionary.
- Category: Select a category (group) for the item. The category allows users to group similar items together for billing and reporting purposes. Revenue code is also tied to the Category. Categories pull from the Category Dictionary.
- Usage units: This field represents how the item will dispensed to the patient. Pulls from the Usage Units Dictionary.
- Unit Cost / Usage Unit: This cost represents the cost of the item per usage unit.
- Average Cost: Read only, system-derived field that will be calculated based on receiving, depleting and adjustments.
- Comments: Free text field that enables you to attach a note to the item.
- Quantity on Hand: Number of items currently on the shelf. The quantity displayed is based on usage units. This is a system derived field based on receipt of goods, depletion of goods and manual adjustments made to the item.
- Check any of the following boxes that apply to the item:
- Do
not include in Pref CardsDo
not include in Pref Cards
If the box is checked, the item will not be selectable when creating preference cards.
Non-coveredNon-covered (UB specific)
If this box is checked, when doing Time & Materials billing, the item will appear in FL 48 (Non covered charges) on the UB-04 form. Generally used for Inpatient billing.
-
A check here indicates the item is not a stock item, such as office supplies or furniture. It may also be used to indicate bulk items that are not depleted on a regular basis.
-
Items marked as taxable will have the applicable amount of tax added to the purchase order when placing an order.
-
Check this box if the item is going to be billed to patients/carriers.
- Do
not include in Pref CardsDo
not include in Pref Cards
Note: Before you can post charges (bill) for supplies/resources, Time and Material Billing must be enabled in the System Administration module. See Time & Material Billing.
Expiration DateExpiration Date
Checking this box will require users to enter an expiration date for the item when receiving or depleting. Reports will also allow you to search for items that are close to or have reached the expiration date. Once you have referenced this item in the system the expiration box cannot be modified.
-
Checking this box will require users add the applicable serial number for items received and depleted. Reports will also include information on serial numbers when they have been indicated. Once you have referenced this item in the system the serialized box cannot be modified.
Hazardous MaterialHazardous Material
System flag used to warn users of potential issues.
Material Safety Data SheetMaterial Safety Data Sheet
Check box to indicate if MSD sheets are on file for Hazardous Material.
Click
 to scan
in a document that will be attached to this item. If a document
is already attached, the printer icon will be active. Click
it to print the document.
to scan
in a document that will be attached to this item. If a document
is already attached, the printer icon will be active. Click
it to print the document.-
System flag used to indicate an item is classified as Latex Free.
Fields 1, 2, 3: These fields are available to address certain situations only under the direction of AmkaiSolutions representatives.
External IDs: Used with interfaces with third party systems to ensure commonality between the two systems.
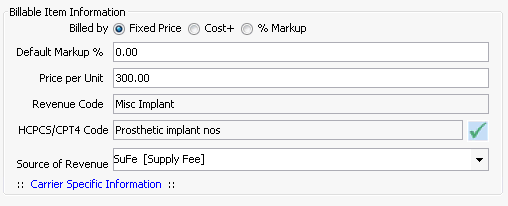
If you checked the Billable item box in step 12, specify how the item should be billed in the Billable Items sectionBillable Items section. Click herehere to learn about fields in this section.
- Billed by: Select the billing method for this individual item: Fixed Price, Cost +, or %Markup
- If Fixed Price is selected, enter an amount in the Price per Unit field. This will be the price that will pull to billing as the standard fee when the item is referenced on the patient's account. Example: If you enter a fixed price of 100.00 the system will bill the item at time of charge at 100.00 regardless of the item cost.
- Cost +: Enter the percentage over Unit cost you would like to bill for the supply as the standard fee in the Default Markup% field.
- Example: To bill the item at 3% over cost, enter 3 in the Default Markup% field. [e.g. if cost of an item is $50 and you choose to bill at cost plus 3%, the item will be billed as follows: 50 + (50 *.03) = $51.50].
- Example: If the cost of the item is $100.00, at time of charge the system will bill out the item at $103.00
- %Markup: Means the items will be billed at a certain percentage of cost.
- Example: To bill the item at 200% of cost, enter 200 in the Default Markup% field (e.g. if cost of an item is $50 and you choose to bill at 200% markup, the item will be billed as follows: 50 * 200% = $100.
- Revenue Code: This field will populate based on the Revenue Code associated to the selected Category. If the field does not populate when you save (Apply) the item be sure to check the set up for the Category and add a Revenue Code if one has not been indicated. When you save the information in the Category dictionary it will automatically update the information in the Supply Resource dictionary.
- HCPCS/CPT4 Code: This field is tied to the CPT-4 dictionary and should be used to indicate the code to be used for billing the item on the HCFA-1500 or UB-04 claim form.
- Source of Revenue: This code is required for all billable items. It identifies how/where the revenue is generated. Pulls from the Source of Revenue dictionary.
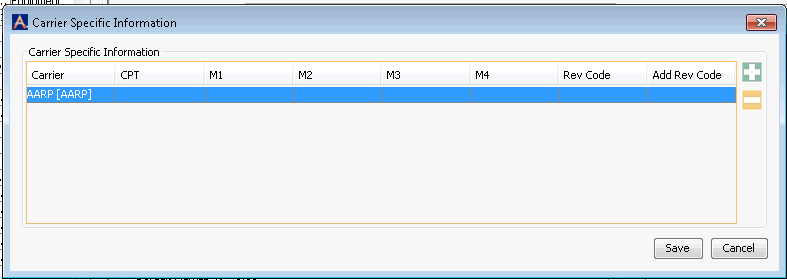
- Carrier Specific Information:
Used to enter unique codes required by certain carriers.
Click herehere
to learn how to add carrier specific information.
- Click the Carrier Specific Information link.
- On the dialogdialog
that appears, click
 to add
a carrier.

- A new line appears in the table.
- Click in each field to select the appropriate codes.
- Click Save.

Note: The Billing Method is set at the category level (in the Supply Resource Category dictionary), but you can set a different billing method for individual items in the Supply Resource dictionary. This section should only be completed if you would like to apply a rate that is unique to this item rather than all items in the same Supply Resource Category.
The steps above describe how to enter information in the fields that are common to all Supply/Resource Types. Click the links below to learn how to enter information in the additional fields that appear when you add the following Supply/Resource Types:
- Click Apply to save the item. Saving the item enters it into stock. (located at the bottom left of the screen)
