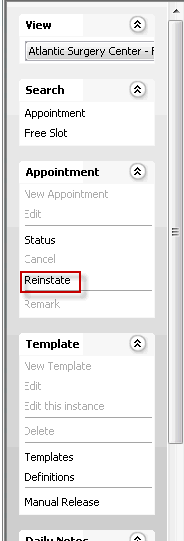
Reinstate
To reinstate a cancelled Appointment:
- Open the Scheduling module.
- Find the Appointment on the Scheduling Grid using one of the following methods:
- Search for the Appointment using the Search Sheet Bar option. (Click Include Cancelled on the Search for Appointment dialog.) Click Navigate to from the Search for Appointment dialog.
- If you know the date of the Appointment, you can navigate to that date on the Grid. Click Show Cancelled. The cancelled appointment appears with a red X over it. Click the Appointment. Click Reinstate under the Sheet Bar Appointment heading.Sheet Bar Appointment heading. You can also right-click on the Appointment and select Reinstate from the menu.

- The Reinstate Appointment dialogReinstate Appointment dialog appears. If there are any cancelled P.A.T. or Recovery Care appointments associated to the surgical appointment, these will be listed in the dialog.

- Select the Appointment you wish you reinstate from the list.
- In the Caller field, use the drop down menu to select Patient, or type the name and role of the person requesting the reinstatement in the free text field.
- In the Reason field, select the reason for reinstatement from the drop-down list. If you do not see the reason in the list, you can add a new reason description to the dictionary by clicking Alt d in the Reason field.
- The system will attempt to reinstate the appointment to the same date/time/room for which it was originally scheduled. If your system is not configured to allow more than one appointment to be scheduled in a room at the same time, you may receive a conflict message that the resource is not available. The same issue may be presented if the physician associated to the case you are reinstating is already scheduled for another appointment at the same time. To resolve the conflict, you may need to move the appointment to a new time/room in the schedule before it can be reinstated.
- Click one of the following options:
- OKOK
Click OK to reinstate the appointment.
- CancelCancel
Click Cancel to discard your changes and return to the Scheduling Grid.
- OKOK
Related Topics