Editing a Template
After you create a Template Definition, you can edit the Template if you need to change any of its parameters. Use these instructions to edit a Template. If you only want to edit one instance of template (e.g. edit one Wednesday of a Template that recurs every Wednesday for the next 10 weeks, see Edit this instance.)
To edit a Template:
- Open the Scheduling module.
- To select the template you wish to edit on the Scheduling Grid and launch the Template Options dialog, choose one of the following options:
- Click the Template on the Scheduling Grid.
-
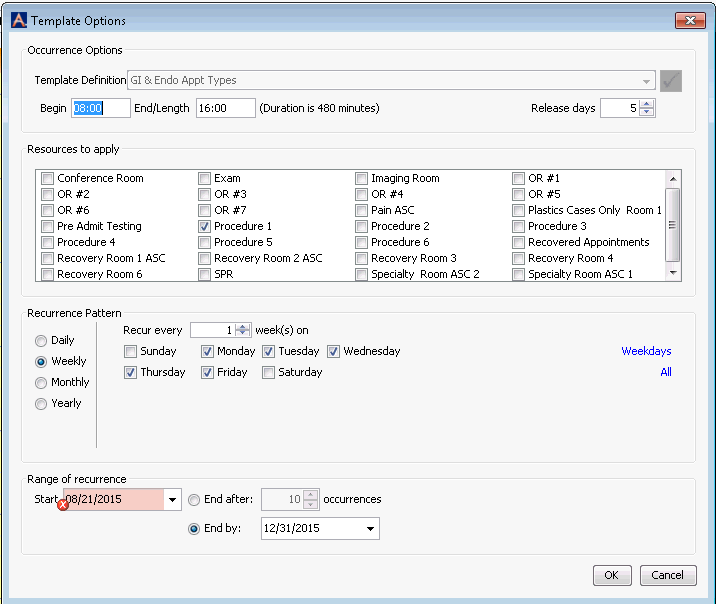
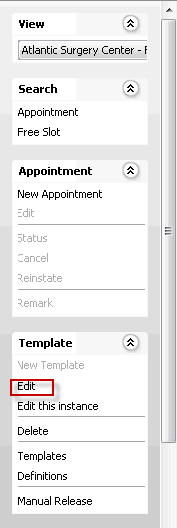
Click Edit under the Template Sheet Bar headingTemplate Sheet Bar heading. (Alternatively, you can right-click the Template on the Grid and select Edit from the right-click menu.) The Template Options dialogTemplate Options dialog appears.
-
-
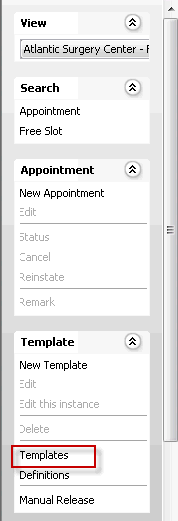
Or, to view a list of all existing Templates, click Templates from the Template Sheet Bar headingTemplate Sheet Bar heading.
-
The dialogdialog that appears shows a list of all existing Templates with From and To dates that span a range including today's date.
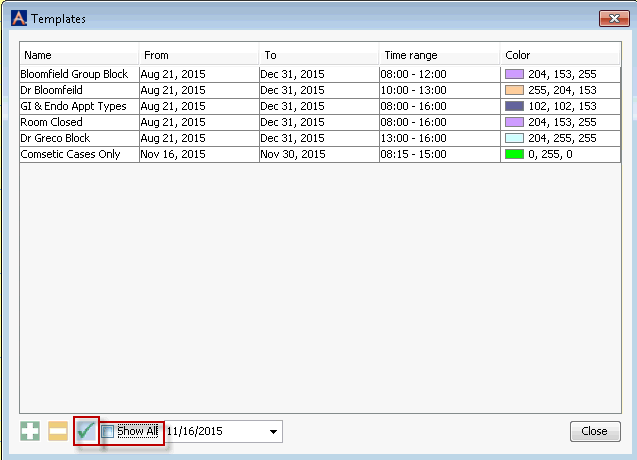
- You can also select the Show All check box to show expired Templates. This option is useful if you defined a Template in the past that you want to reuse.
-
To edit a Template from this dialog, highlight it and click the check mark icon. The Template Options dialogTemplate Options dialog appears.

-
- Click the Template on the Scheduling Grid.
- The Template Options dialog is populated with the values entered when the Template definition was created. You can change any of these values except for the Template Definition (name of the Template). Follow these instructions for editing the Template:
Note: You cannot edit information on Templates that apply to dates in the past. If you edit information on an existing Template, you will need to modify the Range of Recurrence Start date to the current date or a date in the future. The changes will be applied to the Template instances going forward.
- You can change the Begin and End/Length time for the Template. The time format is based on a 24-hour clock. You do not need to enter a colon or a.m. or p.m. (e.g. Begin: 0700, End/Length: 1500). The Duration noted in parenthesis after the End/Length time automatically adjusts to reflect your entries. The End/Length field also accepts a duration in minutes, so you can enter 300 as the number of minutes, and the notation in parentheses will show the End time instead of the Duration.
- To change the number of days to hold the Template before it is released so the time can be used for other appointments, change the number of days (based on your policy) in the Release days field For example, if you set 3 days in the Release days field, and the surgeon has not used the block of time 3 days before it begins, it will available to be released manually. Templates are not released automatically. It is recommended that you monitor any blocks that are eligible to be released using the Manual Release Sheet Bar option.
- In the Resources to apply section, you can change the Room by selecting a different one here. You can also select multiple Rooms to block.
- You have the ability to block a Resource at regular intervals. In the Recurrence Pattern section, you can change the frequency with which the block should recur from the following options:
- Daily
- Weekly
- Monthly
- Yearly
- When you choose one of these options listed above, the options on the right change to match. For example, if you choose Daily, the options on the right change to allow you to establish a recurrence every 3 days or every weekday.
- In the Range of recurrence section, you can change the date either by typing a new date in the Start field or using the drop down list. Then select one of the following options for defining the end point of the recurrence:
-
Enter a number of occurrences (e.g. you can specify the block to recur every Friday and end after 10 Fridays. You would enter 10 in the End after: field.)
-
Enter a date on which the recurrence should end (e.g. if you want the block to recur on the 3rd Wednesday of every month for a year, you would enter a date in the End by: field that is one year from the Range of recurrence Start date.)
-
-
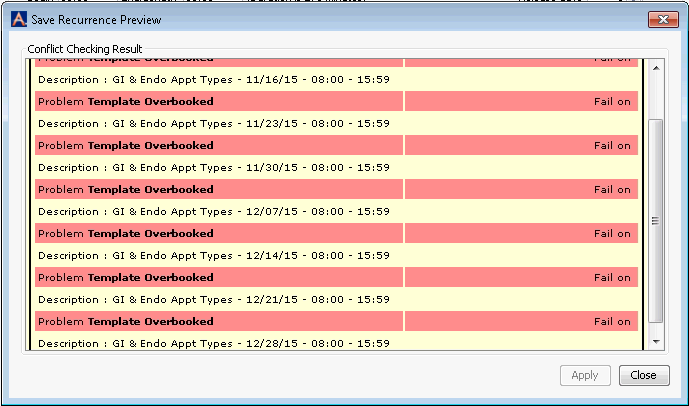
Click OK. If there are any Conflicts, an alert windowalert window will appear indicating what those Conflicts are. Conflicts in Suggested fields will not prevent you from adding the Template to the Grid. If there are any Conflicts in Mandatory fields, the Apply button on the alert window will be disabled, and you will not be able to add the Template until those Conflicts are corrected. Click here to learn more about Conflict Checking.
-
After any mandatory conflicts are resolved, the Template appears on the Scheduling Grid on the dates you have specified. You can hover over the Block to display a hover windowhover window with information on the characteristics of the block.

- You may now schedule appointments within the edited Block. After appointments are scheduled within the Block, two hover windows appear: one displaying information about the Block, and another with information about the appointment.
Related Topics