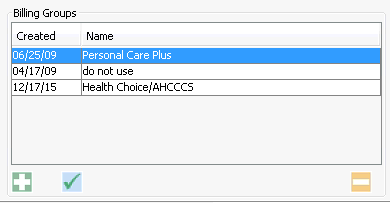
Billing Groups
In the Billing Groups sectionBilling Groups section of the Demographics screen, you organize insurance policies on file for the patient into groups for billing purposes. The Billing Groups section allows you to designate insurance policies as primary, secondary, and tertiary. This designation determines the order in which insurance companies are billed for the case. Billing Groups is also where you will indicate Primary Guarantor and Secondary Guarantor.

The Billing groups screen works in conjunction with the Insurance Policies and Cases sections of the Demographics screen to pull all information necessary for billing into the Financial Management module.
When an account number is created for the patient, the system creates a default billing group named Self-pay. You can edit the Self-pay billing group to reflect the correct billing group components for the patient. See Editing a Billing Group below.
Note: The system requires a billing group be associated to each case. The system defaults all cases to Self-Pay (no insurance). If the patient has insurance for the case, it is best to edit the default Self-Pay billing group to reflect the correct insurance. This is true even if there is only one insurance on file for the patient in order for the billing process to take place after charges are posted to the account.
Tasks
- Adding a
new Billing GroupAdding a
new Billing Group
- Click the plus sign icon. The Billing
group dialogBilling
group dialog appears.

- Enter the name of the billing group. If the patient has both Primary and Secondary Insurance Carriers, you may want to include the names of both in the name of the billing group (e.g. Aetna/AARP).
- The Created field defaults to today's date. Use the drop down list to change the date if needed.
- The Status field defaults to Active. Use the drop down list to change the status if needed.
- The Primary guarantor field defaults to the patient. To change the primary guarantor, click the check mark icon to select or create another person or patient in the system. To change the Primary guarantor back to the patient, click Self.
- If there is a Secondary guarantor, use either Self to select the patient or click the check mark icon to select or create another person or patient in the system. If the patient is a minor, the Primary Guarantor may be the patient’s mother. Secondary guarantor may be the father.
- You must add all relevant insurance policies to the billing group by clicking the plus sign icon. The first one you select to add to the billing group automatically gets designated as the Primary Insurance, while the second one you add gets designated as the Secondary Insurance. You can add up to 3 insurance policies per Billing Group. To switch these designations, use the up and down arrows.
- If Medicare is a secondary insurance carrier for the patient, you are required by Medicare to document the reason why they are not primary. Select the reason from the drop down list in the SITC (Secondary Insurance Type Code) column.
- To remove an insurance policy from the billing group, select it, and click the minus sign icon. Only policies that have not been referenced to billing transactions can be removed from the Billing Group.
- To view the details of a policy, select it and click the check mark icon.
- Click OK to close the dialog.
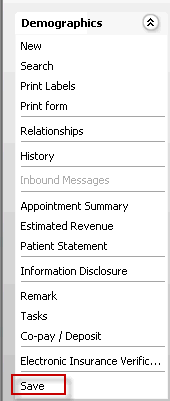
- Click Save from the Sheet BarSheet Bar
to save your changes. A prompt appears asking if you are
sure you want to permanently change the patient's information.
The changes you make in this section will not take effect
until you click OK
on this prompt.

- Click the plus sign icon. The Billing
group dialogBilling
group dialog appears.
- Editing
a Billing GroupEditing
a Billing Group
Select the billing group and click the check mark icon. The Billing group dialog appears. Make changes to any of the fields as described above. To view the history of a billing group, click History. After making your changes, click OK and then click Save from the Sheet Bar.
- Deleting
a Billing GroupDeleting
a Billing Group
Select the Billing Group and click the minus sign icon. A prompt will appear if the Billing Group is assigned to one or more patient's cases and cannot be deleted. You must remove the Billing Group from the case before you can delete it. See Assigning or removing a Billing Group from the case in Cases.