Replace CRNA
To replace the CRNA or add an additional one:
- Open the Scheduling module.
- To replace the CRNA for a single appointment, click the appointment on the Scheduling Grid. To replace an CRNA for a group of appointments, (for example, if he or she is going to be absent on a particular day), do not click an appointment on the Grid. Instead, proceed to step 3.
- From the Sheet Bar, under the Scheduling Tools heading, click Replace CRNA.
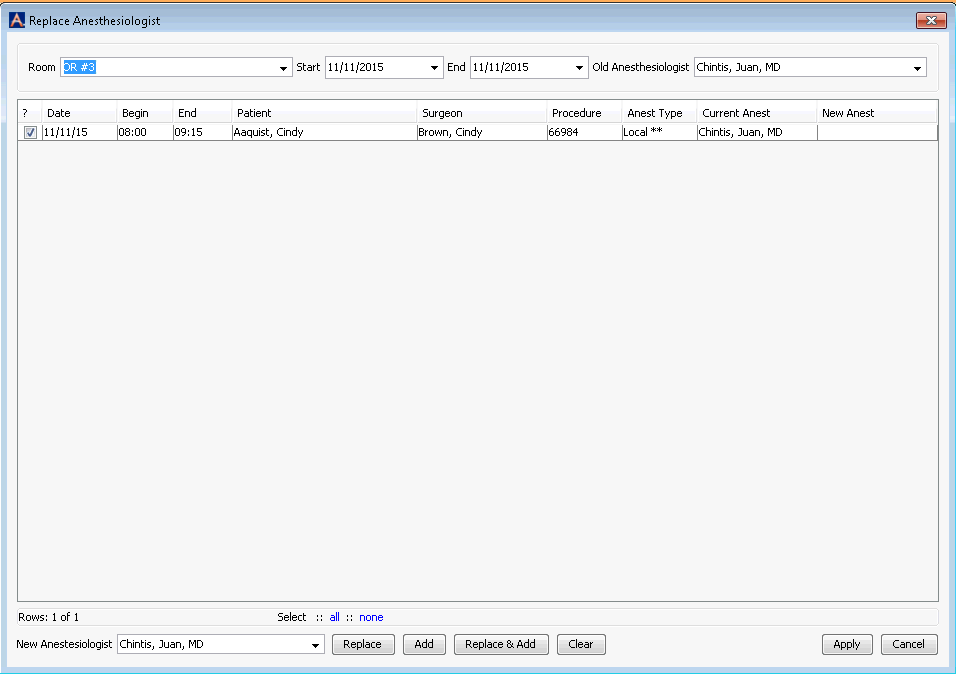
- The Replace CRNA dialogReplace CRNA dialog appears. If you selected an appointment, the fields at the topfields at the top are populated with that appointment information by default. Use the drop-down lists to change the values in these fields to search in different rooms and/or different dates. To view a list of all appointments scheduled within the room/date parameters regardless of whether a CRNA has been assigned, select the blank line and scroll to the bottom of the drop down menu in the Old CRNA field to clear the current selection.
-
- Room
- Start date
- End date
- Old Anesthesiologist
-
- Any Appointments matching the parameters you chose appear listed on the dialog. You can change the CRNA for somesome, allall or nonenone of these appointments.
Click none at the bottom of the dialog.
Click all to change all listed appointments.
Select the check box in the ? field for each appointment you wish to change.
- Select the New CRNA from the drop-down list at the bottom of the dialog.
- Click one of the following options from the bottom of the dialog:
- ReplaceReplace
Replaces the Old CRNA with the new one you selected.
- AddAdd
Click Add to associate the new CRNA you selected to cases that currently do not have a CRNA listed.
- Replace & AddReplace & Add
Use the Replace & Add option if you wish to assign a new CRNA to the case if a CRNA already exists AND if you wish to assign that new CRNA to any cases that do not currently have a CRNA listed.
- ClearClear
Clears your changes.
- ReplaceReplace
- Click one of the following options:
- ApplyApply
Applies your changes to the Appointment. Conflict Checker runs, and any Conflicts found appear in the Conflict Checking Result dialog. You can edit the Appointment to correct these Conflicts, or click Apply to continue saving your changes, as long as there are no Conflicts with Mandatory fields.
- CancelCancel
Click Cancel to return to the Scheduling Grid without making changes to the Appointment.
- ApplyApply
Related Topics