Batch Ledger
The Batch Ledger in the Financial Management module displays read-only information about a Batch and all transactions posted to the selected Batch regardless of the patient to whom the transaction belongs. As you click on the transaction rows on the Batch Ledger, details related to the transaction are displayed in other sections of the screen. Action buttons on the Batch Ledger provide access to the patient's demographics screen, appointment summary, and patient statement history.
To view the Batch Ledger
- From the Financial Management Sheet Bar, select Billing
> Batch Ledger. The Batch
Selection dialogBatch
Selection dialog appears.
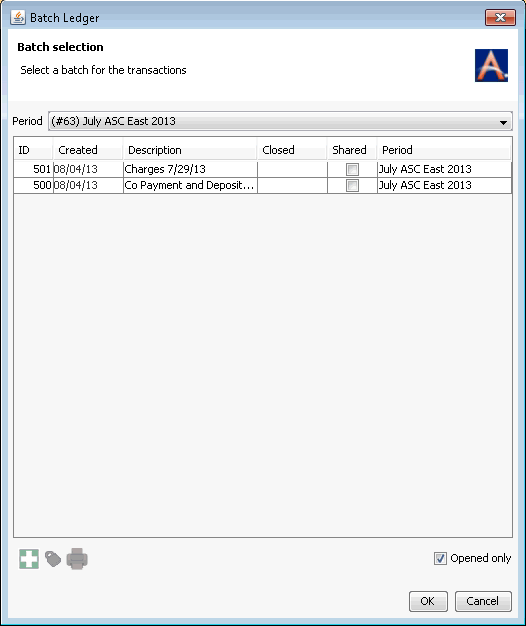
- Select a Batch by highlighting it and clicking OK.
The Batch LedgerBatch Ledger
appears.
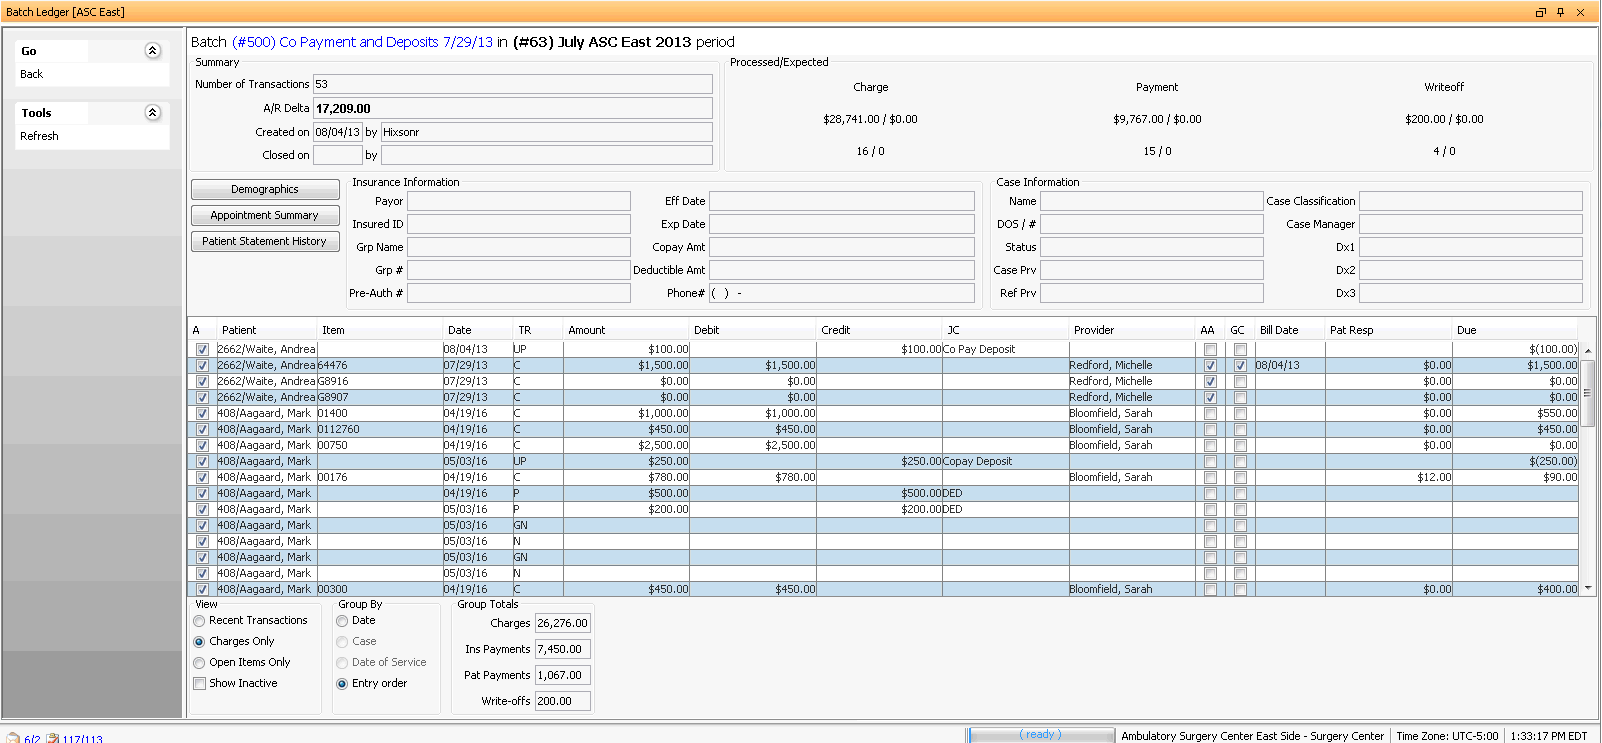
- In the Summary
sectionSummary
section, you can view basic information about
the Batch including the number of transactions posted to the batch
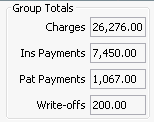
and the A/R Delta (Charges minus Payments and Write offs posted to
the Batch since it's creation as shown in the Group
Totals sectionGroup
Totals section at the bottom of the screen. ).

- In the Processed/Expected
sectionProcessed/Expected
section, you can view the amounts posted to the
Batch in Charges, Payments, and Write offs in comparison with any
Expected amounts entered when the Batch was created. (Actual
totals on left, expected totals on the right.)

- All Transactions posted to the Batch are displayed in the Transaction
GridTransaction
Grid in the middle of the screen. All fields in
the Transaction Grid are read-only.

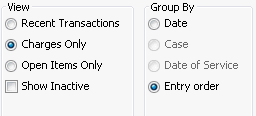
- The purpose of the options in the View
and Group By sectionsView
and Group By sections below the Grid is to
filter and sort the list of Transactions. These
options are not fully operational at this time.
- The Group Totals section displays the totals for all transactions on the Batch Ledger, not just those included in the chosen Group By option. This issue will be corrected in a future release.
- Click herehere
to learn about the column headings in the Transaction Grid.
- A - If checked, indicates the transaction is active
- Patient – account number/last name, first name of the patient
- Item - The CPT® code for procedures and supply resource item quick code associated to the charge lines
- TR Date - The transaction date for the entry
- TR Name - A quick code of the transaction type
- Amount - Amount of the transaction
- Debit - If the transaction entered was a debit transaction, the amount will also show in this column so the user can quickly see that the transaction added to the patient’s accounts receivable.
- Credit – If the transaction entered was a credit transaction, the amount will also display in this column so the user can quickly see that the transaction reduced the patient’s account receivable balance.
- JC - Journal code associated to the transaction (will be blank for charge line items)
- Provider - Last Name, First Name, Title of the rendering provider entered on the charge (will only display for charge line items)
- AA - If checked, indicates the charge was marked as Accept Assignment (can be set as a default in the insurance plan dictionary). When checked, the facility acknowledges the payment by the insurance carrier as payment in full (for that payor) for services rendered.
- GC - If checked indicates the charge was marked as Generate a Claim (can be set as a default in the insurance plan dictionary). The charge will appear as an eligible billable item in the insurance billing section of the financial management module.
- Bill Date - The latest date that the charge has been processed to the payor (if a date is seen here then the charge will not be in the queue of the insurance billing section of the financial management module). If blank, the charge has either not yet been billed or it has been marked as re-billed and will remain blank until the charge is billed for a second time.
- Pat Resp (Patient Responsibility) - The portion of the charge due from the patient.
- Due - The total amount remaining (unpaid) on the charge
- The purpose of the options in the View
and Group By sectionsView
and Group By sections below the Grid is to
filter and sort the list of Transactions. These
options are not fully operational at this time.
- To view the details of a Transaction, highlight it in the Grid.
The fields in applicable sections above and below the Grid populate
with details of the selected Transaction:
- The Insurance
Information sectionInsurance
Information section (read-only) populates
with payor information. If the party currently responsible for
the charges is not an insurance carrier, the fields remain blank.
Data
is pulled from Demographics > Insurance Policy screen.

- The Case
Information sectionCase
Information section (read-only) populates
with information about the case to which the Transaction is associated.

- The section
at bottom rightsection
at bottom right (read-only) displays details
of the selected Transaction itself. The fields in this section
change depending on the Transaction
TypeTransaction
Type selected.
- C (Charge) / CC (Charge Correction)
- P (Payment) / PC (Payment Correction)
- W (Write-off) / WC (Write-off Correction)
- UP (Unassigned Payment)
- GN (General Note)
- N (Note)
- T (Transfer)

- The Insurance
Information sectionInsurance
Information section (read-only) populates
with payor information. If the party currently responsible for
the charges is not an insurance carrier, the fields remain blank.
Data
is pulled from Demographics > Insurance Policy screen.
- Select a patient from the Transaction Grid, and click the
buttons
buttons under the Summary Section to:
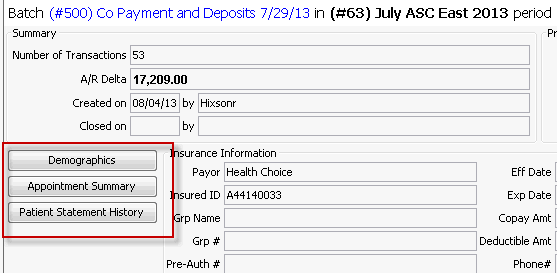
- View or edit a patient's Demographics information.
- View an Appointment Summary.
- View
the Patient Statement HistoryView
the Patient Statement History
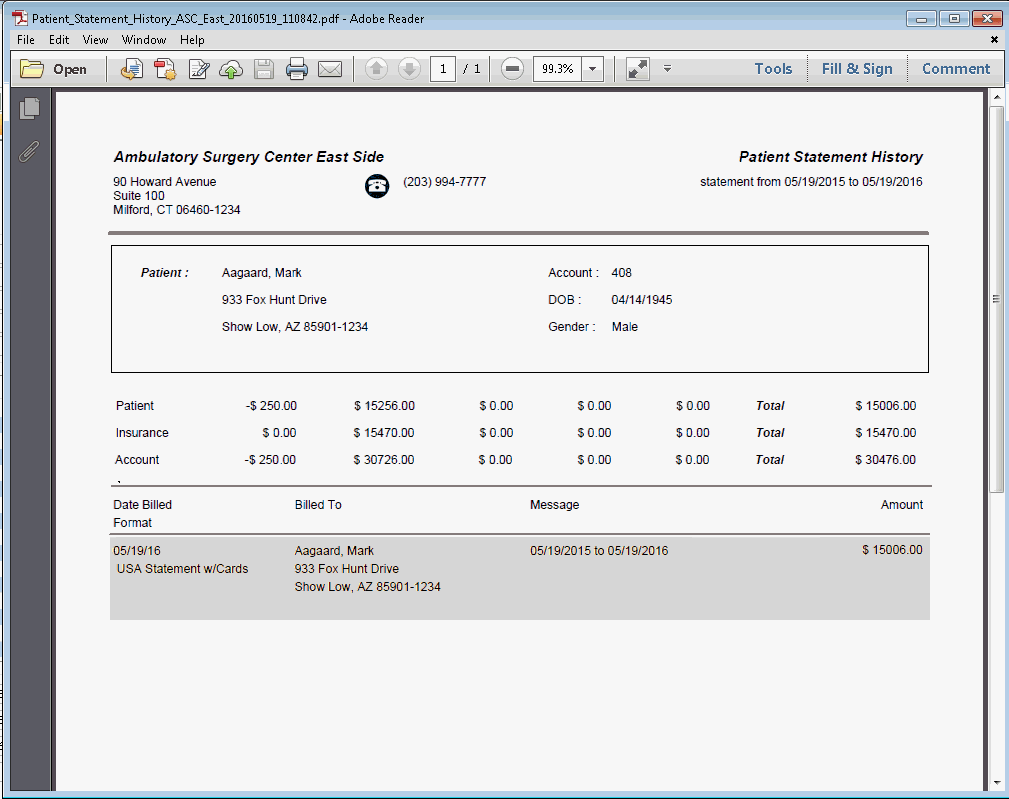
Each time the account is included in a statement run and “Yes” is selected for Mark as billed the system will automatically record the date the statement was generated, to whom the bill was sent along with the mailing address, the message if one was included on the statement and the Amount of the statement generated.
To view the Patient Statement History:
- From the Financial Management Sheet Bar, select Billing > Patient Ledger. The Patient Ledger screen appears.
- Click the Patient Statement History button. From the dialog that appears, select a date range for the history using the Start and End Date fields.
- Select the Output Format. (PDF or Excel spreadsheet), and click OK.
- The Patient
Statement HistoryPatient
Statement History appears.
You can view, print, or save the history.
- To ensure any Transactions posted to the Batch since you opened the Batch Ledger are included in the Transactions Grid, click Tools > Refresh from the Sheet Bar.
- To select a different Batch to view on the Batch Ledger, click the Batch name in blue font in the upper left of the Ledger.