Patient Statement
You can generate a statement for an individual patient from either the Demographics module or the Financial Management module. Typically, statements are generated in the Financial Management module, where you can generate statements for either a single patient or groups of patients.
Having the option to generate a statement in the Demographics module is useful, for example, if you are registering a patient for a current appointment and he requests a statement of charges due from previous dates of service, or if you are making calls to a patient who asks for a statement.
To generate a statement for an individual patient, access the Patient Statement dialogPatient Statement dialog and follow the instructions below.
Accessing the Patient Statement dialog
- Demographics
moduleDemographics
module
- Open the Demographics module.
- Select the record of the patient for whom you wish to view/print a statement. Click here to learn how.
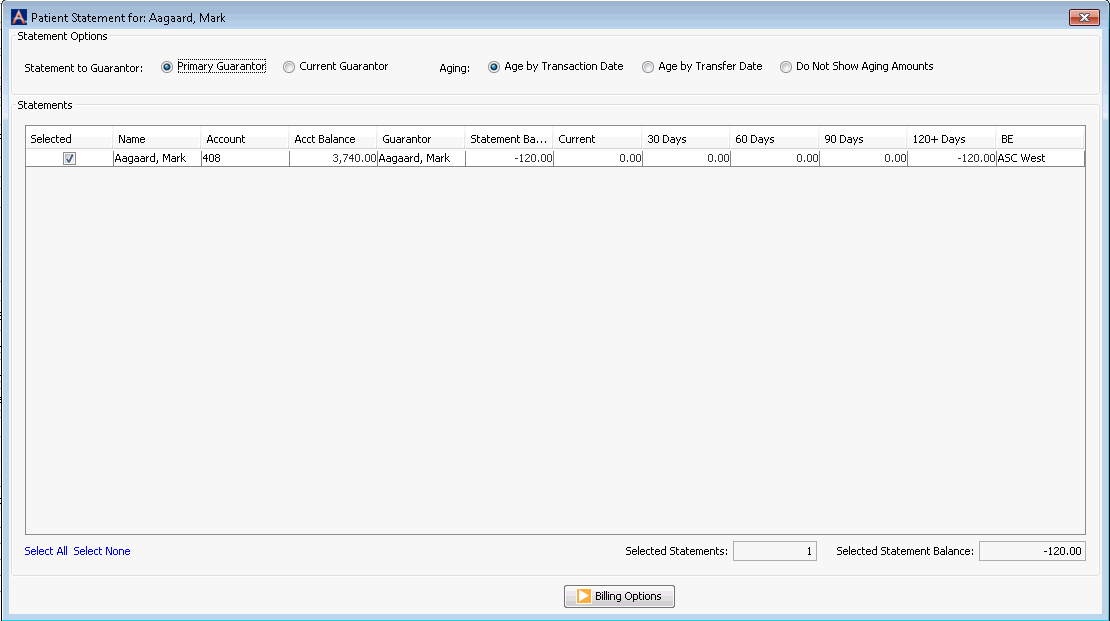
- Click Patient
StatementPatient
Statement from the Sheet Bar.
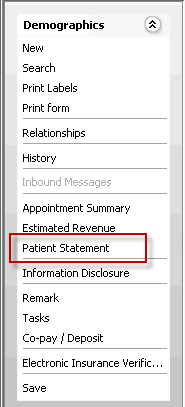
- A message prompt asks if you want to include cases marked
as "no patient statement." Click Yes
to include all outstanding charges for all cases for the current
patient. Click No
to only include charges from this patient's cases not marked
"no patient statement." Setting a case to No Statement is done on
the Case
Details dialogCase
Details dialog.
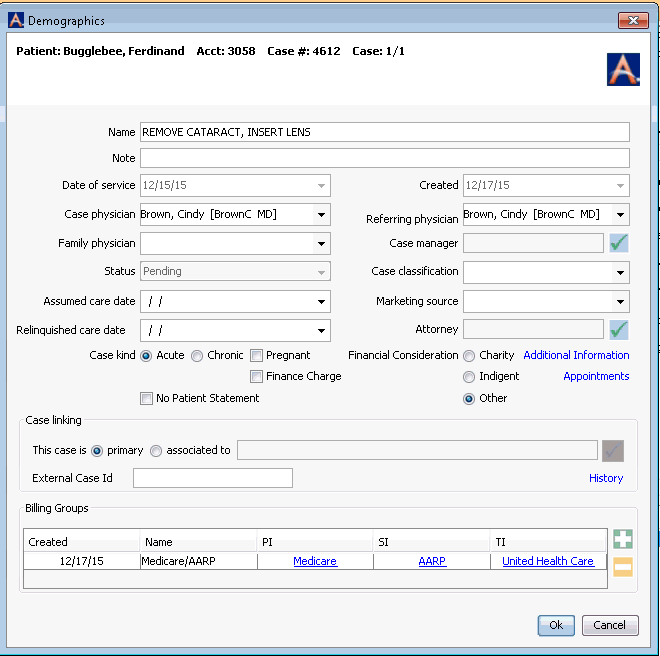
- The Patient Statement dialog appears.
- Financial
Management moduleFinancial
Management module
- Open the Financial Management module.
- From the Sheet Bar, click Patient
Ledger. The Patient
Ledger screenPatient
Ledger screen appears.
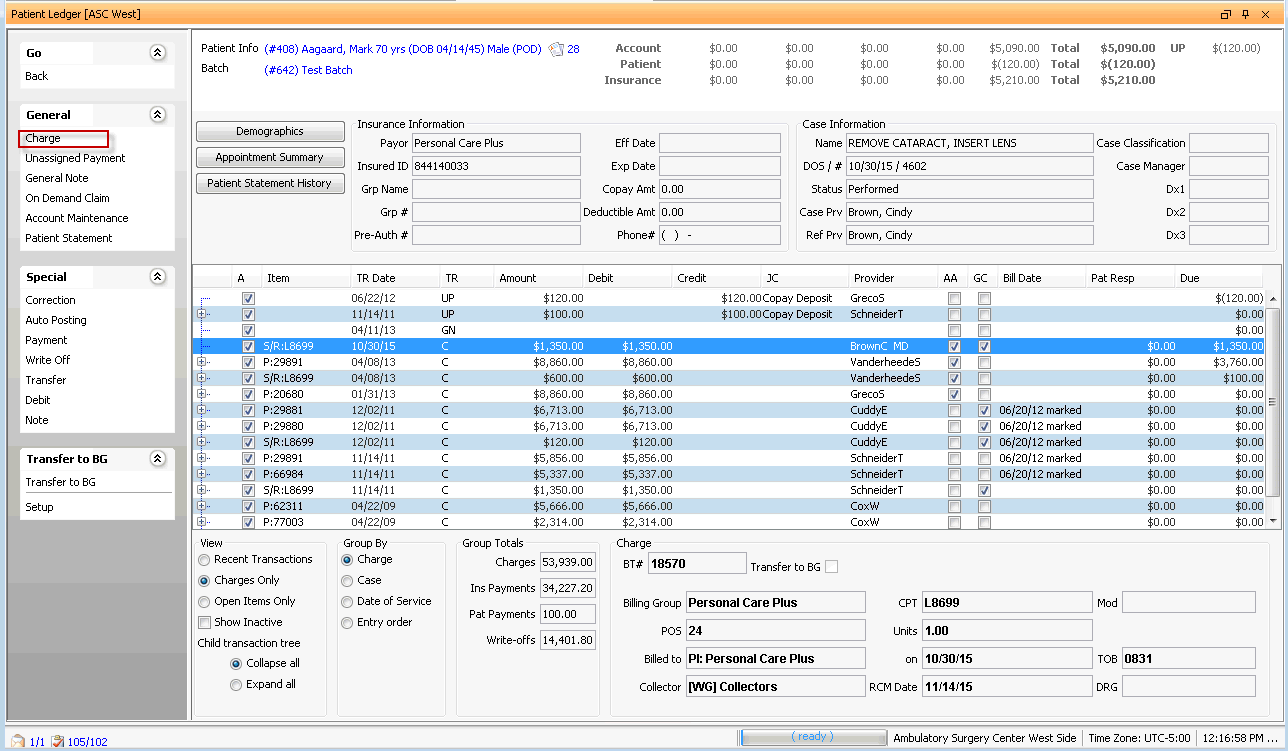
- To select the patient record, click the patient information shown highlighted in blue in the upper left of the Patient Ledger Screen. The MPI launches. Click here to learn how to search for and select a patient record in the MPI.
- From the Patient Ledger screen Sheet Bar, under the General heading, click Patient Statement. The Patient Statement dialog appears.
- A message prompt asks if you want to include cases marked as "no patient statement." Click Yes to include all outstanding charges for all cases for the current patient. Click No to only include charges from this patient's cases not marked "no patient statement."
To view/print a patient statement
- Access the Patient
Statement dialogPatient
Statement dialog. To learn how to access this
dialog, click the link above for the module in which you are working.
This dialog displays transaction dates for cases with an outstanding
balance.

- In the Statement Options section at the top of the dialog, select the party to whom the statement will be addressed: either the Primary Guarantor or Current Guarantor. Select Current Guarantor if you are not sure whether the charges are currently assigned to the Primary or Secondary Guarantor in the patient ledger.
- Select an option for showing aging amounts
on the statement. The past due balances will calculate from the "Age
by" option you select:
- Age
by Transaction DateAge
by Transaction Date
Select this option to show balances overdue by 30, 60, etc. days from the date of service for the charges on the account.
- Age
by Transfer DateAge
by Transfer Date
Select this option to show balances overdue by 30, 60, etc. days from the date the responsibility for payment was transferred to the current guarantor.
- Do
Not Show Aging AmountsDo
Not Show Aging Amounts
Select this option to hide any aging amounts.
- Age
by Transaction DateAge
by Transaction Date
- The patient account you chose will automatically have a check mark in the Selected column. The Selected column is there because in other AmkaiOffice modules, you have the ability to run statements for multiple patients, and you would use this column to select one or more patients. This column does not apply when you are running a statement from the Demographics module.
- To choose the information that will be shown on the statement,
click the Billing Options
button at the bottom of the dialog. The Billing
OptionsBilling
Options screen appears.
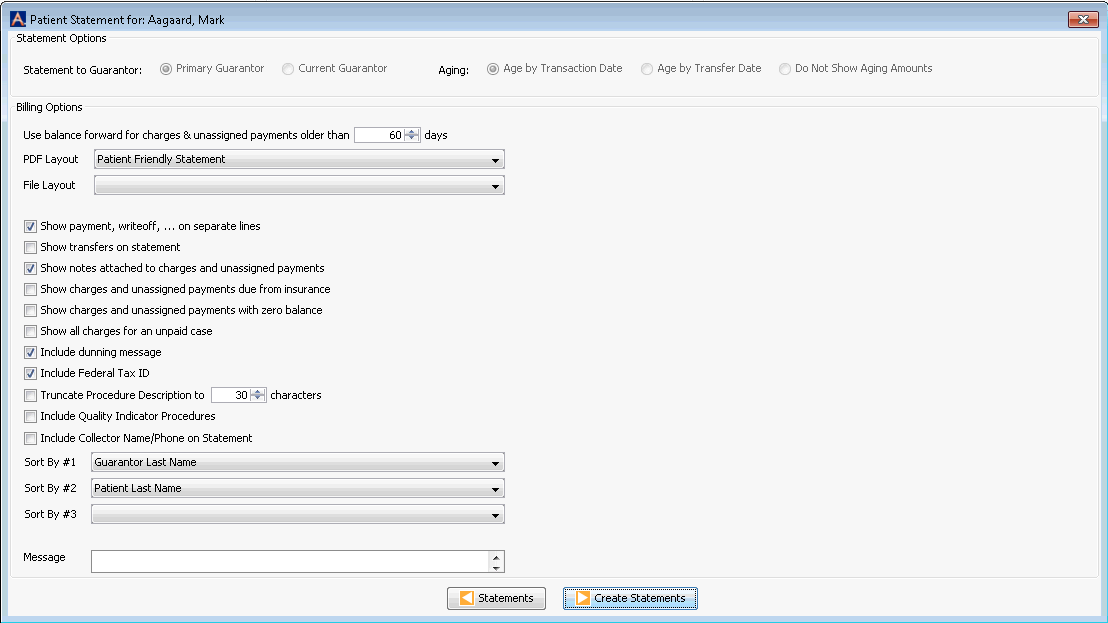
- The selections you made on the previous screen are displayed in the Statement Options section at the top.
- Select from among the following options in the Billing Options
section to determine what information is shown on the statement. Some
of these fields are required and others are optional. Required fields
are indicated as such in the list below. Your facility has the ability
to set preferences in the Administration module for which of these
check boxes will be selected by default.
- Use
balance forward for charges & unassigned payments older than
< select an option
> days.Use
balance forward for charges & unassigned payments older than
< select an option
> days.
If you select 60 days (the default for this field), the statement will pull in any unpaid balance billed more than 60 days ago, or any unassigned payment posted more than 60 days ago. All transactions older than 60 days are rolled up and displayed as Balance Forward.
- PDF LayoutPDF Layout (Required)
Select a statement layout from the drop-down list.
- File
layoutFile
layout
Select a layout for the statement from the drop-down list. This field is only used if you would like to create a CSV (comma separated value) file to send to a third party for statement processing.
- Show
payment, write-off, ... on separate linesShow
payment, write-off, ... on separate lines
A statement usually shows charges and what is owed, but not payments or write-off amounts that have been applied to those charges. Selecting this field displays all payments and write-off amounts for each charge.
- Show
transfers on statementShow
transfers on statement
Selecting this check box will display transfers on the statement. "Transfer" refers to the date the responsibility for payment was transferred from the insurance company to the guarantor.
- Show
notes attached to charges and unassigned paymentsShow
notes attached to charges and unassigned payments
- Selecting this check box displays General Notes and Notes on separate lines. Transaction-specific notes will follow the Journal Code Description. If the box is not checked, all notes will be hidden.
- Transaction-specific notes will be displayed only if the “print on statement” check box is selected on the ledger note screen and the note is active.
- Show
charges and unassigned payments due from insuranceShow
charges and unassigned payments due from insurance
- If you select this check box, you should also select the "use balance forward... days" option for transactions for which the insurance company is responsible.
- The items for which insurance is responsible will be included in the statement of the billing group's primary guarantor.
- Show
charges and unassigned payments with zero balanceShow
charges and unassigned payments with zero balance
If you select this option, you should also apply the "use balance forward... days" option for transactions with a zero balance.
- Show
all charges for an unpaid caseShow
all charges for an unpaid case
This option overwrites all other billing options: if a case is unpaid, all transactions should be included in the statement (patient & insurance responsible transactions, 0-balanced transactions, and not in balance forward).
- Include
dunning messageInclude
dunning message
Selecting this check box includes the appropriate Dunning message on the statement. You can set up dunning messages in the Administration module.
- Include
Federal Tax IDInclude
Federal Tax ID
This option will show the Federal Tax ID of the current Business Entity on the statement.
.
- Truncate
Procedure Description to < select
an option > charactersTruncate
Procedure Description to < select
an option > characters
Select this option to shorten the procedure description to a specific number of characters.
- Include
Quality Indicator ProceduresInclude
Quality Indicator Procedures
Select this check box to include procedures with a status of Quality Indicators.
- Include
Collector Name/Phone on StatementInclude
Collector Name/Phone on Statement
Select this check box to include the name of the collector assigned to this case in the Financial Management module.
- Sort by #1, #2, and #3: Ignore these buttons: they have no use in the Demographics module.
- MessageMessage
The system will include the text you enter in this field on the statement in addition to any default text that was configured in the Administration module. For example, your facility may configure a generic "thank you" message that shows on all statements by default.
- Use
balance forward for charges & unassigned payments older than
< select an option
> days.Use
balance forward for charges & unassigned payments older than
< select an option
> days.
- Click Create Statements. The system will process the statement and display the results on the screen. Print or save the statement.
- A promptprompt
appears with a summary of statements generated. This prompts asks
if you want to mark the charges on the statement as billed.
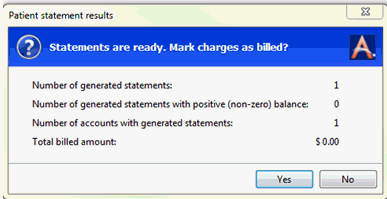
- Click Yes to set a note in the patient’s account that a statement was generated and to set the cycle date for the next statement to be generated. The statement appears in the file format you selected on the Billing Options screen. You can print the statement or save it to your computer.
Or
- Click No to allow the statement to be printed without adding a note to the statement history. The cycle date for the next statement will not be set.