Reorder Appointments
To reorder the Appointments in a Room:
- Open the Scheduling module.
- Click in a Room on the Scheduling Grid.
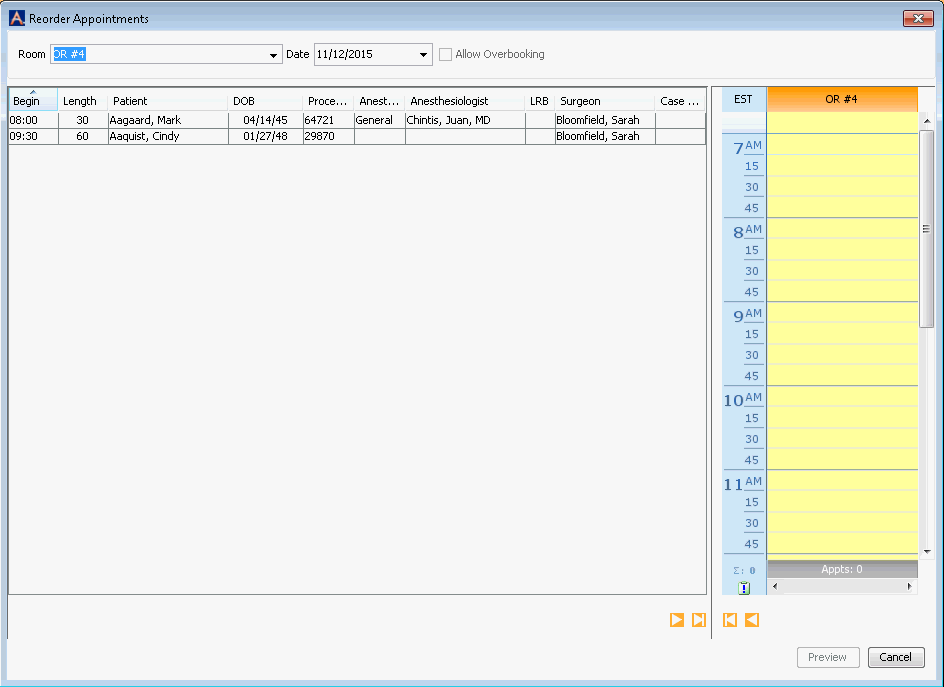
- From the Sheet Bar, under the heading Scheduling Tools, click Reorder Appointments. The Reorder Appointments dialogReorder Appointments dialog appears. The dialog displays a list of appointments scheduled for the day on the left-hand side, and a grid with time slots for reordering those appointments on the right.

- You can change the Room and Date using the drop-down lists at the top of the dialog, if needed.
- Deselect the Allow Overbooking check box if overbooking is not allowed.
- There are several ways to change the order of rooms:
- Click and drag Appointments individually from the left side of the dialog to their new time slots on the right, placing them in the order in which you would like them to occur.
- Highlight the Appointment you want to place in the first time slot of the day, and click the Add Selected arrowAdd Selected arrow at the bottom of the dialog. Repeat this step for each Appointment in the order you wish them to appear on the Grid. Select the other arrow in this section to move all appointments at once.

- Highlight the Appointment you want to place in the first time slot of the day and drag it over to the new time slot on the right, or click the Add Selected arrow. Highlight all remaining appointments and click the Add All arrow. The system will move all of the remaining appointments to follow directly after the first.
- Click any of the column headers in the Appointment list to resort by that column. For example, if you would like to reorder by patient age, click the DOB column. Click one time to sort by youngest first and click again to sort by oldest first. Once the order has been modified, click the Add All arrowAdd All arrow to move all of the reordered appointments to the Room. This option is also helpful to order Appointments by body side so rooms can be set up for all Left side procedures then by all Right side procedures.

- You can move Appointments from the Room column back over to the left side of the dialog either one at a time or all at once using the arrows at the bottom of the Room column.
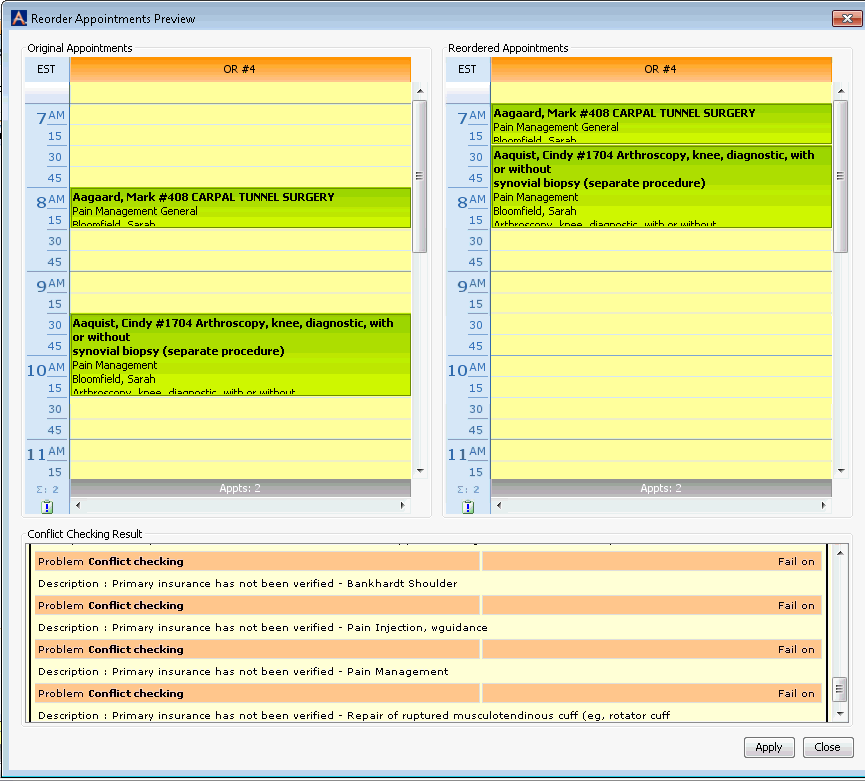
- Click Preview. The Reorder Appointments Preview dialogReorder Appointments Preview dialog appears with the original ordering of appointments shown on the left and the new order shown on the right. Conflict Checking Results show at the bottom.

- You can click Close to close the dialog and then edit any Appointments to correct any Conflicts, or if there are no Conflicts in Mandatory fields, you can click Apply to save your changes.
Related Topics