Ledger Batch Report
The Ledger Batch Report shows all transactions posted to a Batch. For each transaction, the report shows the following information:
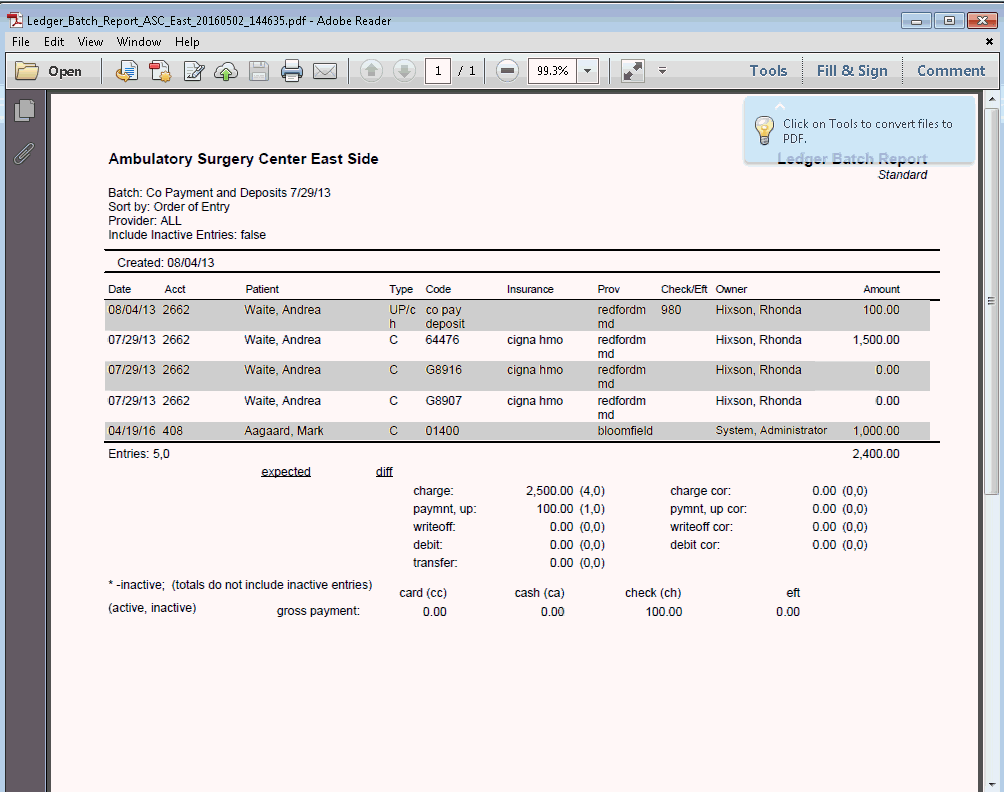
Date entered
Patient's name and account number
Transaction Type code
Transaction code
Insurance plan quick code
Provider quick code
Check or EFT number
Transaction owner
Transaction amount
Totals by transaction type and payment type
Note: Prior to closing a Batch, view/print the Ledger Batch Report to ensure all necessary transactions have been entered into the batch. In addition, if expected values were entered when the batch was created, those values are also displayed and should match the actual transaction totals before the batch is closed. If they do not match, an error message will be displayed, but you can still close the batch.
Accessing the Ledger Batch Report dialog
You can access this dialog from the Select Batch dialogSelect Batch dialog, which can be accessed in the following modules. Click the links to learn how to access this dialog from each module.
Scheduling moduleScheduling module
- Right-click the appointment on the grid and select
Arrival/Departure
Status from the menu. The Arrival/Departure
Status dialogArrival/Departure
Status dialog appears.
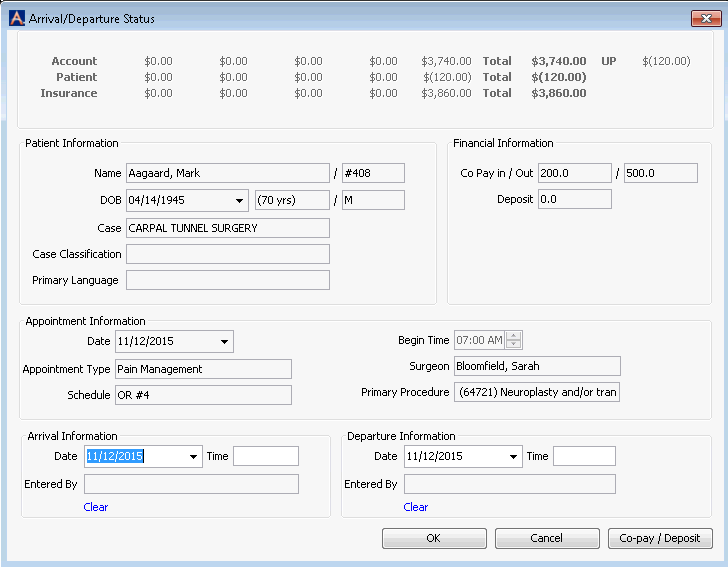
- Click the Co-pay/Deposit button. The Select Batch dialog appears.
- Right-click the appointment on the grid and select
Arrival/Departure
Status from the menu. The Arrival/Departure
Status dialogArrival/Departure
Status dialog appears.
Demographics moduleDemographics module
- Select patient's record. Click here to learn how.
- From the Sheet Bar, select Co-pay/Deposit. The Select Batch dialog appears.
-
From the CDM module Sheet Bar, select Supplies/Resources from either the Case heading or the appropriate clinical department heading.
Click the No Batch button to launch the Select Batch dialog.
Financial Management moduleFinancial Management module
- Select the Patient Ledger Sheet Bar option from
the Billing heading. The Patient
Ledger screenPatient
Ledger screen launches.
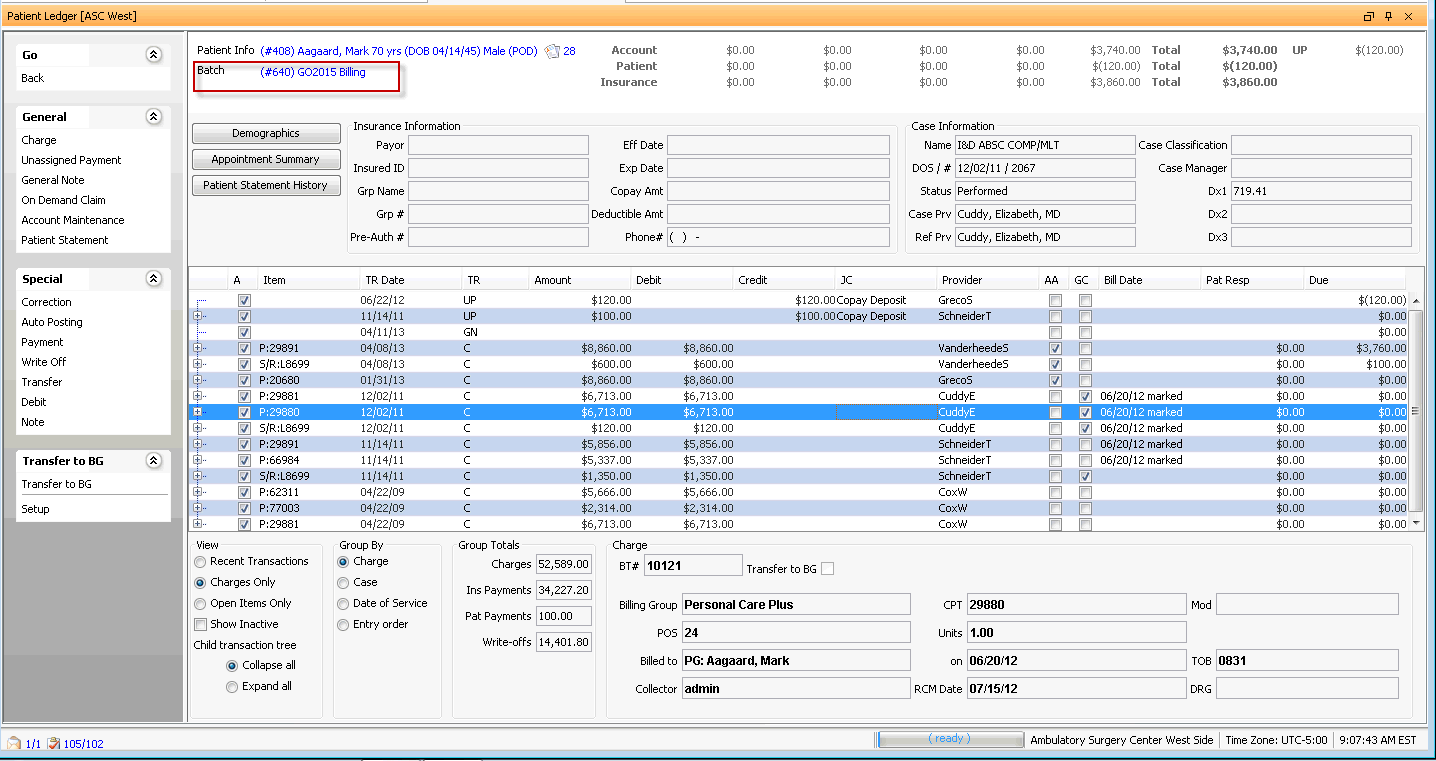
- Click the current batch number in the upper right of the Patient Ledger screen. The Select Batch Dialog appears.
- Select the Patient Ledger Sheet Bar option from
the Billing heading. The Patient
Ledger screenPatient
Ledger screen launches.
Viewing/Printing the Ledger Batch Report
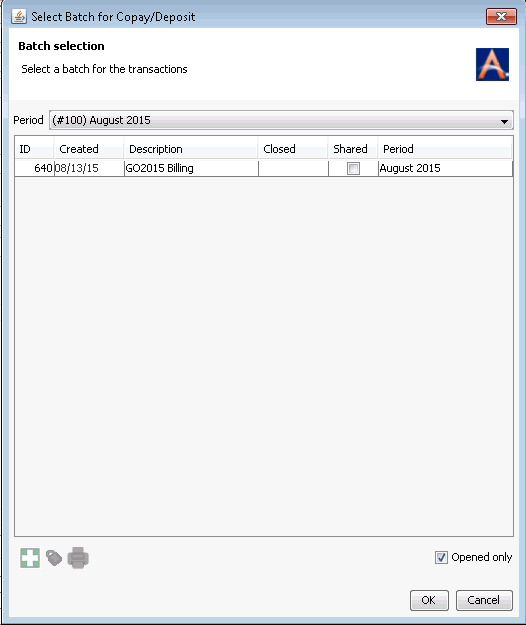
- From the Select
Batch dialogSelect
Batch dialog, highlight a Batch and click the
printer icon at the bottom left of the dialog. The Ledger
Batch Report dialogLedger
Batch Report dialog appears.
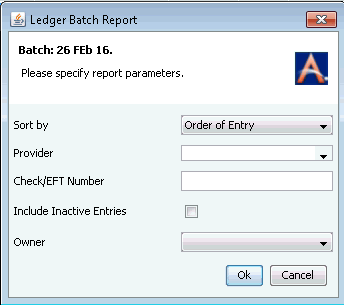
- By default, the report will display all transactions entered in
the batch. Use the following fields on this dialog if you would like
to narrow your results. The only mandatory field is Sort
by, which defaults to displaying transactions by
Order of Entry. Click the
name of each field for more information:
- Sort
bySort
by
You can select an option from the drop-down list in this field to determine how the transactions from the ledger are grouped on the report.
Transaction Date
Transaction Type
Patient
Order of Entry (default)
Provider
- ProviderProvider
If you wish to view only transactions related to a specific provider, select a provider from the drop-down list, or access the dictionary using Hot Keys [Alt + D] or [Alt + E] in the field. If you do not select a provider will be included in the report.
- Check/EFT
NumberCheck/EFT
Number
Enter the check number or identifying number for an electronic funds transfer in this free text field to view only those transactions associated to that number.
- Include
Inactive EntriesInclude
Inactive Entries
Check this check box to include transactions marked inactive.
- OwnerOwner
The Owner is the person who posted the Transaction.
- Sort
bySort
by
- Click OK to generate the report. A dialog appears offering you the choice of output formats. Select either PDF or CSV file by clicking the appropriate radio button.
- Click OK to view the reportreport
on your screen. From here, you can save the file to your computer
or print.
Related Topics