Ad Hoc Reports
If you do not find a standard report in the Reports module that meets your needs, you can assemble your own report from various data elements using the Ad Hoc Reports functionality, available from the View menuView menu.

To create an Ad Hoc Report
From the View menu, select Ad Hoc Reports. The Ad Hoc Reports moduleAd Hoc Reports module appears, open to the Data Source screen by default. The steps to creating a report are listed in the left-hand pane on this screen. Each step corresponds to a screen, and you can proceed through the steps to the next screen (step) by clicking the Next button at screen bottom after choosing options for your report on each screen.
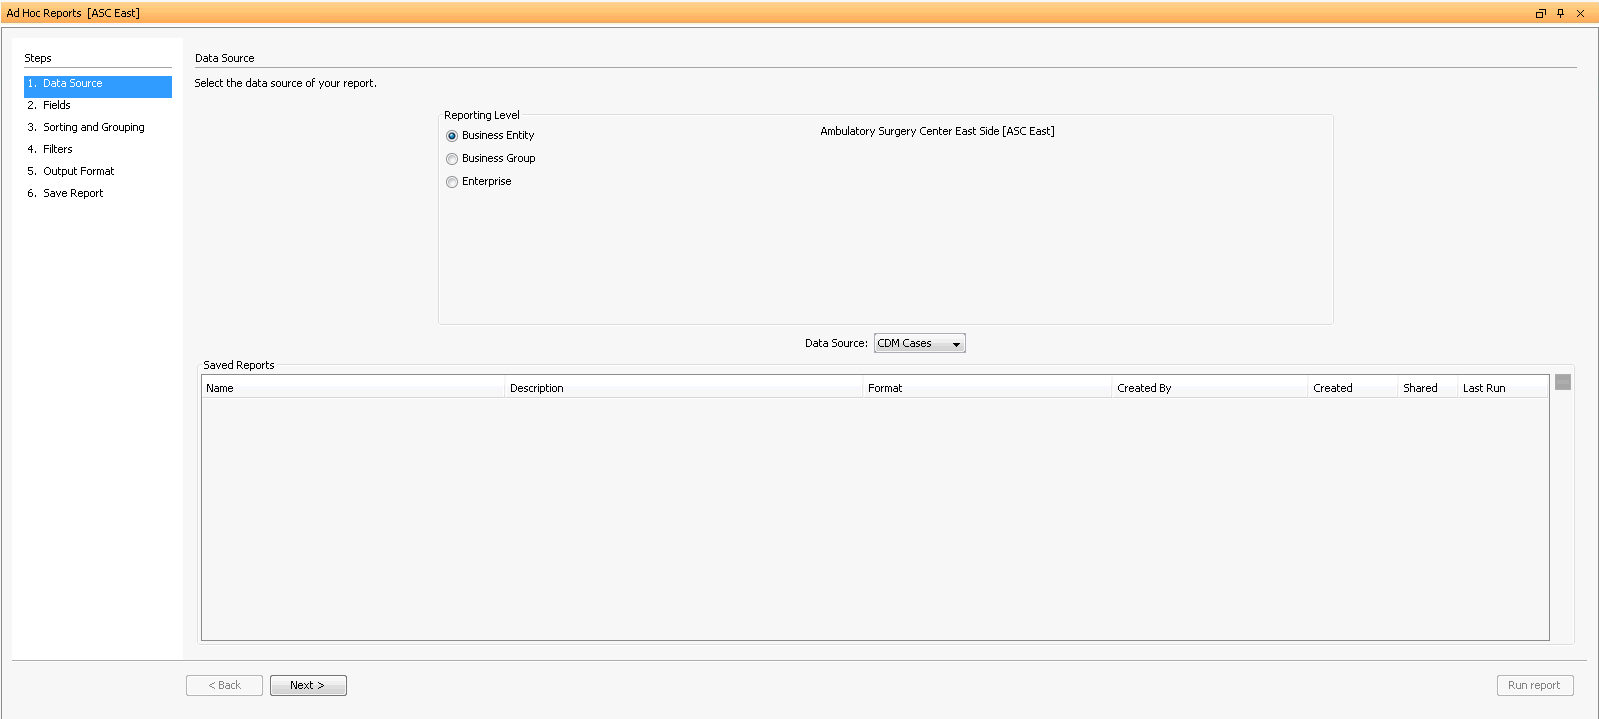
In the Reporting Level section of the Data Source screen, select the radio button that corresponds to the level of data you wish to pull for your report: Business Entity, Business Group, or Enterprise.
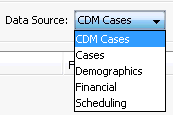
In the Data Source field (below the Reporting Level section), select the areaarea of AmkaiOffice from which you wish to pull data for the report.
Any previously saved Ad Hoc reports for the selected area will be listed in the Saved Reports section. To run one of these reports, double-click it or highlight it from the list and click Run Report.
To create a new report, click Next. The Fields screenFields screen appears. This screen enables you to select the data elements to include in your report. Each field listed within the folder structure on the left represents a data element.
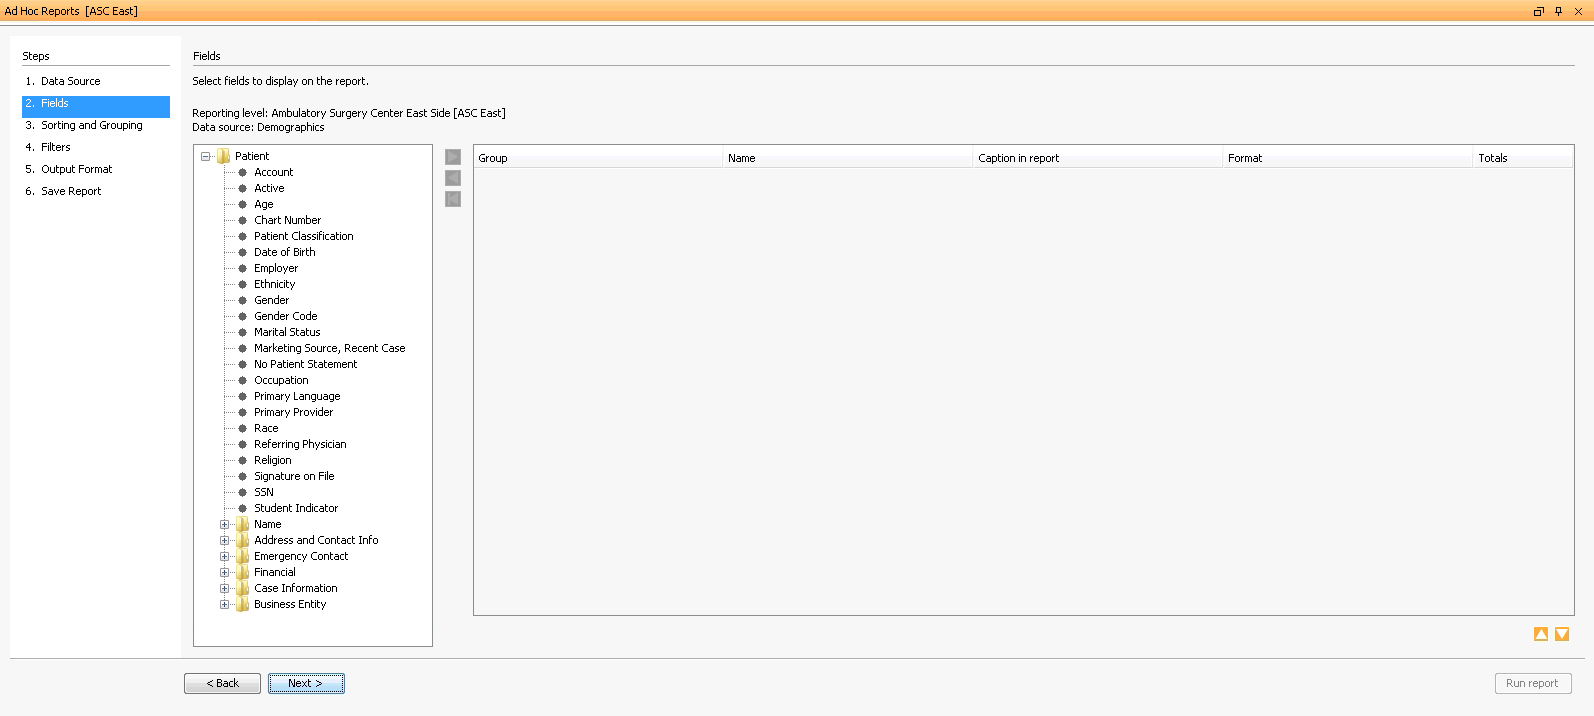
To select the fields to add to your report, click a field name from the folder structure, click
 at top left, and repeat for each field you wish to add. The selected
field will be listed in the tabletable
on the right. The Caption in report
column shows how the selected data element will be labeled in your
report. These fields (captions) will become the columns on your report
in the order they are listed.
at top left, and repeat for each field you wish to add. The selected
field will be listed in the tabletable
on the right. The Caption in report
column shows how the selected data element will be labeled in your
report. These fields (captions) will become the columns on your report
in the order they are listed.
To include a total of items for a specific field, select the check box in the Totals column.
Use these buttons
 at bottom right to
change the position of a field on the report.
at bottom right to
change the position of a field on the report.To remove items you selected from the report, use these buttons at top left:
 .
.
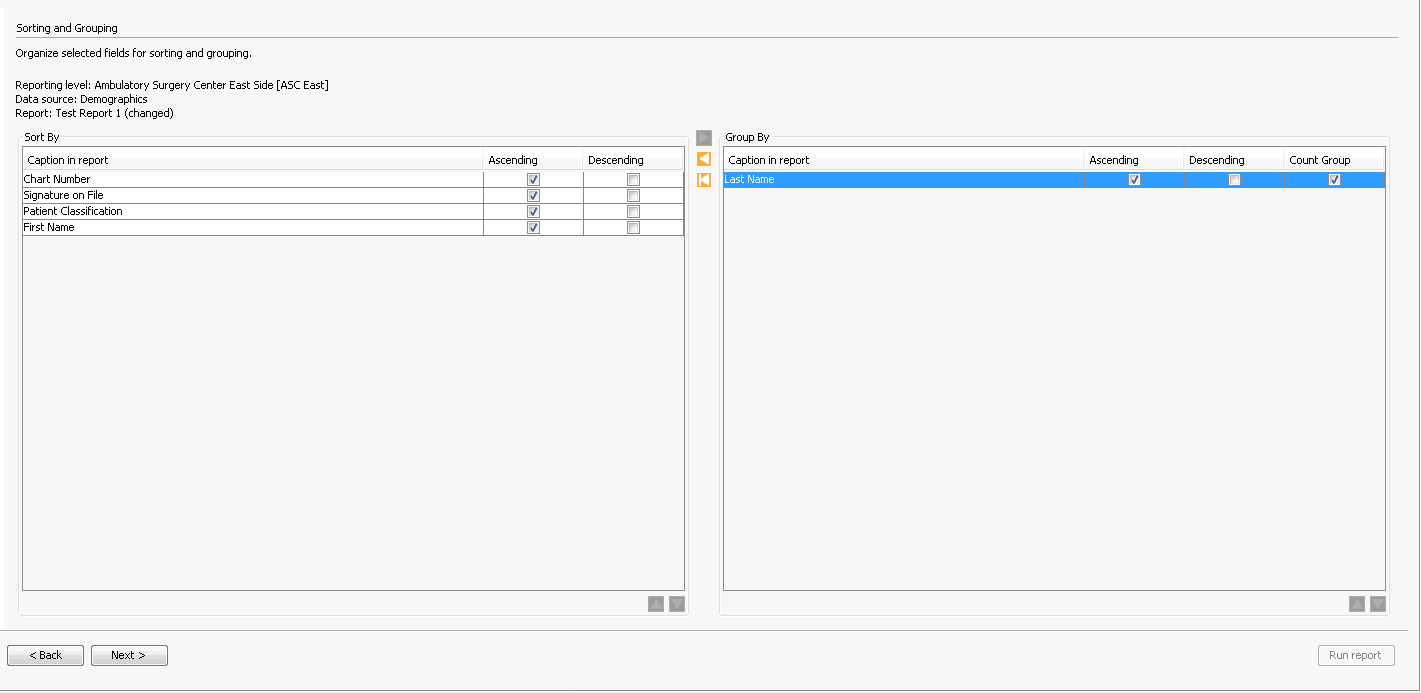
Click Next. The Sorting and Grouping screenSorting and Grouping screen appears.
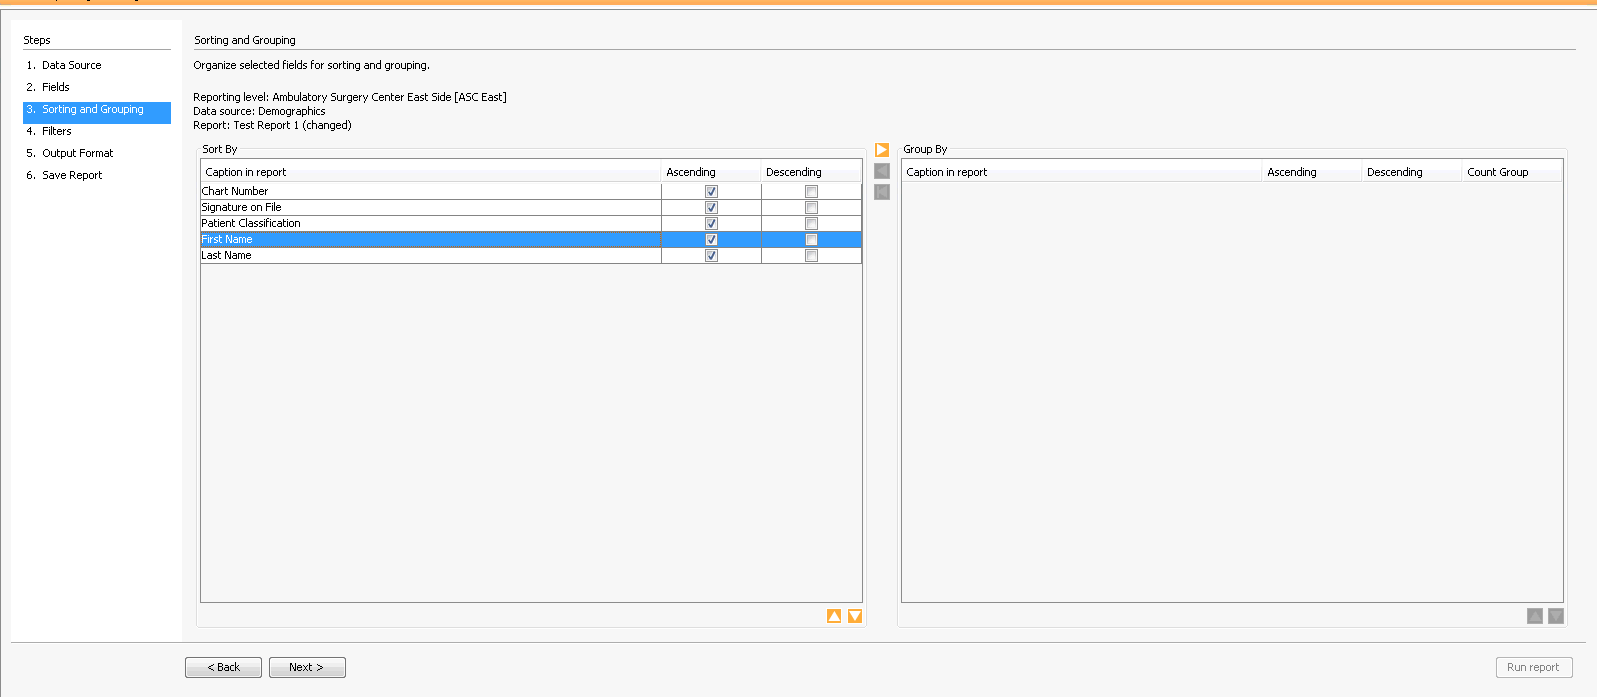
The fields you selected in step 5 (above) are listed in the Sort by section under the heading, Caption in Report.
To change the order of the columns, select a Caption and move it up or down the list using the orange arrows below the Sort by section.
To specify a sort order within the report results for a Caption, select either the Ascending or Descending check box next to that Caption.
To group your report results by a Caption, select that Caption in the Sort by section and use the right pointing arrow to move it over to the Group by section.
To specify a grouping order, use the Ascending and Descending check boxes in the Group by section.
To include a count of items within a Group, select the Count Group check box in the Group by Section.
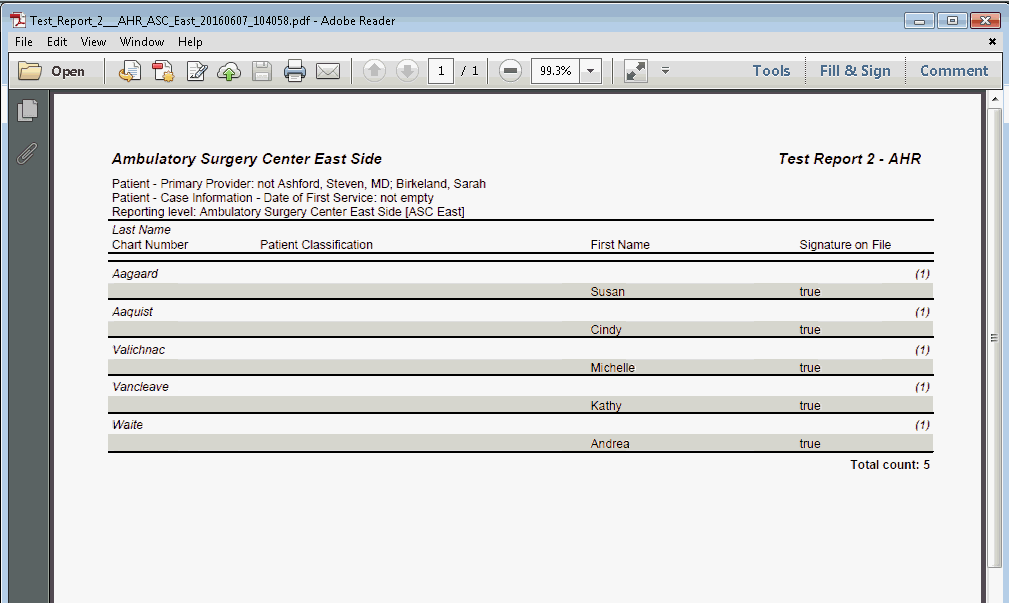
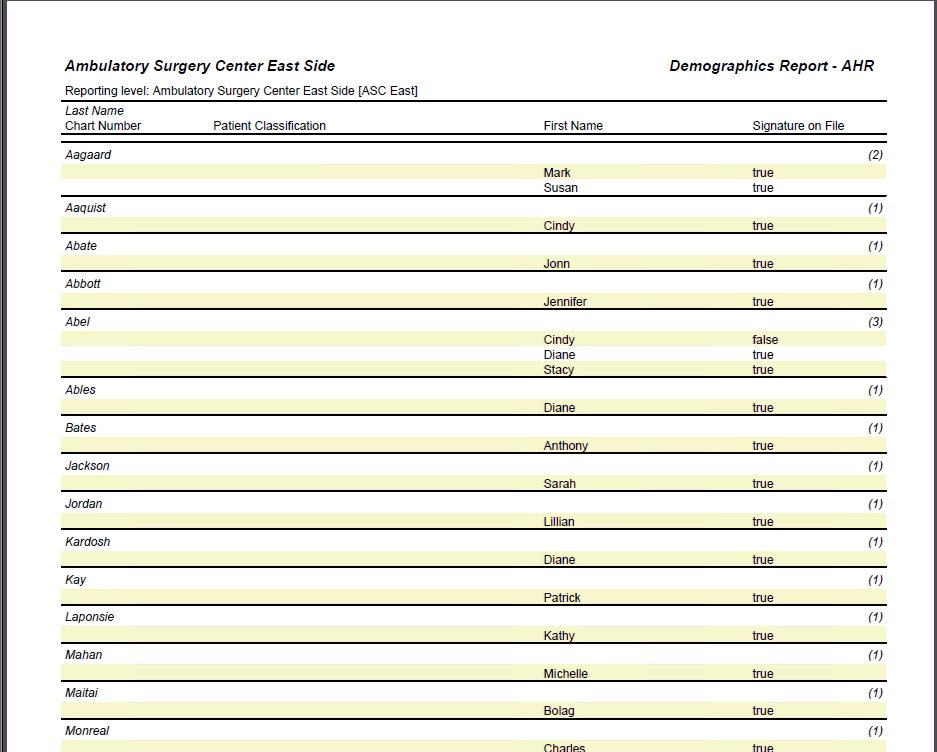
As an example, these sorting/grouping optionsthese sorting/grouping options resulted in this report structurethis report structure.
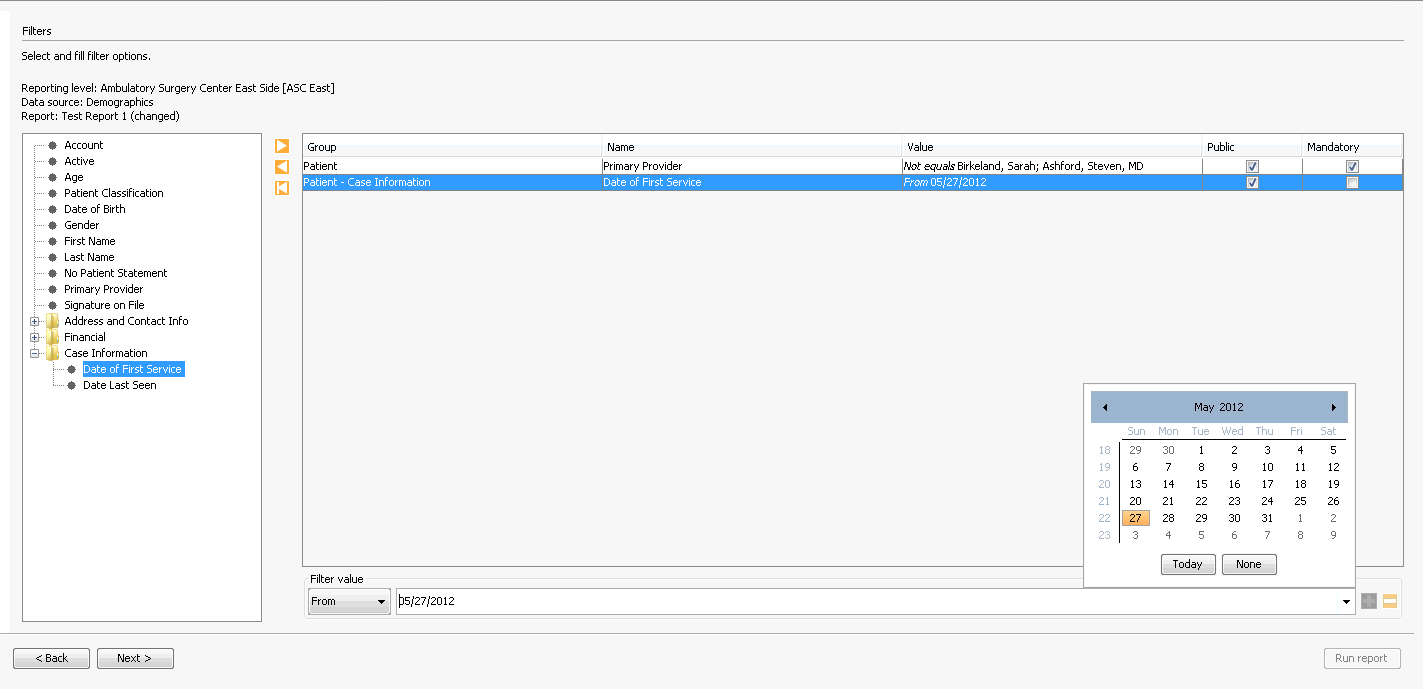
Click Next. The Filters screenFilters screen appears. On this screen, you can select filters to limit your report results to a subset of data within the selected Captions.
For example:
To include only those patients whose Date of First Service was after 5/27/2012, select Case Information > Date of First Service from the folder structure in the left-hand pane.
Select a Filter valueFilter value from the drop down menu (in this case, From).
The options available in the Filter value field and the drop down menu next to it adjust based on your choice. Additionally, the drop down menu next to Filter value adjusts depending on the Filter value you selected. Click here here for examples.
- In the example shown in the screen shot above, we selected From, so the drop down menu offered a calendar from which we can select a beginning date.
- If we had selected Not Empty as the Filter value, the drop down menu would have disappeared, because there would be no choices to make: all Dates of First Service would have been included in the results.
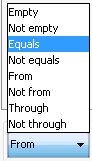
- If we select Primary
Provider as a Filter, the Filter value offers
us these
optionsthese
options, which enable us to select
accounts with a specific provider (Equals), accounts
with no Primary Provider (Empty), any provider (Not
empty), or accounts with any provider except a particular
individual (Not equals).

- If we select Equals or Not equals from the Filter value field, the drop down menu provides a list of providers from which to choose. In this case you can add additional providers (to include or exclude from your results) by clicking the plus sign next to the drop down menu and then selecting additional providers from the menu. To remove all your selections from the drop down menu, click the minus sign.
- Your filter selections will display in the Value column in the list of selected filters at the top of the screen.
If you want the report to show that a particular filter was used, select the Public check box next to that filter. The report header will name that filter as shown herehere.

If you are going to make this report available for other users to run and want the selected field to be mandatory for users when the report is run, select the Mandatory check box. For example, if you have the field First Date of Service set as Mandatory, users would need to enter a date before they could run the report.
Click Next. The Output Format screenOutput Format screen appears. Select the formatting options you wish to use for your report. If you select a Custom file for your Output format, you can then load a template on this page by clicking Load next to the Template file field. To learn more about Templates, click the Help button next to the Template file field.
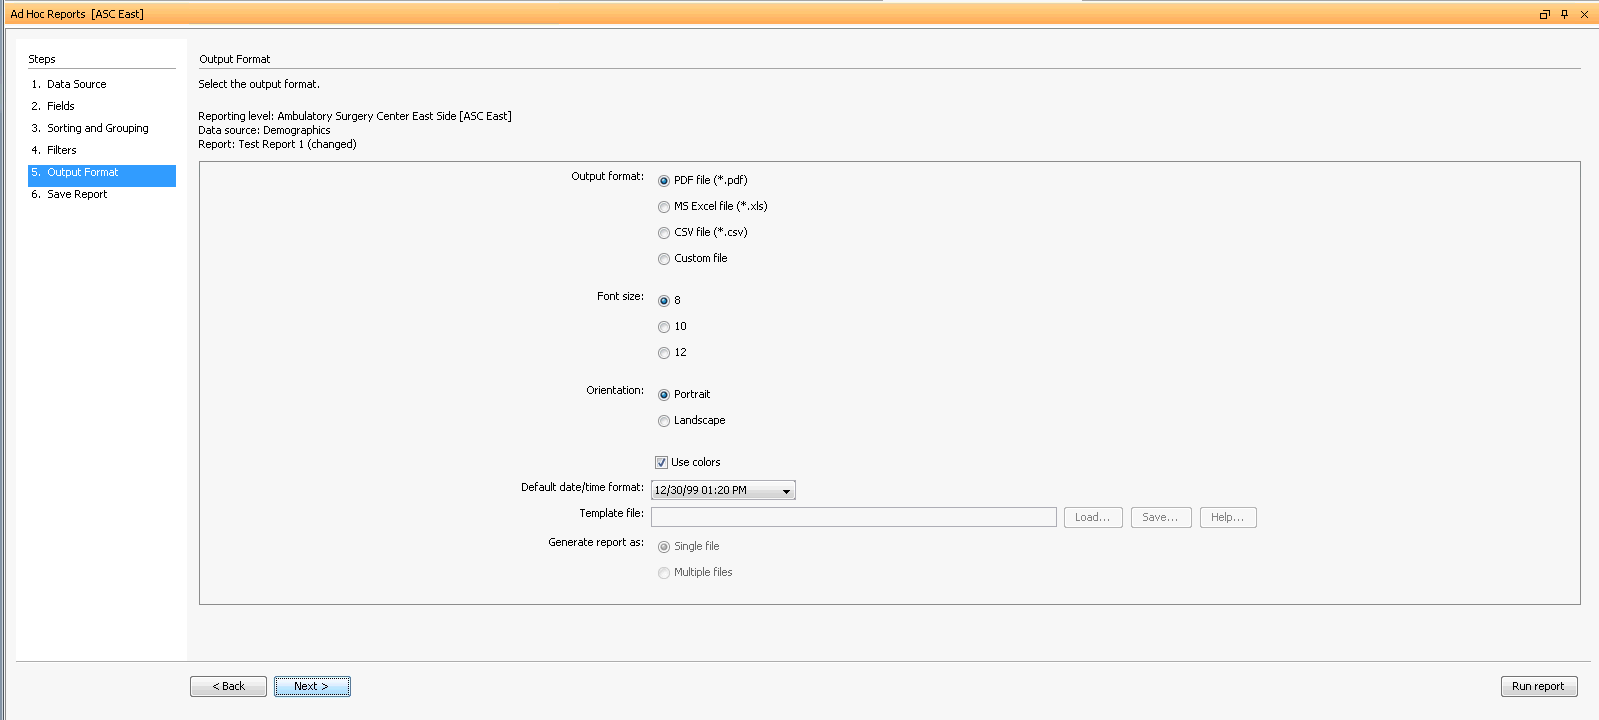
Select one of the following options:
To save your report, click Next. The Save Report screenSave Report screen appears. The Report Name and Description fields are mandatory. To make this report available for other users, select the Shared check box. If you selected an existing report to modify in step 3 (above), the existing Report Name and Description default into this screen. To save a variation of this report, change the name/description and click Save new. You can then run the report by clicking Run Report.

To run the report without saving it, click Run Report.
The report appears on screen. You can save the report to your computer and/or print it from the windowwindow that appears.