How to Run Reports
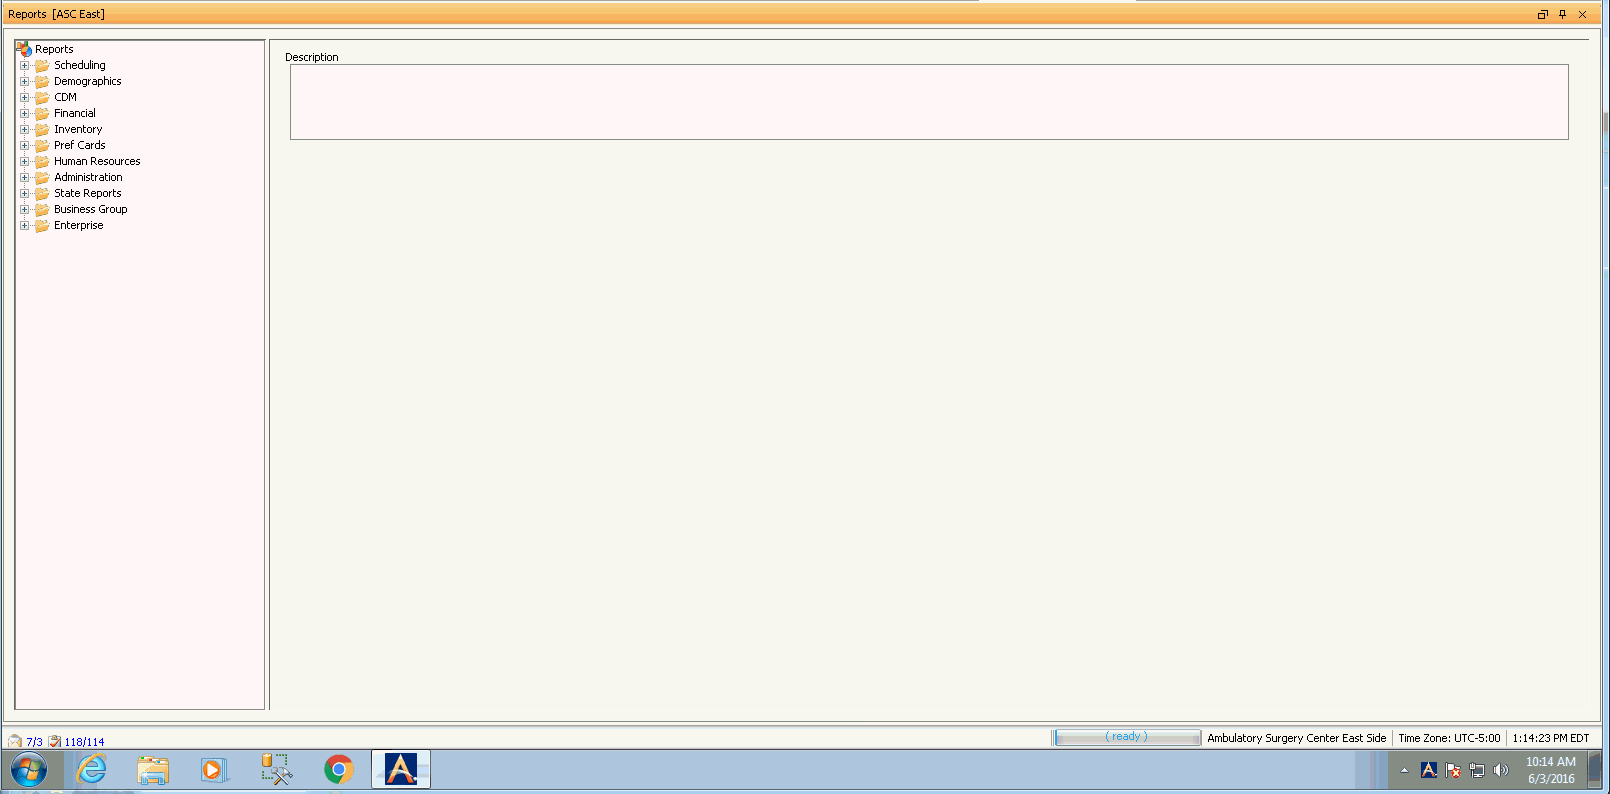
- Open the Reports Module. The Reports
Filters screenReports
Filters screen appears.
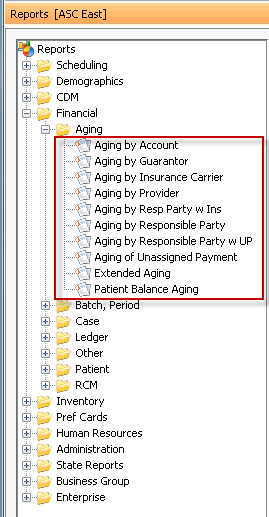
- AmkaiOffice's standard suite of reports is organized in folders
and sub folders in the left-hand pane of the screen. To view the reports
in each category, click the plus sign next to the folder (and any
sub folders) to reveal list
of available reportslist
of available reports.
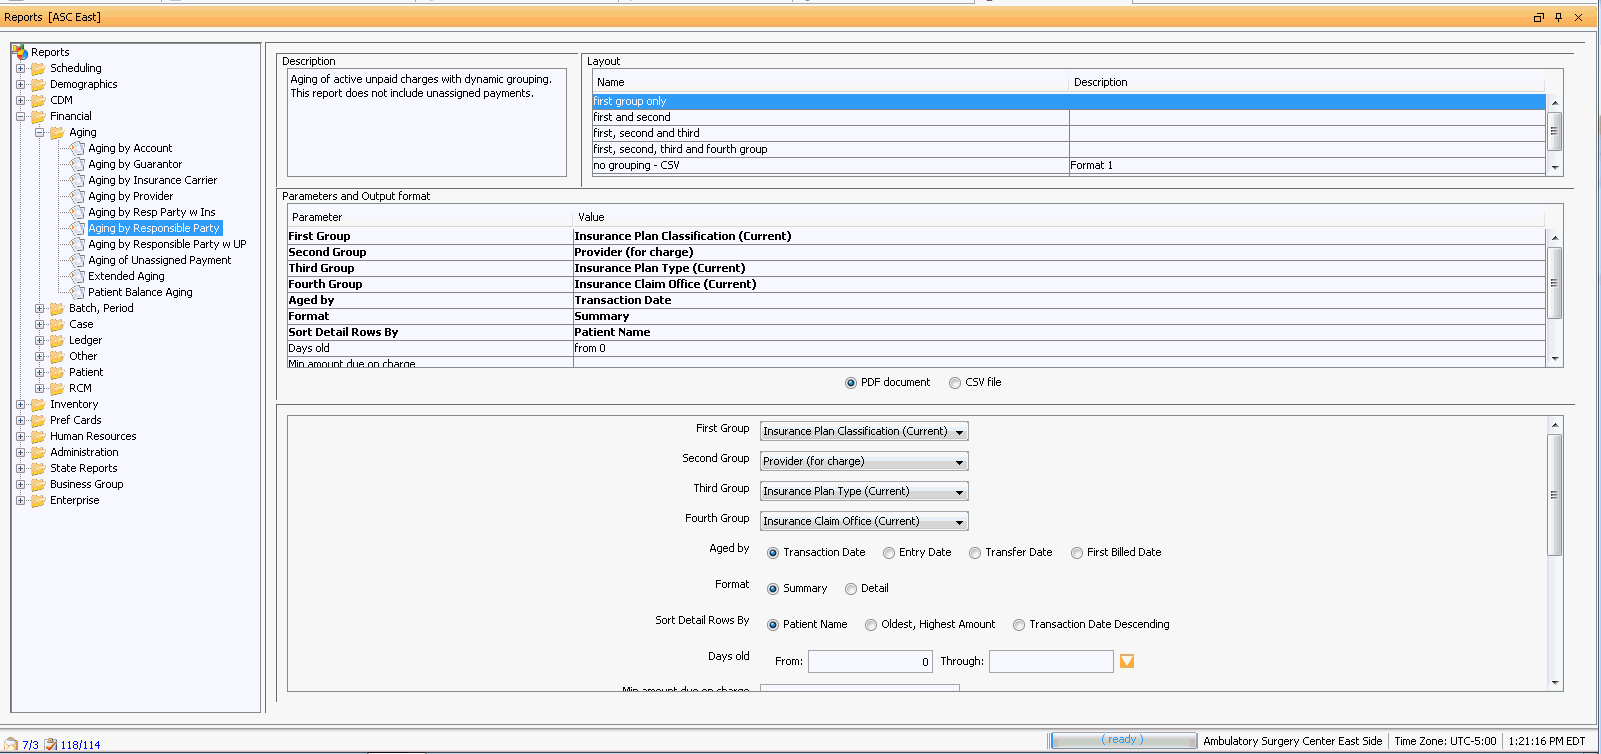
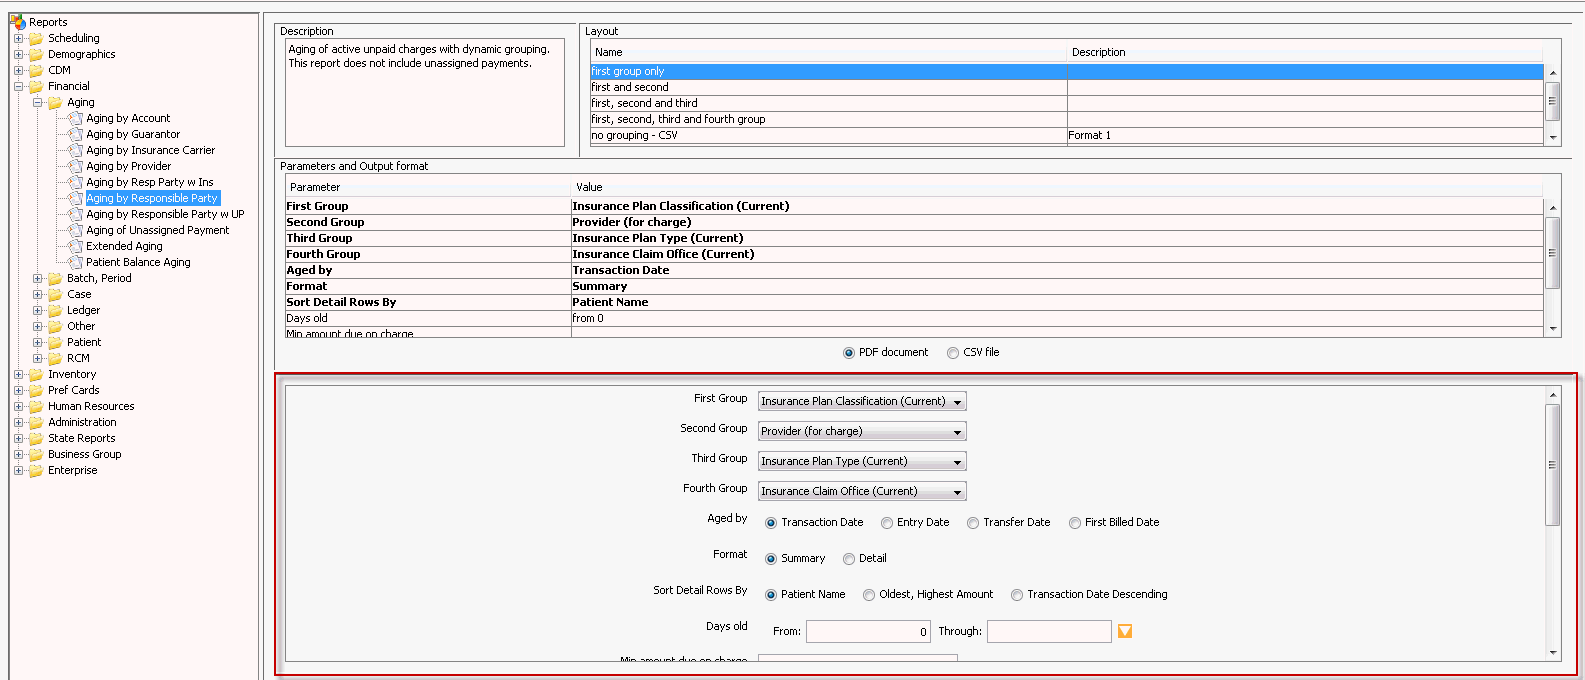
- Select a report from this list. The right-hand
paneright-hand
pane of the screen populates with a description
of the report and layout/formatting options. Depending on the report,
you may have options for grouping, sorting, filtering, including/excluding
certain types of data, selecting a date range and showing either a
summary of the data or details.
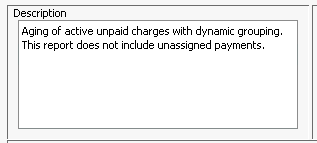
- To decide whether the selected report is exactly the one you need,
carefully read the Description
sectionDescription
section which provides a summary of the data elements
included in the report. In addition, the description often states
what elements are not included, if their exclusion differentiates
the current report from another. For example, the Aging by Responsible
Party report's description indicates it does not include unassigned
payments, because the Aging by Responsible Party w UP report does
include them. The differences among reports are not always obvious
from the report names.
- Select options for sorting/grouping/filtering the report data in
the bottom section of the screen. The options available in this section
vary by report. This
exampleThis
example is the Aging by Responsible Party report.
The options you select in the bottom section of the screen will
be displayed in the Value column in the Parameters
and Output format sectionParameters
and Output format section. If there is a missing
required option, that option will display in red
textred
text in Value Column in the Parameters and Output
format section.


Click the links below to learn how to use some of the sorting/grouping/filtering options available for various reports:
- Dynamic
GroupingDynamic
Grouping: enables you to subcategorize your
report data from general to specific. For many reports, you have
the option to group data by up to four groups.
- Select data elements
from the dynamic grouping drop down menus (First
Group, Second
Group, etc.) to group your data from general
to specific. For the Aging by Responsible Party report,
we selected these values from the drop-down menus
in the bottom part of the page:
- Business Entity (First Group)
- Provider (Second Group)
- Patient (Third Group)
- Insurance Plan Type (Primary) (Fourth Group).
- The data elements you selected are then displayed
in the Value column in the Parameters
and Output format sectionParameters
and Output format section of the
Reports Filters screen.

- To enable grouping by all four selected groups, select first, second, third, and fourth group in the Layout section at the top of the screen. Select the report format by clicking either the PDF document or CSV file radio buttons. You can double-click this selection in the Layout section to run the report, or select additional formatting options and then click OK at screen bottom.
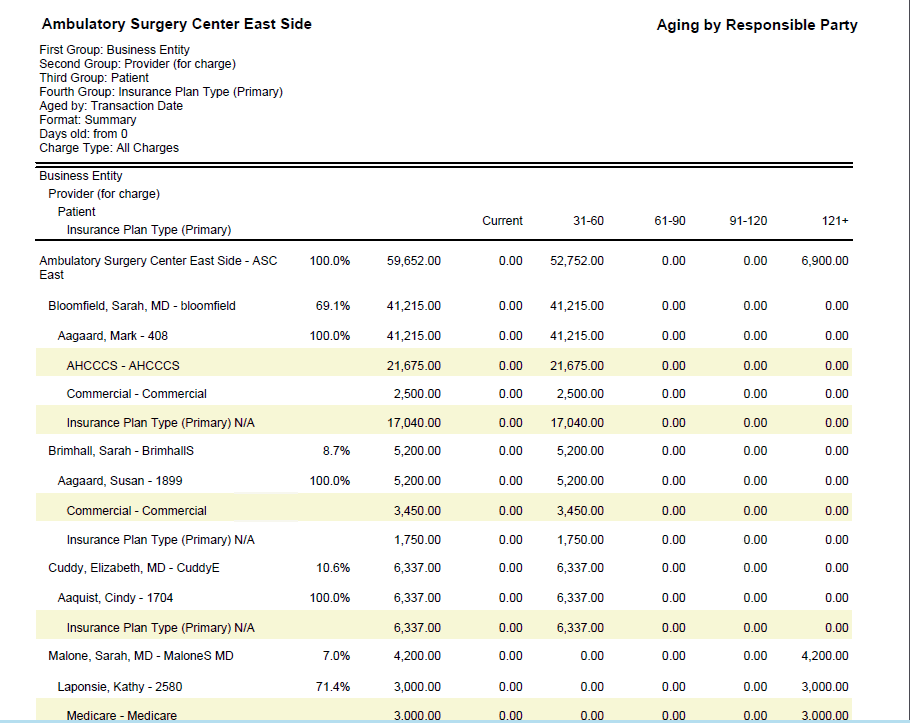
- See the results of dynamic grouping in this screen shot of the
reporscreen shot of the
report. The data is grouped generally
by BE, within the BE it is grouped by provider, then
by patient, then by Insurance Plan Type (PrimaryPrimary)
If we had selected Insurance Plan Type (Current) instead of Primary, the report would group by the type of the Insurance Plan currently responsible for charges. So, if charges had been transferred to the Secondary Insurance Plan, that type would pull to the report.
- Select data elements
from the dynamic grouping drop down menus (First
Group, Second
Group, etc.) to group your data from general
to specific. For the Aging by Responsible Party report,
we selected these values from the drop-down menus
in the bottom part of the page:
- Format:
Summary vs. DetailFormat:
Summary vs. Detail
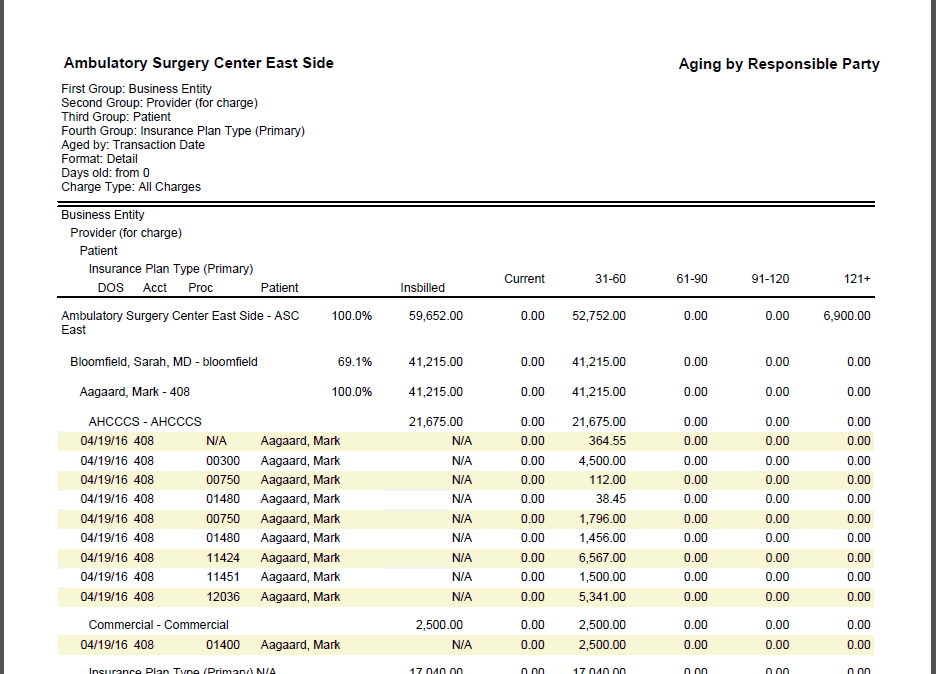
In practice, if you are uncertain about whether to run the Summary or Detail format of the report, it is recommended that you run the Summary version first (select the Summary radio button in the Format field). If the Summary version does not contain the information you need, then run the Detail format. See this example of the Detailed format of the Aging by Responsible Party reportAging by Responsible Party report, which contains individual transactions in addition to the totals shown in the Summary format.
- Plus
and minus buttonsPlus
and minus buttons next to a Patient
field
Click the Plus sign button to add a patient to the report. Repeat until you have added all the patients you wish to include in the report. To remove all of your selections, click the Minus sign button.
- Tables: Use click + Ctrl or click + Shift to select multiple
items from tablestables.
The number of items you selected displays in the upper right of
the table. To clear your selections, click None.

- History
buttonHistory
button: Use this button to view or print either
the parameters you used in previous report runs, or the parameters
used by all users.
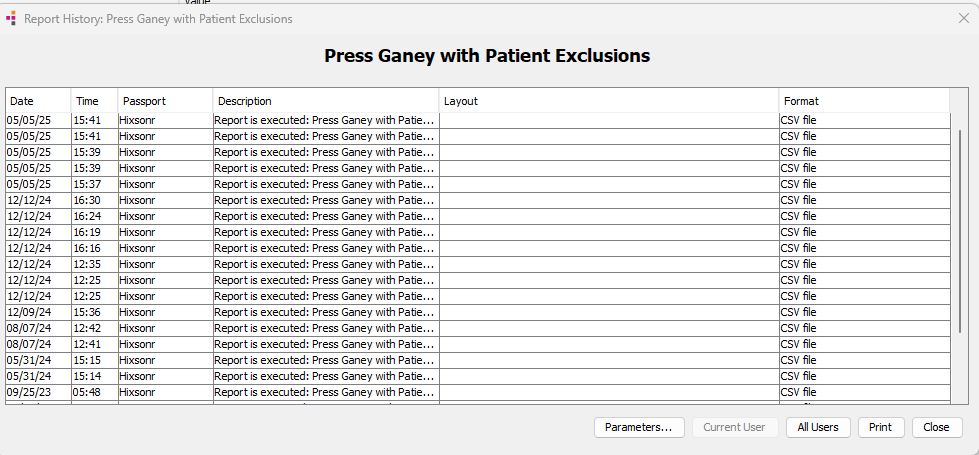
- Click the History button. The Report History dialogReport History dialog appears. By default, the dialog displays a line for each time you ran the report.
-
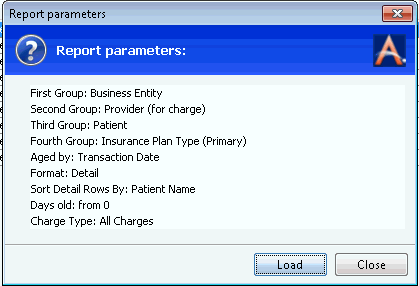
- To view the parameters used for a specific report run that you created, select that run from the list and click Parameters. The Report parameters dialogReport parameters dialog displays.
- To view parameters other users have used, click All Users.
- You can print the list of parameters by clicking Print.
- To view the parameters used for a specific report run that you created, select that run from the list and click Parameters. The Report parameters dialogReport parameters dialog displays.
- To use the parameters shown in the dialog for the current report run, click Load. You are returned to the Report Filters screen, where you can adjust any of the report parameters you wish and run the report.
- Click the History button. The Report History dialogReport History dialog appears. By default, the dialog displays a line for each time you ran the report.
- Dynamic
GroupingDynamic
Grouping: enables you to subcategorize your
report data from general to specific. For many reports, you have
the option to group data by up to four groups.
- Select the report format by clicking either the PDF document or CSV file radio buttons, if these are available for the report you are printing.
- To run the report, you can either double-click a selection in the
Layout sectionLayout section,
or click OK at screen bottom.
