Resubmitting a Claim for Electronic Professional x12p (HCFA) and Institutional x12i (UB) Claims
This topic provides instructions for resubmitting a corrected claim, and applies to Electronic Professional x12p (HCFA) and Institutional x12i (UB) Claims.
Resubmitting an Electronic Claim
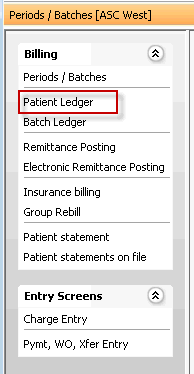
- Navigate to the Patient Ledger (from the Financial Management module,
select the Patient
Ledger Sheet Bar optionPatient
Ledger Sheet Bar option under the Billing heading
on the left side of the screen.) The Patient
Ledger screenPatient
Ledger screen appears.


- Click the patient information shown highlighted in blue in upper left of the screen to select a patient record.
- All Transactions posted to the selected patient record (account)
display in the Transaction
ListTransaction
List in the middle of the screen.

- You can filter and sort this list using the Viewing
and Grouping OptionsViewing
and Grouping Options at the bottom of the
screen.
You can adjust the way transactions are displayed in the Transaction List using the following options:
- ViewView
- Recent
TransactionsRecent
Transactions
Displays all transactions posted in the previous 30 days, including parent and child transactions.
- Charges
OnlyCharges
Only
Displays all parent transactions. You can view all child transactions by clicking the plus sign next to a parent transaction.
- Open
Items OnlyOpen
Items Only
Hides all charges that have reached a 0 balance, and displays all other transactions. You can view all child transactions by clicking the plus sign next to the parent transaction.
- Show
InactiveShow
Inactive
When left unchecked, only active transactions will be viewable on the transaction list. When checked, both active and inactive transactions will be displayed.
- Child
Transaction TreeChild
Transaction Tree
- Collapse
allCollapse
all
Hides all child transactions from view
- Expand
allExpand
all
Displays all child transactions
- Collapse
allCollapse
all
- Recent
TransactionsRecent
Transactions
- Group
ByGroup
By
- ChargeCharge
Groups transactions by charges (default)
- CaseCase
Group transactions by Case
- Date
of ServiceDate
of Service
Groups all transactions with the same date of service together
- Entry
OrderEntry
Order
Displays all charges in the order they were posted on the ledger
- ChargeCharge
- Group
TotalsGroup
Totals
The Group Totals will display the totals for the transactions included in the option you selected in the Group By section. If you select a different Group By option, the totals will recalculate based on your new selection.
- ViewView
- When you see
 next to a Transaction, you can click this symbol to view Child
Transactions (payments, write-offs, notes) associated to the Parent
Transaction.
- You can filter and sort this list using the Viewing
and Grouping OptionsViewing
and Grouping Options at the bottom of the
screen.
- For each charge to be included on the resubmitted claim, remove
the Bill Date, if present:
- Right-click the charge in
the Bill
Date columnBill
Date column and select Remove Bill Date from
the menu that appears.

- Right-click the charge in
the Bill
Date columnBill
Date column and select Remove Bill Date from
the menu that appears.
- For each charge to be
included on the resubmitted claim, update the Type
of Bill by changing the 4th digit from 1
to 7 on the Charge Detail screen. For example, if your current
Type of Bill is 0831, change
it to 0837.
- Double-click the charge to launch the Charge
Details screenCharge
Details screen.

- Modify the number in the by changing the 4th digit from 1 to 7 in the Type of Bill field (free text).
- Double-click the charge to launch the Charge
Details screenCharge
Details screen.
If the balance due is not currently sitting with the payor you are resubmitting the claim for, you will need to Transfer the balance due to the correct Role:
With the charge selected, click Transfer under the Special heading on the sheet bar.
On the screenscreen that appears, in the Transfer Info section, deselect the Auto Xfer to next role check box.

Use the drop down selector to select the payor you are resubmitting the claim for.
Add the Original Reference Number shown on the Remittance Advice for the rejected claim:
From the Patient Ledger, click the Demographics button.
In the Cases section, double-click the case you are resubmitting the claim for.
Click the Additional Information link.
On either the HCFA or UB tab (does not matter which tab you select), enter the Original Reference Number in the Original Ref # fieldOriginal Ref # field.

To save your changes, click Ok to close each dialog you opened in step 7.
Process the electronic claim as usual. You can review the Detail x12 file to verify that the Type of Bill (0837) and the Original Reference Number are included in the new claim:
Loop 2300 – CLAIM INFORMATION: CLM (Type of Bill Data) REF (Original Reference Number)
X12i (UB)

X12p (HCFA) – only the 4th digit of the Type of Bill will be referenced in the professional format.
