Pathology/Specimen Log
In the CDM module, you can add or edit information about pathology/specimen reports for a case for billing and reporting purposes. Information entered in the Pathology Log will be reported in the CDM Report > Pathology Log Report. This report runs by Case date and can be filtered based on report status, laboratory or surgeon.
To update/edit the Pathology/Specimen log, the case status must be set to one of the following: Performed, Partially Performed/Billable, Partially Performed/Not Billable, or In Progress. Pathology/Specimen log will not be allowed to be entered if the case status is set to Pending or Cancelled.
To update/edit the Pathology/Specimen log
-
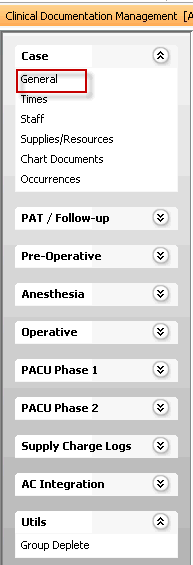
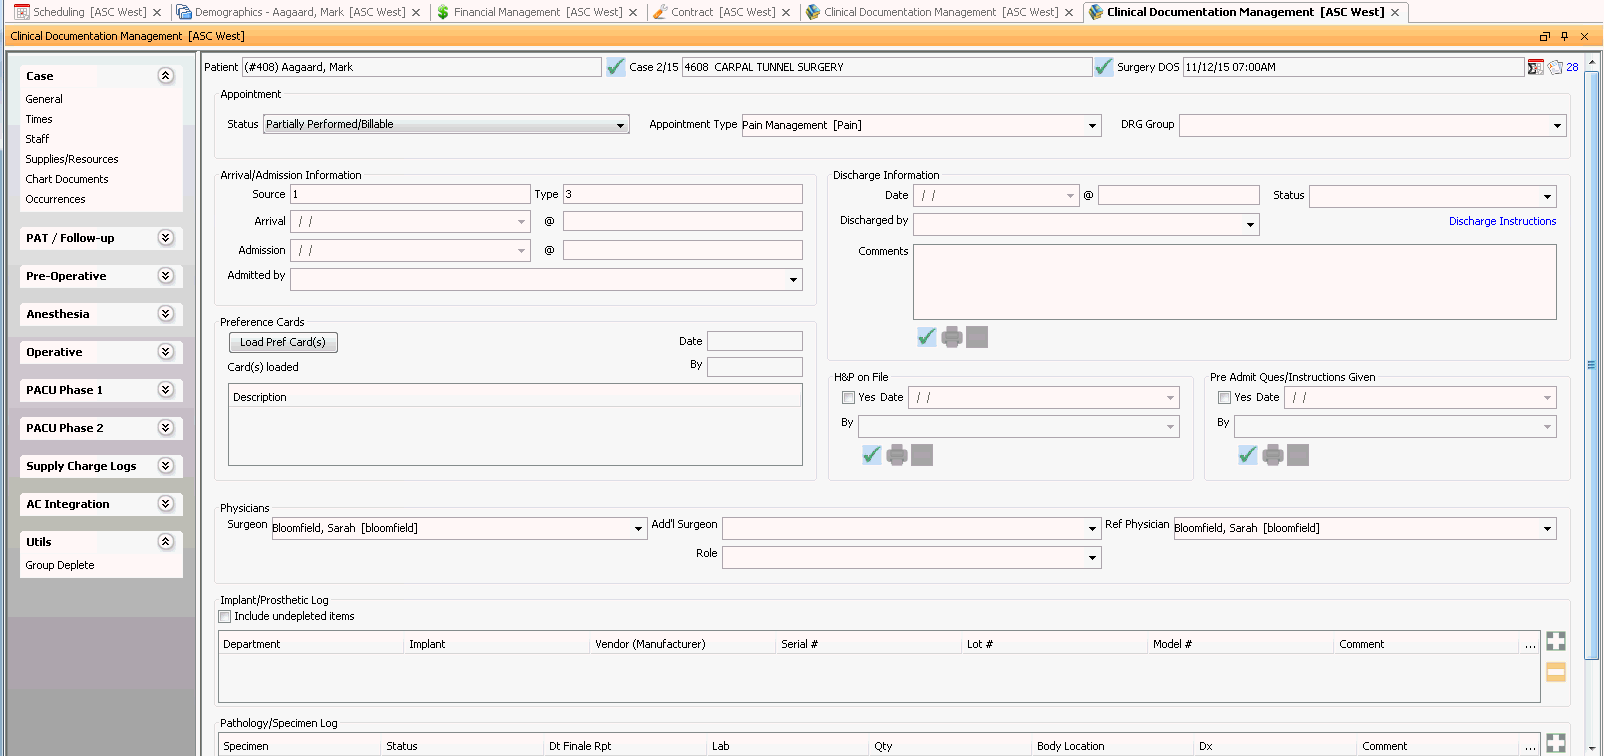
Launch the CDM module. You will be prompted to select a patient and case. Click herehere to learn how. The module opens to the Case Screen.Case Screen. This screen is accessible by clicking General under the Case heading on the CDM module Sheet BarSheet Bar.


-
Scroll to the bottom of the screen to find the Pathology/Specimen Log. Click the plus sign to add a line to the log. Complete all relevant fields as described here.
-
Specimen: This is a free text field where you can enter the specimen description (no character limit).
-
Status: From the drop-down list, select the current status of the pathology report. This is a non-editable dictionary-based field. In the Pathology log report, users have the ability to run the report based on the status you indicate here. (example: Users can run a report showing all pending pathology reports.)
-
Date Final Report: This field defaults to today's date and indicates the date the final pathology report was received. Click herehere to learn how to change the date.
Use one of the following methods to populate a date field:
- Manually type a date in the field. You must use this date format: MM/DD/YYYY.
Or
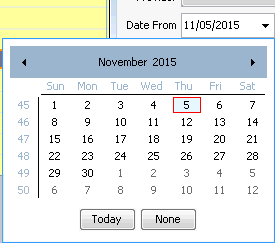
- Click the drop-down in the date field to access a calendarcalendar:

- Populate the date field by clicking a date on the calendar.
- Leave the field blank by clicking None.
- Navigate to a prior or future month using the arrows to the right and left of the month name.
- Click the month name to see a list of months and select the name of the month you wish to view from the list.
- Navigate to a prior year by clicking the year and using the up/down arrows to move forward or back one year at a time.
- Populate the field with today's date by clicking Today.
-
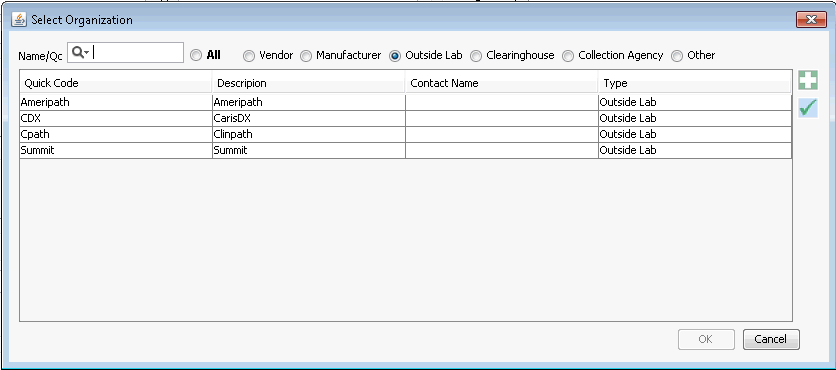
Lab: Double-click this symbol: … to launch the Select Organization dialogSelect Organization dialog to choose a pre-existing lab, edit an existing lab, or create a new lab

-
To choose a pre-existing lab, highlight the lab and click OK.
-
To edit a pre-existing lab, highlight the lab you wish to edit and click the check mark icon. The Organization Dictionary appears. You can add or modify the lab's information in the dictionary from here. Click here to learn more. (link to dictionary topic) Click Save to update the lab with your changes.
-
To create a new lab, click the plus sign icon. The Name and Quick Code fields will be presented as mandatory and Organization Type Outside Lab will default to checked. Complete any other relevant fields and click Save to store the new information. Click here for more information on the Organization Dictionary. (link to future topic)
-
-
Quantity: Free text field where you can enter the number of specimens sent to the lab (no character limit)
-
Body Location: Free text field where you can indicate the body location the sample was taken from (no character limit)
-
Diagnosis Code (DX): Enter the pathologist's final diagnosis code in this field. You can choose a diagnosis code in one of the following ways:
-
Manually type in the code
-
Use the drop down arrow to filter through the list
-
Change the menu options with a right-click (ex. Filter by name vs.. quick code)
-
Create/Edit- To create or edit a diagnosis code, click Alt + D to launch the Diagnosis chooser dialog.
-
-
Comment: This is a free text field where you can enter comments associated to this specimen.
-
Image: To add an image click the C at the end of the dialog. The Digital Document Editor will open where you may scan or load in any related documents to this specimen. Click here to learn how. Images may only be added if the field Date final Report has been entered.
-
To add additional specimens, repeat these steps, clicking the plus sign icon to open a new Pathology Line screen for each instance.
-
Use the minus sign icon to remove an existing Pathology Line. If you delete an entire Pathology Line, you will lose all data entered on this line.