Creating Dunning Message Rules
Dunning Message are messages added to patient statements to remind customers of payment terms or delinquent payment.
Your facility creates Dunning Rules in the System Administration module to govern which patient statements receive messages and which messages are applied to those statements. Typically, you would create rules that result in messages with progressively stronger language being applied to statements based on the age of the charges or the age of transfer of responsibility for payment to the patient, depending on the selection made when the patient statement is generated. See examples of dunning messages below.
There are a number of criteria you can select from when creating these rules that enable you to tailor the messages to specific situations. For example, you can create dunning messages that are specific to patients who have Medicare as the Primary Insurance for a Billing Group or messages that are specific to accounts with a Patient Status of Payment Plan. The criteria available to use to create dunning rules include Insurance Carrier, Insurance Plan Type or Patient Classification. You can further define rules based on minimum balance due and/or date of last payment.
For more information about dunning message rules, see Dunning Message Criteria.
To create a dunning rule and messages
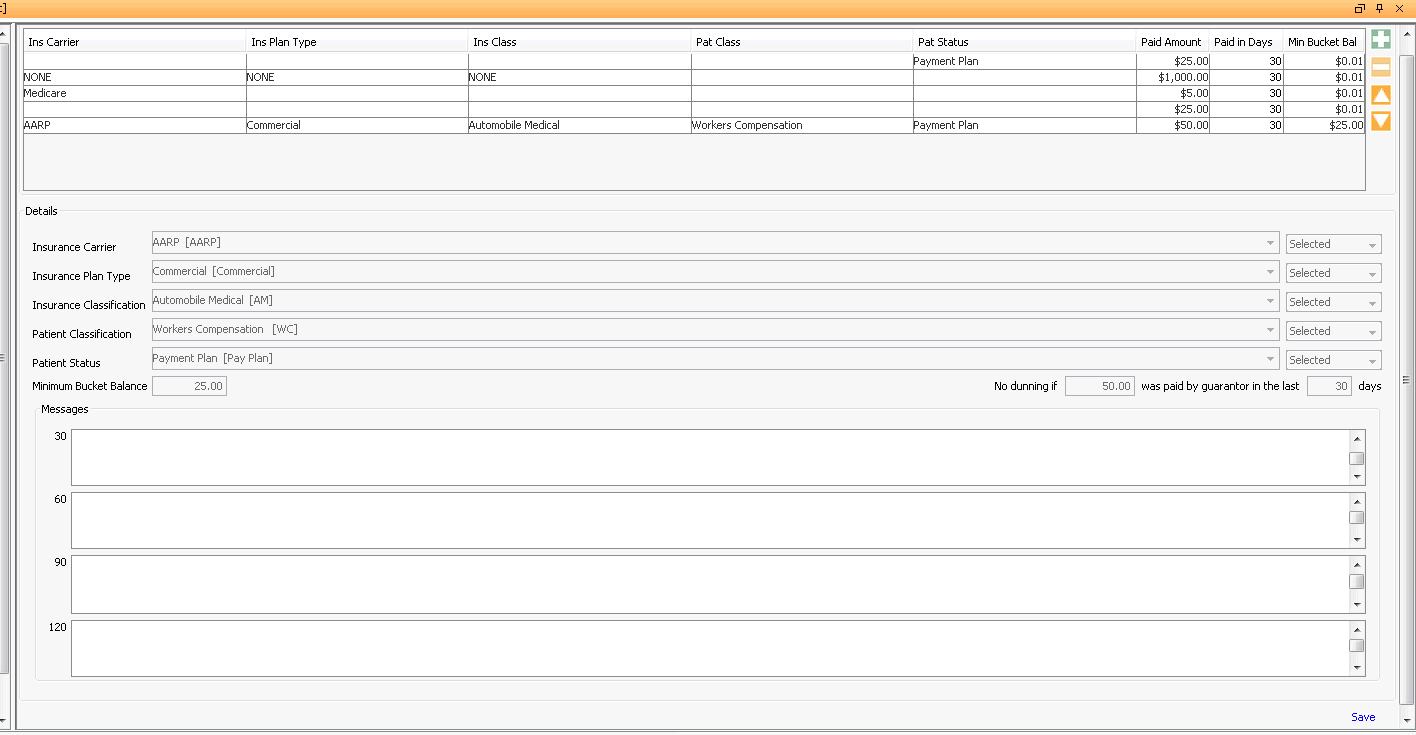
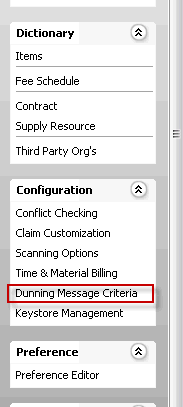
From the System Administration Sheet Bar, select Dunning Message CriteriaDunning Message Criteria under the Configuration heading. The Dunning Rules Configuration screenDunning Rules Configuration screen appears. Existing Dunning Rules are listed at the top in the Dunning Rules section.


Click the plus sign to add a new dunning rule. A new line is added to the Dunning Rules section, with all fields marked as mandatory. These fields are not editable. The entries you make in the Details section will populate the fields in the Dunning Rules section.
Define the group of patients who will receive the message(s) by selecting criteria in the Details section of the screen. Select one or more criteria (Insurance Carrier, Plan Type, etc.), then use the drop down menu to the right of each criterion to specify how the system should handle the criterion:
Using the Insurance Carrier field as an example:
Selected: (Default) Let's say you select AARP in the Insurance Carrier field and leave Selected as the default. The system will pull into the group only patients with AARP as the primary insurer in the billing group.
Any: Leave the Insurance Carrier field blank, and then select Any. The system will pull all patients who have a carrier listed as primary insurer, regardless of which carrier. It will not pull patients with no carrier at all listed.
None: Leave the Insurance Carrier field blank, and then select None. The system will pull only those patients who have no associated carrier at all.
Define the "aging balance due" that will trigger dunning messages by entering an amount in the Minimum Bucket Balance field:
Aging balances are grouped in "Buckets" by the number of days the balance is overdue. There are 4 buckets corresponding to progressively stronger dunning messages: 30, 60, 90, and 120 days. An amount equal to or greater than the value entered in the Minimum Bucket Balance field must exist in a bucket in order for a message associated to that aging balance to be applied.
- Example: Minimum bucket balance = $25.00. Current account aging is 30 days $120.00, 60 days $0.00, 90 days $20.00. The system will assign the 30 day dunning message to the account, as the 90 day bucket does not meet the minimum bucket balance for message assignment.
- Enter a minimum amount paid and number
of days since last payment that will prevent the system from applying
a dunning message to the statement:
- Example: No dunning if _$50___ was paid by guarantor in the last _60__ days.
- In the Messages section, enter the text of your facility's 30 day, 60 day, 90 day, and 120 dunning messages. See examples above. If you do not enter at least one message, you will not be able to save your new dunning rule.
- Click Save. Your new dunning rule is now listed in the Dunning Rules section and will be applied to accounts as you specified.