Implant/Supply Details dialog
The Implant/Supply Details dialog is used to update/edit details such as Serial Number, Expiration Date, etc. for both Implants and Supplies used in a surgical case. The name of the dialog is different, depending on where you launch it from, but the fields and functionality are the same.
Accessing the Implant/Supply Details dialog
Click the links to learn how to launch each version of the dialog:
- Implant Details dialogImplant Details dialog
-
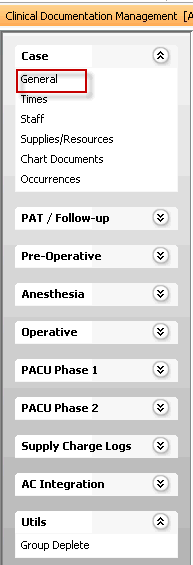
- Launch the CDM module. You will be prompted to select a patient and case. Click herehere to learn how. The module opens to the Case ScreenCase Screen. This screen is accessible by clicking General under the Case heading on the CDM module Sheet BarSheet Bar.
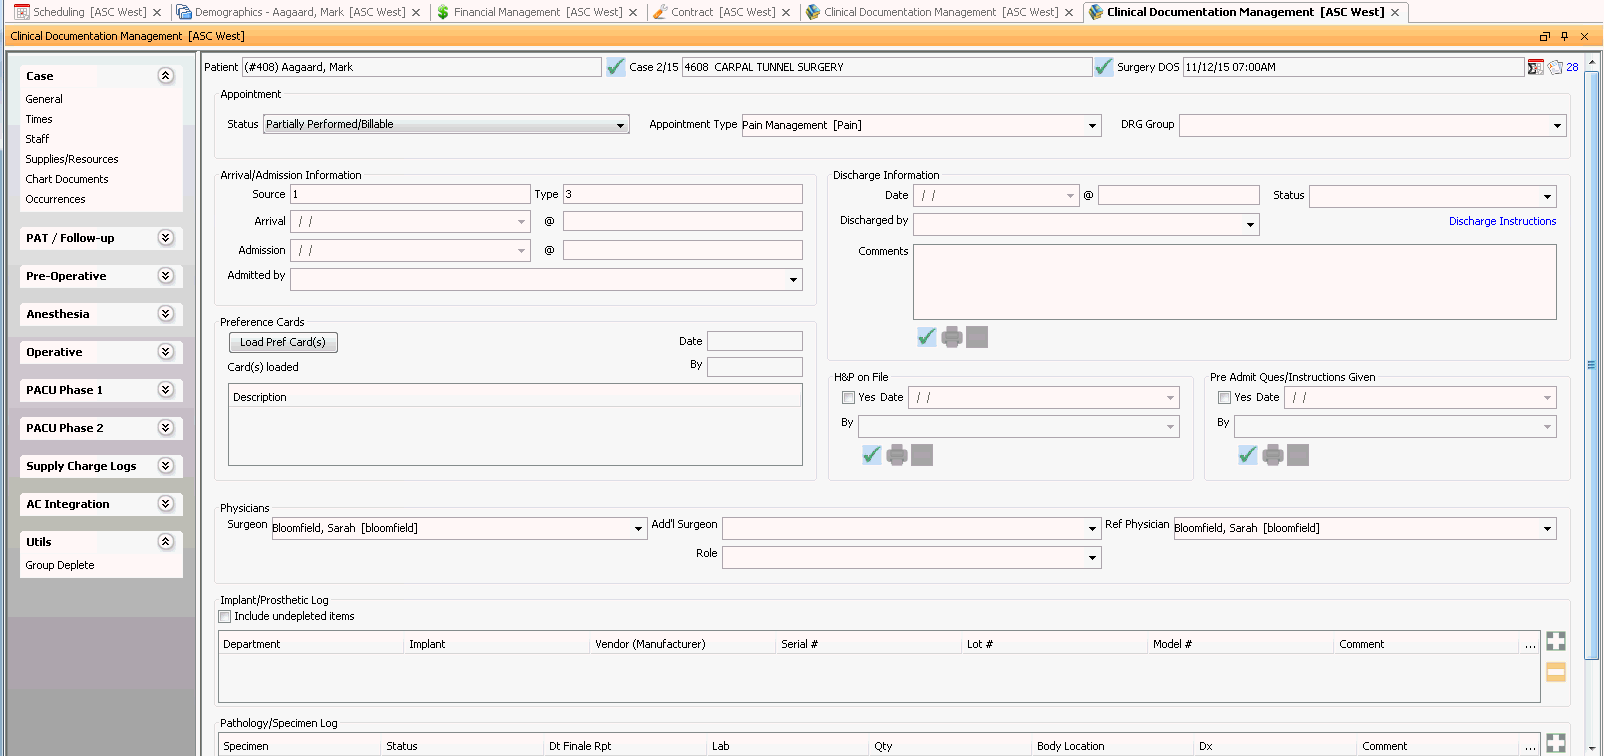
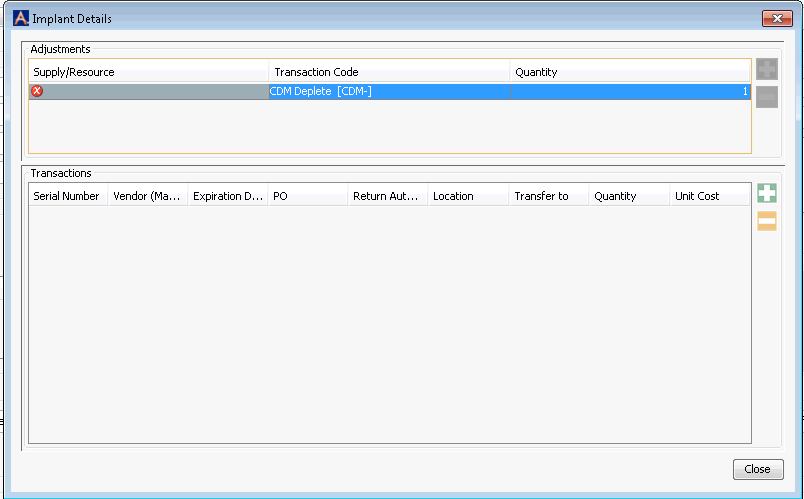
- In the Implant/Prosthetic Log section of this screen, click the plus sign icon to open the Implant Details Implant Details dialog.
- Launch the CDM module. You will be prompted to select a patient and case. Click herehere to learn how. The module opens to the Case ScreenCase Screen. This screen is accessible by clicking General under the Case heading on the CDM module Sheet BarSheet Bar.
-
- Supply Details dialogSupply Details dialog
-
- Launch the CDM module. You will be prompted to select a patient and case. Click herehere to learn how. The module opens to the Case ScreenCase Screen. This screen is accessible by clicking General under the Case heading on the CDM module Sheet BarSheet Bar.


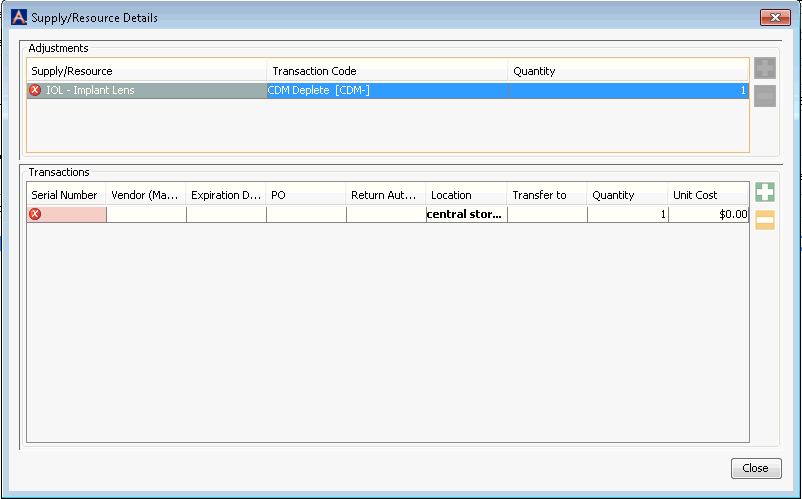
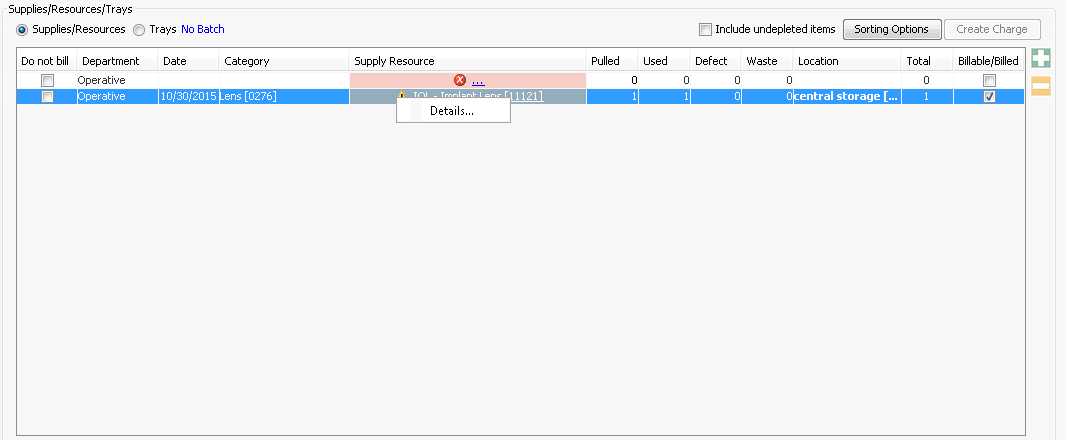
- Right-click an individual supply item from the Supplies/Resources/Trays tableSupplies/Resources/Trays table and select Details to launch the Supply Details dialogSupply Details dialog. The Supplies/Resources/Trays table can be found under the following CDM module Sheet Bar options:
-
- Case > Supplies/Resources
- PAT/Follow-up > Supplies/Resources
- Pre-Operative > Supplies/Resources
- Anesthesia > Supplies/Resources
- Operative > Supplies/Resources
- PACU Phase 1 > Supplies/Resources
- PACU Phase 2 > Supplies/Resources
- Launch the CDM module. You will be prompted to select a patient and case. Click herehere to learn how. The module opens to the Case ScreenCase Screen. This screen is accessible by clicking General under the Case heading on the CDM module Sheet BarSheet Bar.
-
To update/edit the Implant/Supply Details dialog
Required fields are marked in red.
- In the Adjustments section, double-click in the Supply/Resource field. A drop-down list appears. Select the item from this list. You can right-click in the field to access a menu that enables you to view these items by name or by quick code, or to choose List View to access the dictionary. In order for implants or supplies to show in this dictionary, they must first be entered into the supply resource table and be identified as the Type Supply or Implant.
- The Transaction Code field automatically populates with your default code that has been setup in the Inventory Configuration screen in the Inventory Management module. To change to a different code, double-click in the field. A drop-down list appears. Select the Transaction Code from this list.
- CDM DepleteCDM Deplete
Select this code if the item to record that the item was used in the case and to deplete it from your inventory.
- Defective ItemsDefective Items
Select this code for reporting purposes to record that the item was not used in the case because it was defective.
- Wasted ItemsWasted Items
Select this code to record for reporting purposes that the item was not used in the case, and to specify that it was not defective, but was wasted.
- CDM DepleteCDM Deplete
- The item Quantity in the Adjustments section defaults to 1. To change the quantity, click in the Quantity field and type in a different number. If the Quantity is greater than 1, you can add a line in the Transactions section for each item to indicate differences in characteristics of the items used (example: you used two knee implants, each with a different serial number). Click the plus sign icon to add each additional line.
- In the Transactions section, complete any necessary fields.
- If your item has been designed as Serialized in the dictionary, the Serial Number field will be required. Click in this field to view a drop-down list showing all available serial numbers associated to this implant. Select the serial number of the implant from the list.
- Select the vendor or manufacturer from drop-down list. Only those vendors/manufactures associated to the implant in the Item Master in Inventory Management will show in this list.
- The Expiration Date field is required and editable if your item has Expiration Date selected n the supply resource table. Use the drop-down to select the appropriate expiration date for this item, or you can enter a new date using the calendar function in this field.
- The PO field is only used when items are returned to a vendor and is not active on this screen.
- The Return Auth # field is only used when items are returned to a vendor and will not be needed in the Implant Log or Supply Log.
-
The Location field auto fills based on the default location associated to the item. You have the option to change locations at this time, using the drop-down list. Only locations associated this item will be in this selection menu.
-
The Transfer to field is only used when items are transferred to a different location and is not editable on this dialog. If it is necessary to transfer an item to a new location, you can do it from the Supplies/Resources Sheet Bar option in the CDM module or in the Item Master > Transfer screen.
-
Quantity field: If the item selected is set to require serial numbers, then you will need to enter one line per instance of an implant. (e.g. if there are two lenses with serial numbers being implanted, use one line per lens) Click the plus sign icon to add an additional line. You can manually enter the quantity being used: the system defaults to one. Total quantities for the Transactions (bottom portion) must equal the quantity entered for the Adjustments (top portion)
-
Unit Cost field: The System auto fills the unit cost for this implant. This unit cost pulls from the Item Master.
-
Use the minus sign icon to remove an existing Transaction line. If you delete an entire Transaction line, you will lose all data entered on this line.
-
Click Save to save your changes to the CDM module. If you are finished updating the CDM module for the current patient, click Save & Next to save your changes and search for the next patient record.