Adding a Business Entity
If your AmkaiOffice license has been updated to include an additional Business Entity (BE) in your organization, you can add that BE to the system using the following procedure:
- Select the Enterprise > Organization
Sheet Bar option from the Administration module. The Organization
screenOrganization
screen appears.
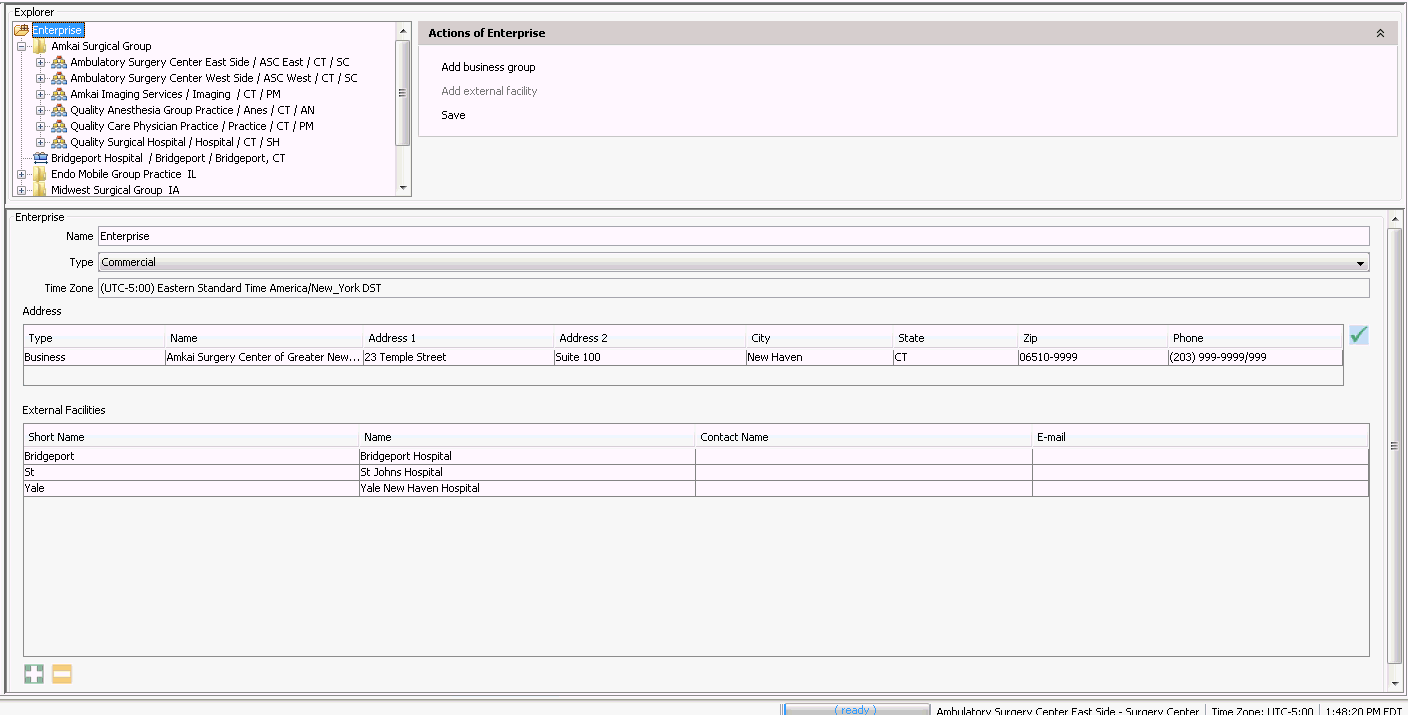
- In the Explorer section, select the Business Group to which you would like to add the new Business Entity (BE).
- Click Add Business Entity.
The Add Business
Entity dialogAdd Business
Entity dialog appears. Enter the name as it should
appear on Claim Forms, Patient Statements and Report headings and
the acronym, a short name that will display on the menu bar to identify
the Business Entity that is currently being accessed for the selected
module.

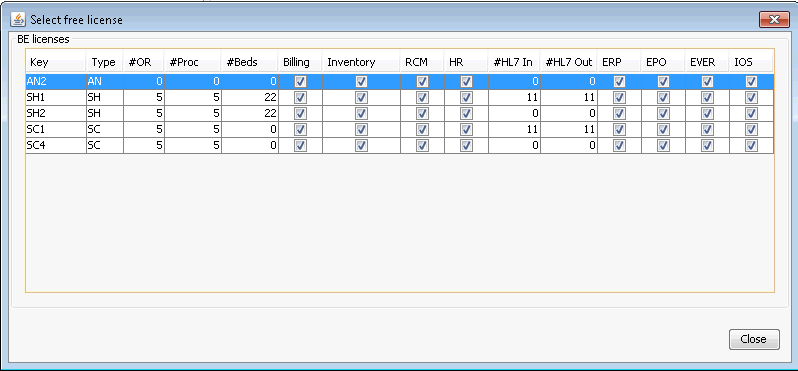
- Click Select License to
select a BE license that is not already being used by another BE within
your organization. The Select
free license dialogSelect
free license dialog appears. The fields on this
dialog are read-only. Highlight the row corresponding to the license
you would like to use and click Close.
The license key of the license you selected now appears in the Add Business Entity dialog. Click
OK. The Select Time Zone dialog appears.
- Select the appropriate time zone and click OK. The system adds the new Business Entity.
- Complete the following fields in the Business
Entity section:
- Type: Read-only field indicating whether the entity is a Surgery Center, Surgical Hospital, Physician Practice or Anesthesia Business Entity. System functionality is tied to the Type.
- Federal Tax ID: Enter the Tax ID number associated to the Business Entity. This number will be referenced on claim forms/file and can be displayed on Patient Statements. Leaving this field blank could result in claims not processing correctly.
- Taxonomy Number: Enter the Business Entity Taxonomy number if applicable.
- National Provider ID: Enter the Business Entity NPI number. This number will be referenced on claim forms/files as the Business Entity NPI. Leaving this field blank could result in claims not processing correctly.
- Main Office: This field should be populated with the main Facility that is to be used for billing. The Facility select here will be used as the default Facility for billing when Place of Service is referenced.
- Supervisor: (optional) Select a person you would like set as the default Supervisor if one has not been set at the individual Passport level. This field will be used when Conflict Checking is enabled and alert supervisor has been checked. If a supervisor has not been set for the individual Passport, the default set here will be used.
- # of days to alert: (Optional) Set a number to be used if one has not been set at the individual Conflict Checking level.
- Budget: (Optional) Chose a Budget to be used as the default Budget for Cost Management.
- Report Suffix: (Optional) Enter a suffix you would like to display on reports. This field is best used when the Business Entity is one of many in a Business Group. It will help to indicate which Business Entity the information is being reported for.
- ISO OID: Use this field to enter the appropriate data when you are using an external inventory system.
- AC Time Zone: Select the appropriate time zone for the server that is running Amkai Charts. This field should only be set or adjusted by AmkaiSolutions staff or under their direction.
- ICD-10 for State Reports as of: Enter the Date of Service for which the system should begin using the ICD-10 code set for state reporting.
- Enter one or more addresses by clicking the
 in the Address section.
The Address
EditorAddress
Editor appears.
in the Address section.
The Address
EditorAddress
Editor appears.
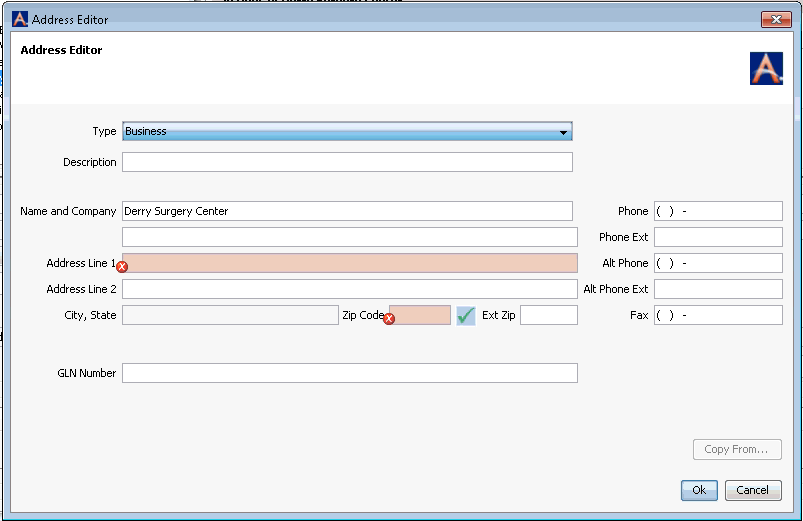
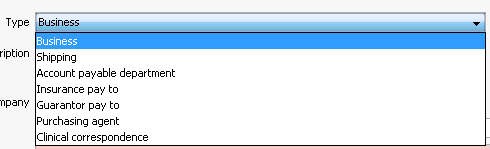
- Select the TypeType
from the drop down menu.
- Enter the physical street address for the Business Entity. This field will be used for Patient Statement, Claims processing and will print on Purchase Orders.
- Select the TypeType
from the drop down menu.
- If both ePrescribe and AmkaiCharts are used by the Business Entity, complete the fields in the Amkai RX Registration section with information provided by your Amkai representative. Click Test to test your connection. If you receive a message about an error that you cannot correct on your own, contact your Amkai representative.
- In the Patient Statement Options section, you may enter free text messages in either or both of the boxes. These messages will appear on all patient statements.
- Click Save in the Actions...section at the top of the page to save the Business Entity record.